
Upgrade to Windows 10 on VirtualBox with OSX host

Lots of OS upgrades lately, Windows went to Windows 10 and Apple to El Capitan. I am usually pretty ok upgrading to Apple’s latest OSs a week or two after their release – they are usually of good quality.
As VirtualBox (“VBox”) also came out with their version 5 release, it was time to upgrade the Windows 8.1 virtual machine (“VM”) running in VBox, with OS X as host.
Turns out this is (of course..) not as easy as one would think – but still possible.
Here we will walk through the steps of
- Extending the Windows 8.1 virtual disk in VBox
- Forcing the Windows 10 installer to run, even though its hardware compatibility checker says the VBox machine is not compatible with Windows 10
- Installing the VBox Guest Additions in the Windows 10 VM.
Before doing any of those steps, you might want to upgrade to OS X El Capitan, and to latest Virtual Box (5.x as of this writing).
Increasing size of a VirtualBox disk
Before even trying to upgrade from Windows 8.1 to 10, verify that the 8.1 VM’s disk has at least 10 GB free. If not, you need to extend it. This is actually pretty easy to do:
- Open a terminal window (iTerm is a great replacement for OS X’s built in Terminal app..) and cd to the directory where your .vdi virtual disks are.
- Run the command below, after adapting it to your needs. Run just VBoxManage to get a list of all the options
VBoxManage modifyhd “/path/to/your/vdi-files/<disk name>.vdi” –resize <new size in MB>
- This will take just a few seconds, the result will simply be a larger virtual disk.
- Boot up Windows. In File Explorer you still do not see the new space. You also need to make Windows aware of it. To do this:
- Right click on Computer in File Explorer. Select Manage, then go into the Storage->Disk Management section in the “Computer Management” app that opens. Or just run diskmgmt.msc from the start menu.
- In the disk management software, you will see a partition that is listed as “Unallocated”, that’s the space you just created in previous steps. Right click the existing partition and select “Extend Volume”. The default setting should be fine, assuming that you want to make all the new space available to Windows. That’s it – Windows can now see that full, larger disk.
After writing this I found a good similar page, with lots of screenshots and all – good resource if you need some extra guidance.
Forcing an upgrade from Windows 8.1 to Windows 10 on OS X host in VirtualBox.
Seems plenty of other people have had trouble doing this too, with some suggested solutions in this thread. Here is what worked for me:
- Uninstall the Guest Additions from within the Windows 8.1 VM. Reboot it.
- Download Microsoft’s media creation tool to the 8.1 VM. It will need a couple of GB or so of disk space.
- Run the tool and select the “Upgrade now” option. This will take quite some time, including several reboots of the Windows VM, but worked nicely in the end. Display scaling and other features probably do not work very well after the upgrade though, so you will need to install the new Guest Additions that came with VirtualBox 5.x.
Installing VirtualBox Guest Additions in Windows 10 on OS X host
I keep forgetting this myself, so as a note to self, here is where to find the Guest Additions ISO disk image on OS X:
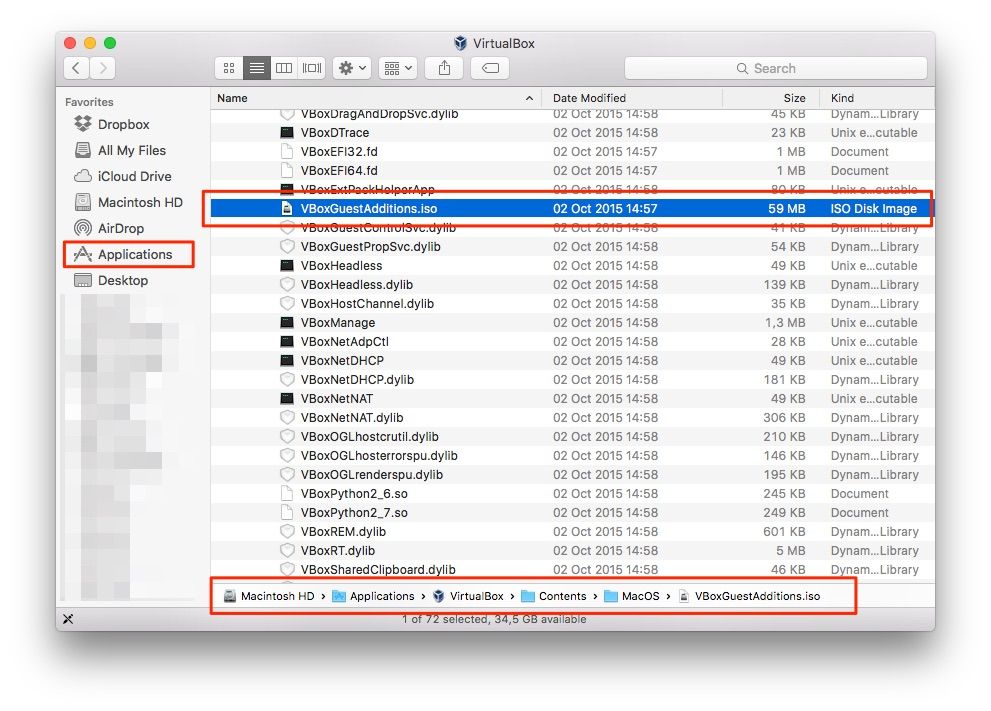
- The Guest Additions ISO image is found with the VirtualBox app folder. In Finder, go to the Applications folder. Right click on VirtualBox, then select “Show Package Contents”.
- In the “Contents/MacOS” subfolder there is a file called “VBoxGuestAdditions.iso”. From within VirtualBox’s Virtual Media Manager, mount that ISO as a disk. This disk will then immediately become available to the Windows 10
- Run the Guest Additions installer from within Windows 10. Reboot. When done, dynamic screen resizing, 2D/3D acceleration and other goodness should now be working in Windows 10

Closing words after using Windows 10 for a while
Windows 10 is not bad at all. While Win 8.x was just a mess, Windows 10 feels pretty much ok. All applications that I tend to use runs nicely, including Sense Desktop – very nice indeed!