
How to set up free SSL certificates for Qlik Sense


I recently had a need for an isolated Qlik Sense environment, in order to test some of the new features of Qlik Sense September 2017.
While it works perfectly fine to run Sense with self-signed certificates, you then get browser warnings that the certificates are not valid etc. That might be fine, but as the test at hand involved testing my app duplicator service for Qlik Sense (which require a proper SSL cert) together with the September 2017 version of Sense, I needed a proper SSL certificate.
As I have good experiences using the free certificates of Let’s Encrypt (they secure this blog, for example) I thought it would be a good exercise figuring out how to use them together with Qlik Sense Enterprise.
The notes below are largely reminders-to-self, in case I need to do this again some day. Maybe they can also be useful for others out there.
1. Get a domain – set up DNS
A fundamental requirement of the concept described here is that you have a proper, public domain for your server. Either a static domain pointing to the publicly available IP of your server.
Yes, your Sense server *must* be available to the Internet – otherwise Let’s Encrypt cannot verify that you control the domain in question. There are ways around this, but they are significantly beyond the scope of this text.
As I was only doing a test that would last a few days, I used a virtual server in Google’s cloud. Keeping a low budget I kept the default ephemeral public IP address, which would change every time the server was restarted.
To handle this I set up a dynamic DNS (from NO-IP) for the server. Basically, this instantly gives me a proper domain such as plabs-sense.ddns.net that points to the Sense server.
Note: I am using the entry-level, paid product from NO-IP. This gives me 25 host names for which dynamic host names/DNS can be configured. So this setup is not zero cost (but still cheap) – but there are also entirely free dynamic DNS solutions from other providers.
Google is your friend here, try searching for “free dynamic DNS” or similar to find an option that suits you.
2. Prepare IIS
Let’s Encrypt uses a challenge-response concept to verify that you control a particular domain. This means that Let’s Encrypt will try to read a response file over http from your server. I.e. you need a http server running on your Sense server.
IIS comes with Windows Server, but you should be able to use any http server that runs on Windows Server. As I didn’t have any other web sites hosted by IIS on this particular server, I used the default IIS web site to get the Let’s Encrypt certificate.
The idea is simply to get an SSL certificate for the default IIS web site, and then re-use that certificate for Qlik Sense Enterprise.
My goal was to access Sense via a https://plabs-sense.ddns.net.
I therefore configured the default IIS web site to respond to http://plabs-sense.ddns.net. This can be done using the bindings dialog in IIS:
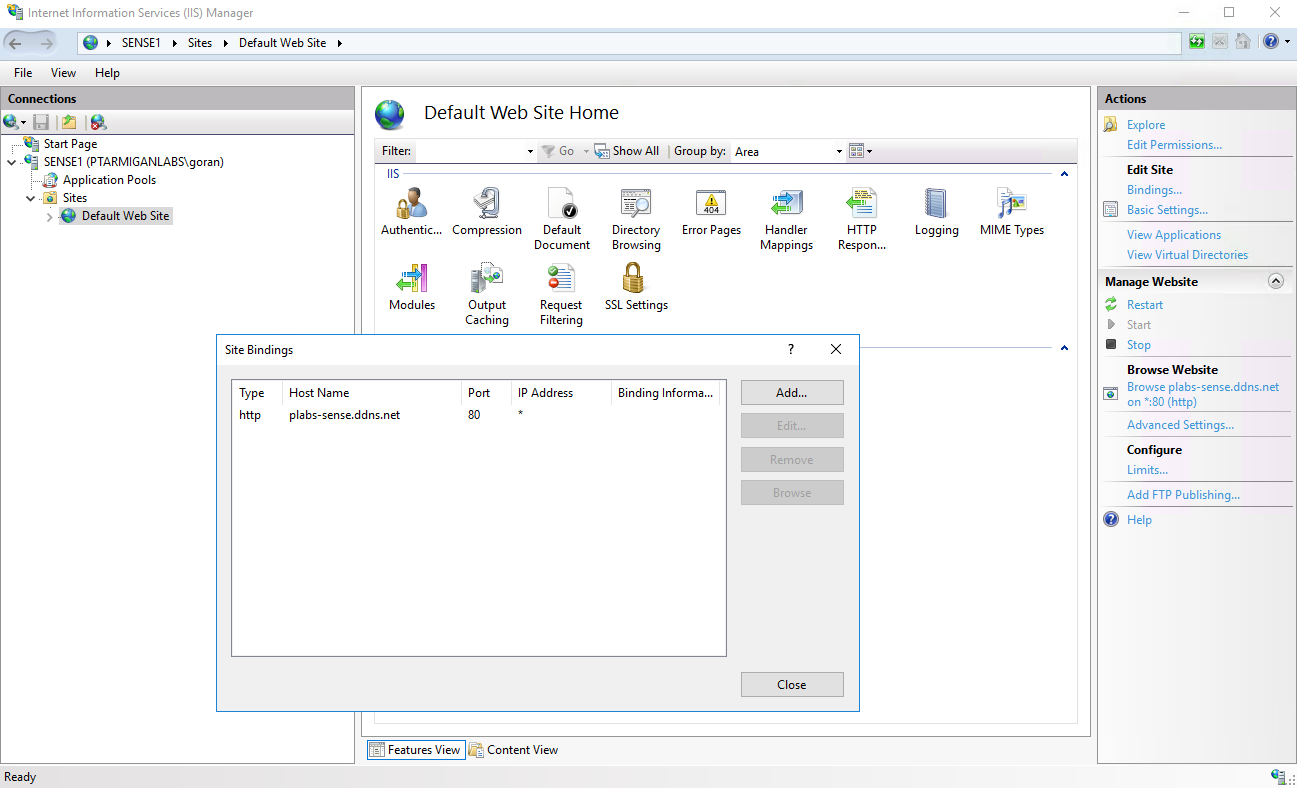
Note that there is only an http binding so far.
Also, make sure the IIS web site is running (otherwise Let’s Encrypt won’t be able to verify the response file).
3. Let’s Encrypt client
As often is the case when it comes to open source projects, Windows is not a primary focus of the developers. The good news is that there are various third party tools that make it possible to use Let’s Encrypt on Windows.
The easiest one to use (that I have found) seems to be letsencrypt-win-simple. It can be used both though an interactive menu and from the command line (both started from the command shell).
Installation is simple, just unzip the latest release into a directory (e.g. c:\tools\letsencrypt-win-simple.V1.9.6.1 – or skip the version number – either works) on your Sense server.
Configure letsencrypt-win-simple
Out of the box letsencrypt-win-simple will place certificates in a less than ideal (from a Sense perspective) part of the Windows certificate store.
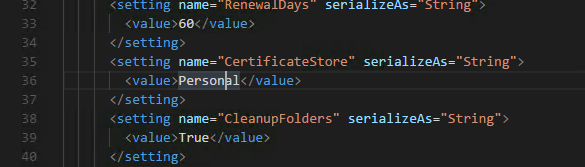
Sense expects the SSL certificates to exist in the Personal certificate folder. letsencrypt-win-simple has a config file where this can be configured, make sure to edit the CertificateStore key in the letsencrypt.exe.config file as follows:
Get certificate
Open a command shell with administrator rights (run as admin).
Cd into the tool’s directory,
Run letsencrypt.exe. Given version 1.9.6.1 of the tool, you will see something like this:
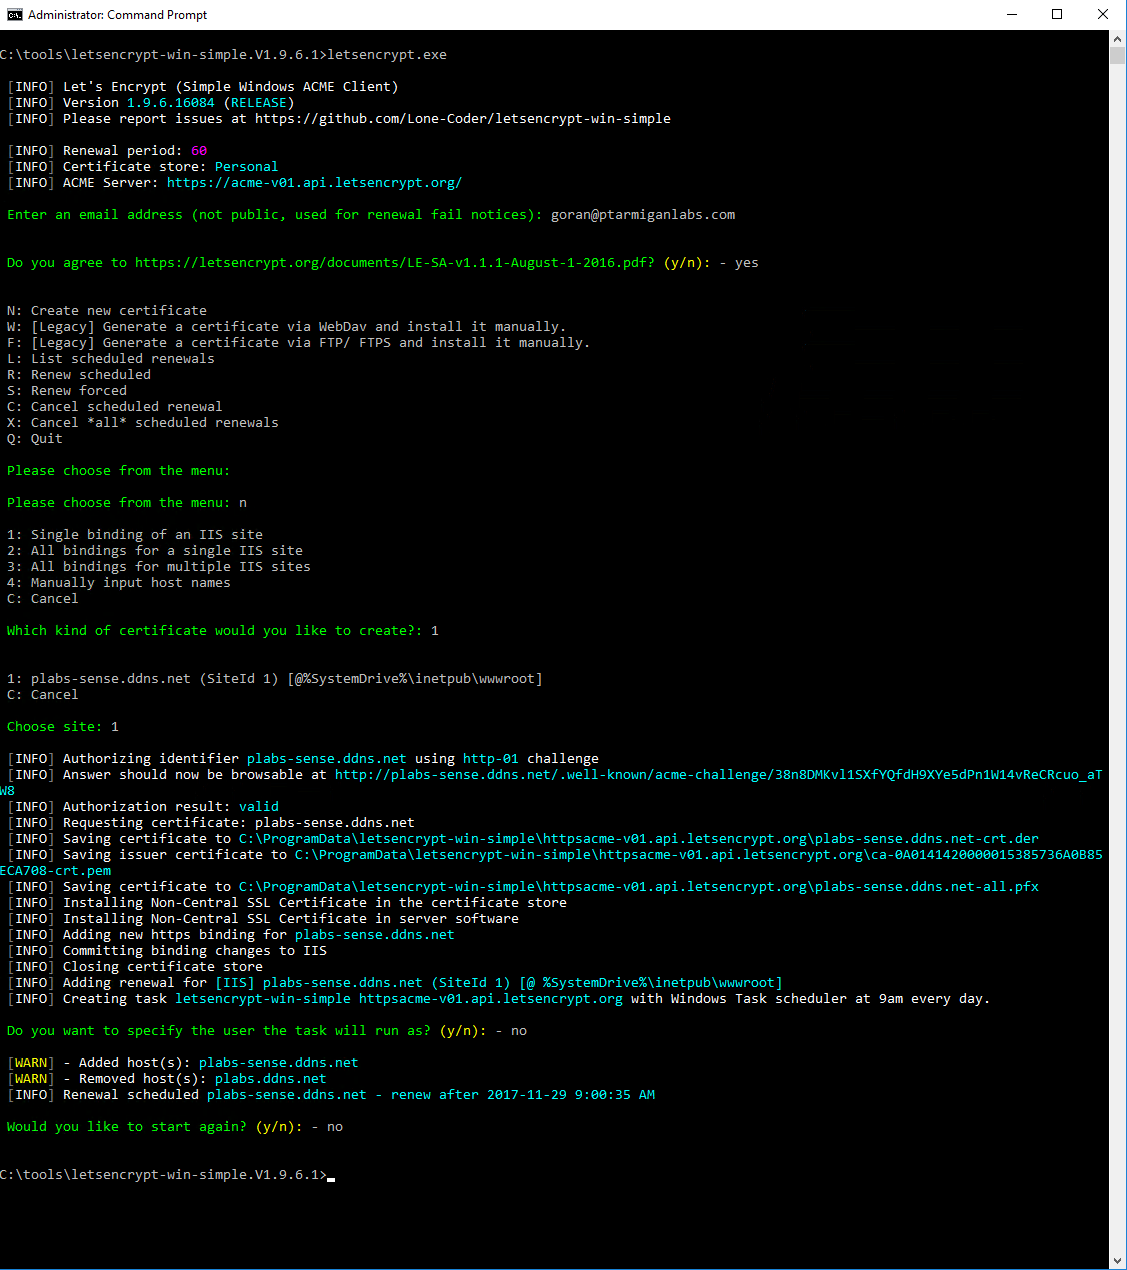
So, at this point the letsencrypt-win-simple tool has done the following:
- Requested a certificate for the domain plabs-sense.ddns.net
- Received the certificate
- Stored it into the Windows certificate store
- Created a https binding in IIS for https://plabs-sense.ddns.net
- Scheduled an update of the certificate (the certificates expire every 60 days, and thus need to be updated at least with that frequency. This is the price you pay to get a free SSL cert)
4. Competing https services – not good!
The letsencrypt-win-simple tool has done a great job so far, but it has actually done a bit more than we wanted from a Sense perspective.
Step 4 above means that we now have two services making claims for port 443 (=https): IIS and Sense. Not good. The IIS bindings now look like this:

Easily fixed though. Just remove the https binding in IIS, and Sense will be the only service making claims for port 443.
5. Configure the Qlik Sense proxy
Almost there. Let us take a look at the new certificate in the Windows certificate store:
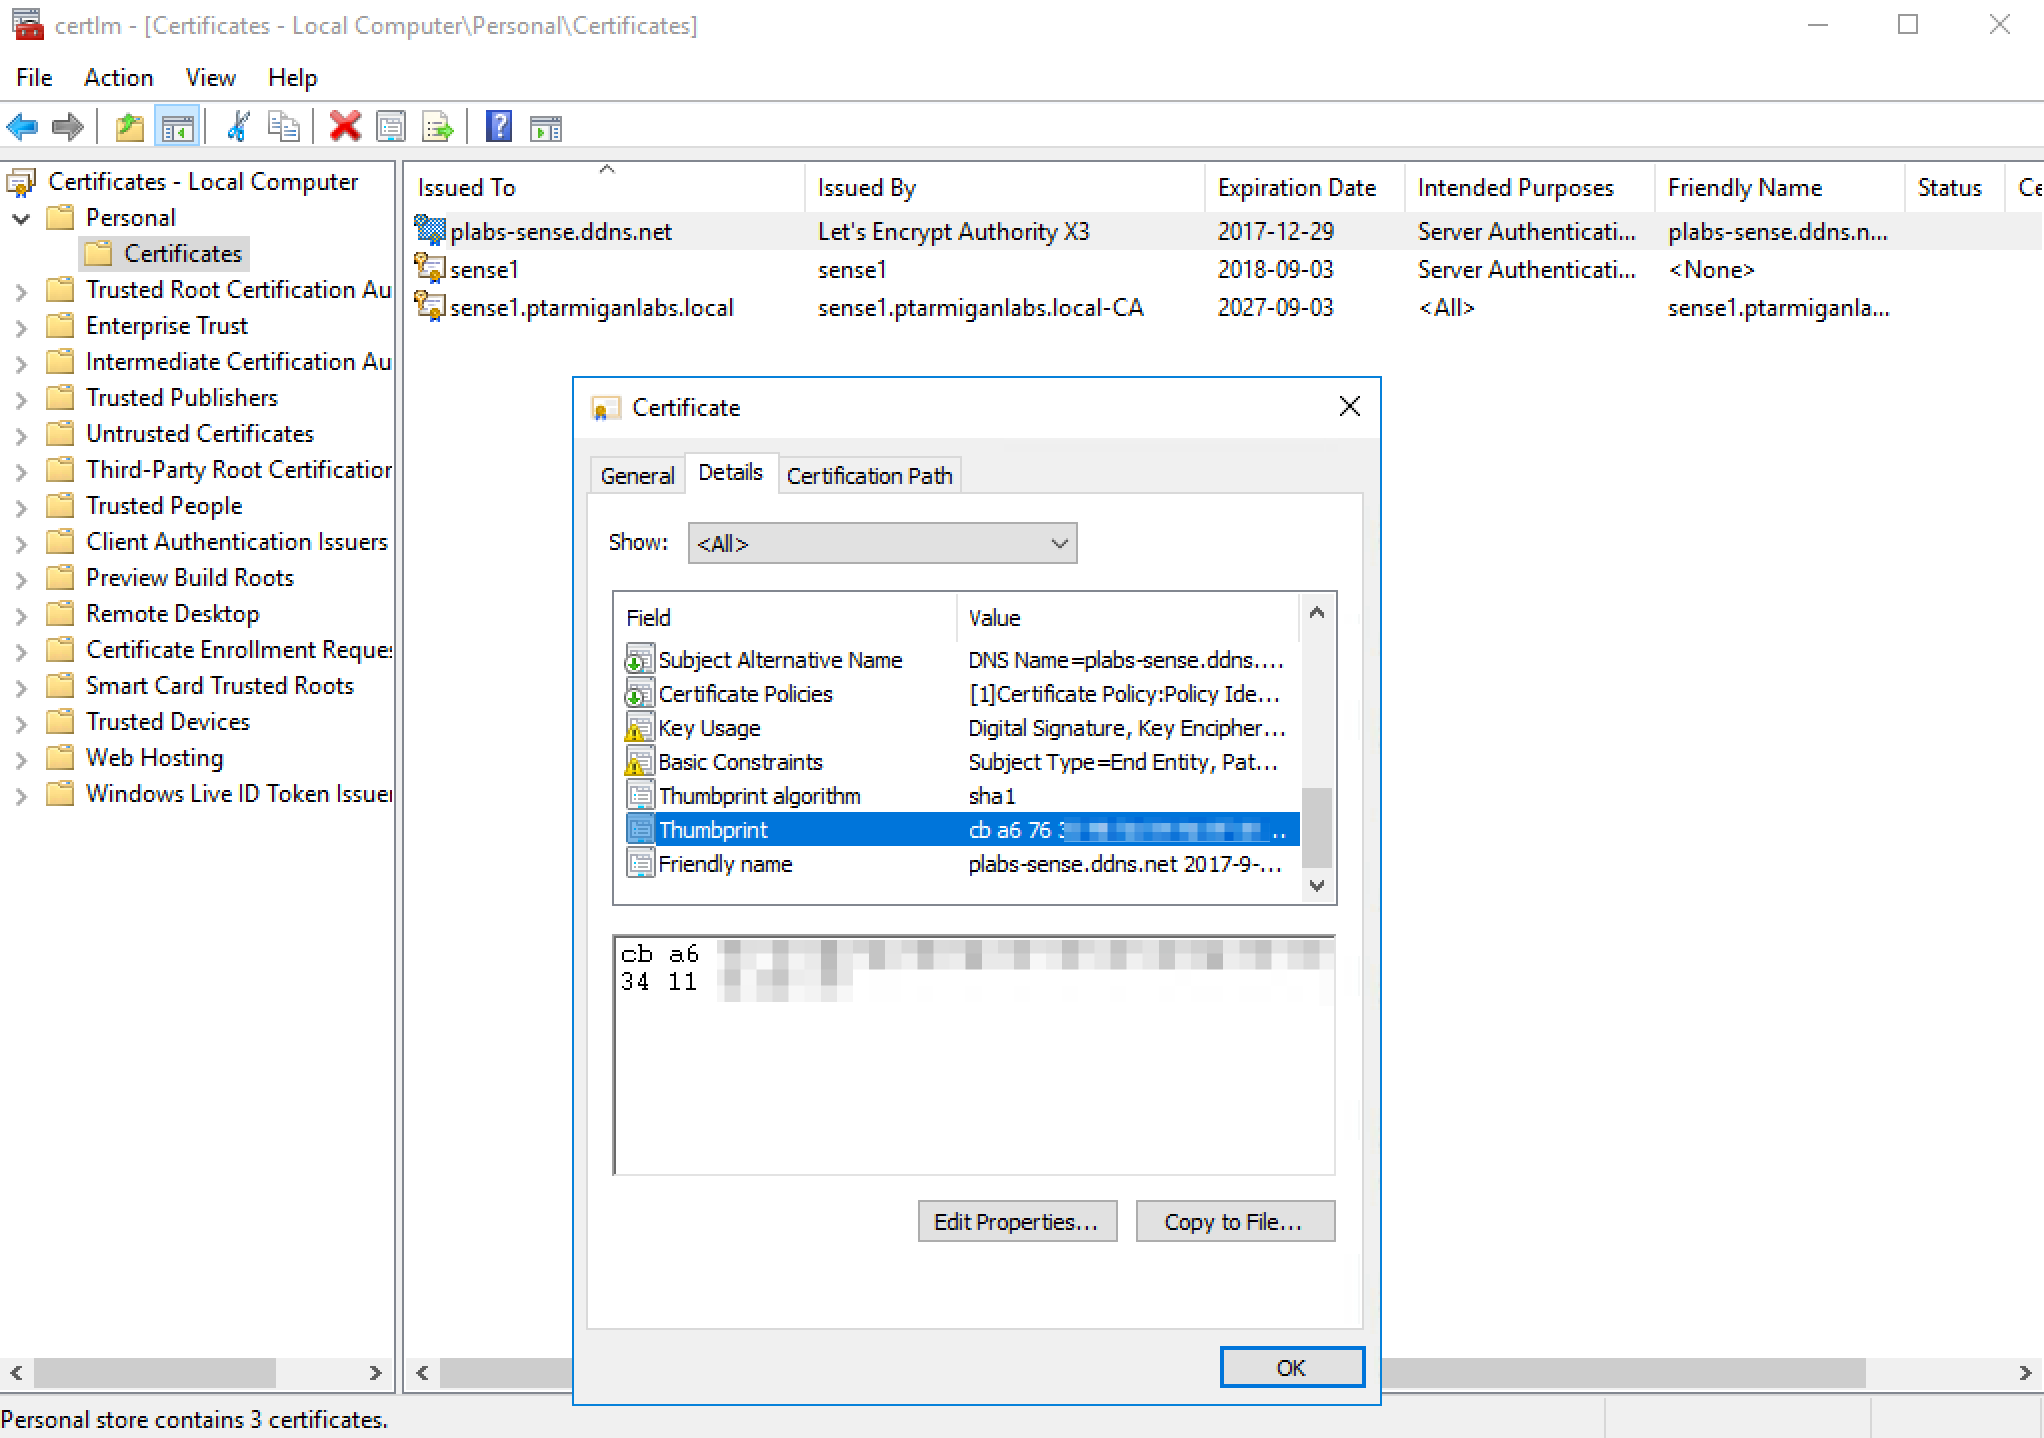
Copy the certificate’s thumbprint (shown above) to the clipboard, then paste it into the thumbprint field in Sense QMC’s proxy settings (in the security section):
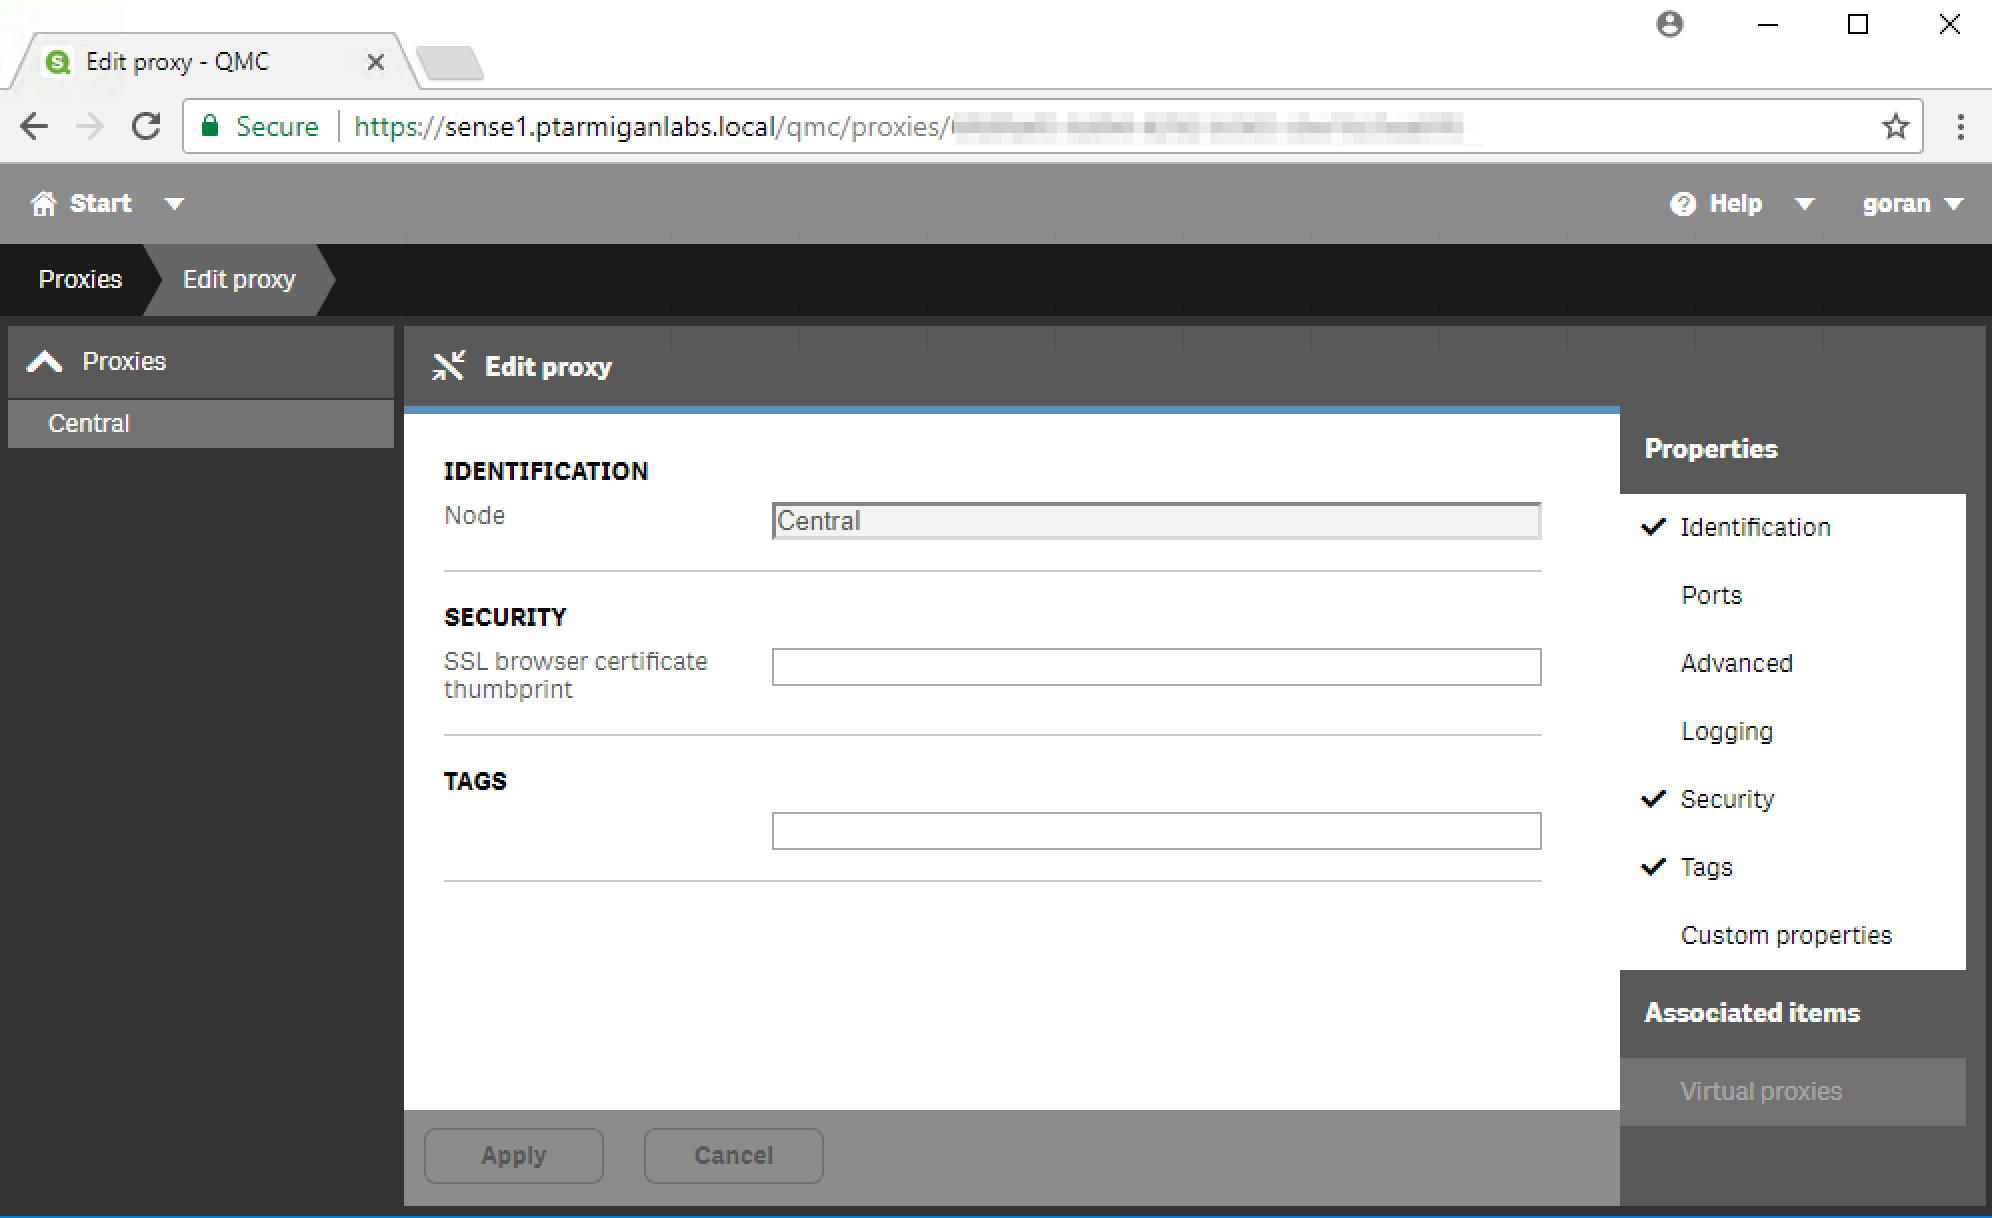
Remove any spaces from the thumbprint copied from the certificate, then click apply.
The proxy service will restart, causing the session to end. Just reload the QMC, and we should be done.
6. Testing… will it work?
Going to https://plabs-sense.ddns.net from a browser on my laptop gives me the page below – success!
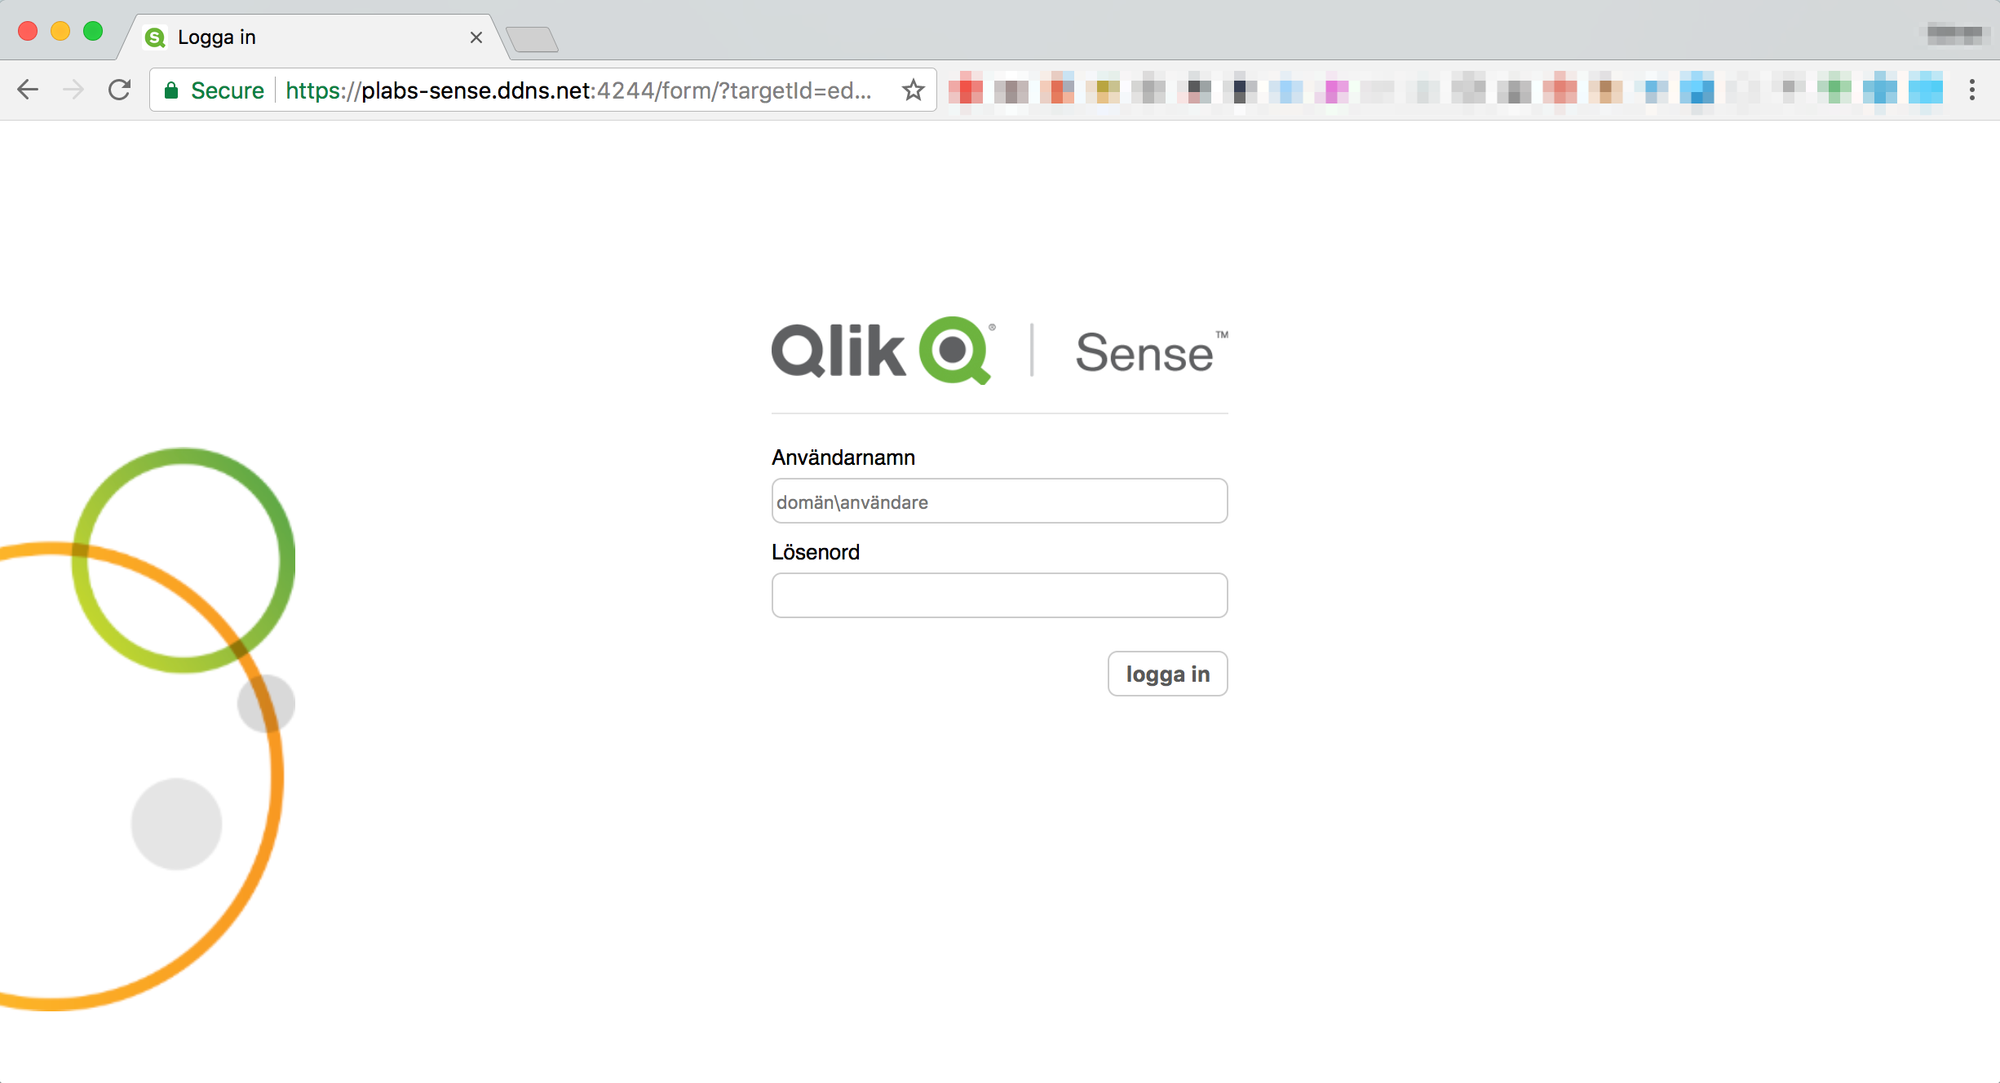
Not sure why the page is in Swedish, but that’s a minor inconvenience… Something relating to my browser settings, probably.
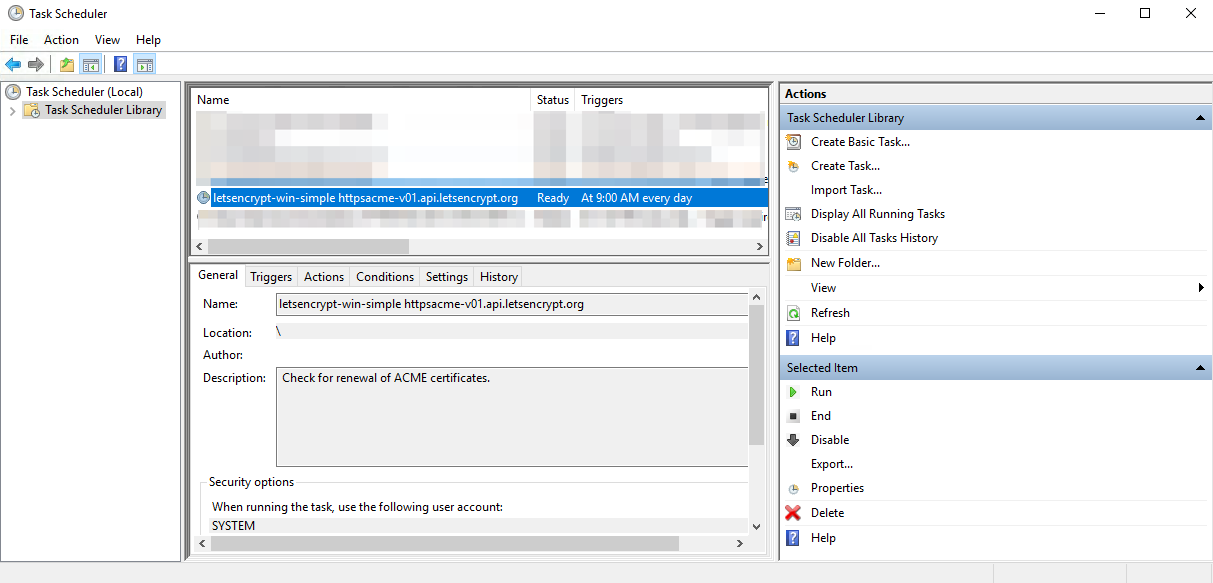
7. Updates will break things
A final word of caution:
The letsencrypt-win-simple tool will install a task in Windows’ Task Scheduler to update the certificates every 60 days.
The idea is great, but has two independently unfortunate (breaking!) consequences for Qlik Sense:
- The update will re-apply the https binding in IIS, once again creating a situation with two competing https services on port 443.
- The new certificate received during the update/renewal process will have a different thumbprint, compared to the old cert.
That thumbprint needs to be copied into the QMC proxy settings.
While both of these issues could be mitigated by wrapping the renewal task in a PowerShell script that remove the IIS https binding, and use the Qlik Repository Service APIs to update the thumbprint in the Sense repository, there really was no need for this in my test setup.
The test lasted a few days so the 60 day life of the certificates was plenty.
8. Summary
If you really want a free SSL solution for a Qlik Sense environment, this is possible to achieve. On the other hand, if you are using Sense commercially, your budget probably allows for buying a proper SSL certificate too… and that solution will certainly be simpler long term.
Still, the certificate from Let’s Encrypt proved useful in this limited usage scenario at hand here, so it is certainly a tool to keep in your tool box.