
How to start on-premise Qlik Sense tasks from anywhere
Start Qlik Sense reload tasks from anywhere, using a single http call. Can be very useful when source systems need to trigger data reloads in Sense. The solution is low cost and can be made as secure as needed using Azure Event Grid and Function Apps.


I've encountered this challenge again and again over the years when helping companies with their Qlik Sense environments:
A client wants to start Sense tasks from some other system - sometimes even over the Internet - but does not (usually for good reasons) want to expose their on-premise, client-managed Sense environment to the world.
There are lots of ways to achieve this (keep reading for a summary of them), but in essence we're talking about this:
How can we start on-premise Sense reload tasks from anywhere in the world - maybe even over the Internet - in a simple, low cost and secure way?
What are the options?
The most common scenarios I've encountered over the years are outlined below, each with its own pros and cons. They will all allow Sense reload tasks to be started from remote systems.
The last one (option 4) is the one we'll look closer at in this blog post, as it nicely balance simplicity, low cost and security.
In the examples below Azure will be used as the foundation for the integration services, the same can most likely be achieved with other cloud providers too.
All code used in this post is available in this GitHub repository. Credentials, certificates etc have been removed from the files stored in that repository, but the general structure of files etc should still be useful when following along the text below.
A production scenario should include locking things down to the degree needed.
As the described solution largely uses Azure tools (Event Grid, Function apps, Storage accounts etc), there are good and established ways of securing those tools, for example by configuring Azure's standard firewalls.
1: Put Qlik Sense on the Internet
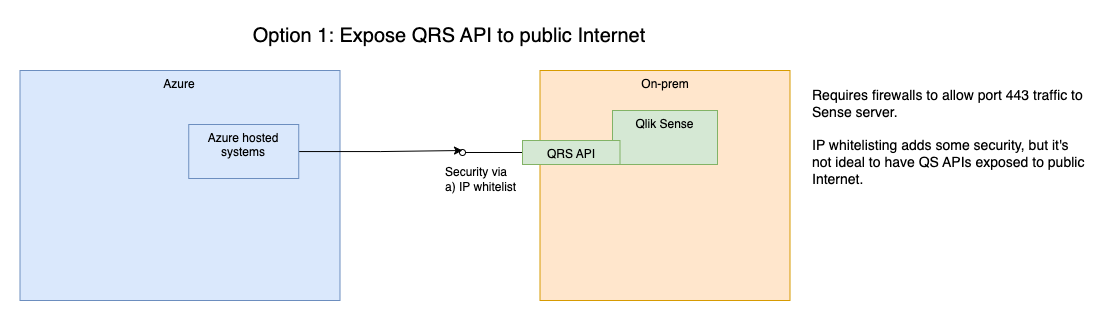
While possible and relatively easy to implement, this is only a good option if there is also a thorough security framework in place.
Users have to be properly authenticated, there should probably be some kind of protection against DDOS attacks and attempts to brute force the QRS security. Blocking all IP addresses except a list of approved ones is probably a good idea too.
If the purpose is to allow Sense reload tasks to be started from Azure, other clouds or Internet in general, it's probably overkill to expose the entire QRS API to the Internet.
2: Secure site-to-site VPN tunnel to Sense
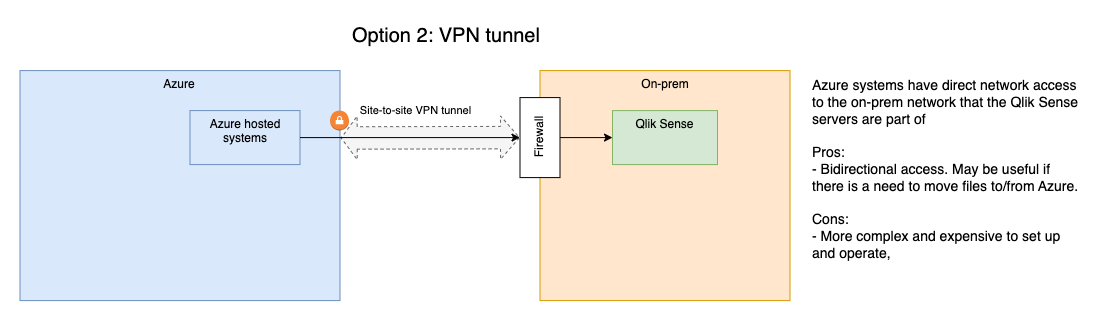
Let's say you have systems running in Azure (or AWS, Google Cloud or elsewhere) and these systems should be able to start Sense reload tasks.
I.e. one site in the cloud and one site locally/on-premise.
One solution is to create a site-to-site VPN tunnel between the two sites. This will make the two systems available to each other on a network level, allowing both for calls from the outside system to the QRS API and also data to be transfered from the on-prem site to the remote site.
The downside of this solution is that it requires rather expensive VPN tunnel endpoints on the on-prem side. Typically an enterprise grade firewall appliance is used for this, and those are not cheap.
There are also costs associated with the VPN tunnel on the remote/cloud side, no matter if it's Azure, AWS or something else.
3: Publish-subscribe model + Butler

With this option Qlik Sense can be totally isolated, no inbound connections are needed. The important parts are:
- An external MQTT broker is used as a messaging hub. Messages can be sent to it from any system that can talk MQTT.
- Mosquitto is an open source MQTT broker with a good track record, but there are others too, both open source and commercial.
- The open source Butler tool can both connect to an MQTT broker and start Qlik Sense reload tasks - and start reload tasks when certain MQTT messages arrive.
The concept is pretty simple:
- A source system posts a MQTT message to an agreed upon MQTT topic, for example
qliksense/starttask. The message contains the id of the Sense task to be started. - Butler subscribes to the same topic and gets the message within a few seconds of it being published.
- Butler starts the task specified in the message.
MQTT is a simple yet robust pub-sub (=publish-subscribe) messaging protocol. It is widely used in IoT solutions, with all the major cloud providers supporting it in their pub-sub products.
There are MQTT libraries for all major programming languages, making it a good protocol for linking together different systems, solutions and environments.
More info at mqtt.org and Wikipedia.
Butler is an open source tool that use the Qlik Sense APIs to offer new features to Sense admins and developers.
Failed reload alerts, Windows service monitoring, MQTT integration and a built-in key-value store are only some of the features offered by Butler.
More info at butler.ptarmiganlabs.com.
4: Pub-sub + webhook + Butler
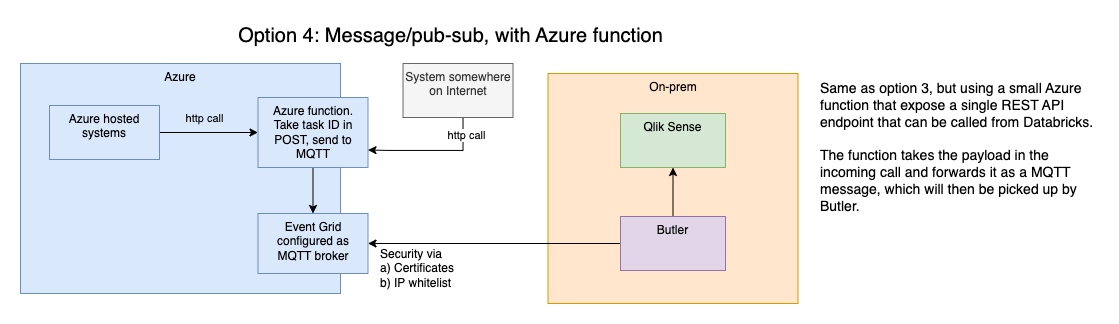
Exactly the same as previous option, but with a webhook added to cater for systems that don't support MQTT.
The rationale for this solution is that plain, simple http(s) calls are very widely supported by all kinds of systems.
In other words: Most systems can be configured to make an http call - and thus also start a Qlik Sense reload task.
With this background in place, let's implement this solution in Azure and with an on-premise Qlik Sense server.
Solution overview
Steps to cover:
- Set up a new Azure Event Grid namespace with MQTT enabled.
- Create an Azure Function App that expose a webhook onto Internet.
- Set up Butler to use MQTT and start Sense reload tasks using info in MQTT messages.
- Test the whole solution.
When it comes to the Azure-related work, that can be carried out in various ways.
- The Azure web portal can be used to create, configure and monitor resources.
- Azure resources can be created and configured using bicep files, i.e. using an infrastructure-as-code concept. For production setups that's usually the preferred option, as it lets you store the bicep files in Git etc.
- The az command line tool is available for Windows, macOS and Linux.
- Most work could be done from within Visual Studio Code (=VSC), using the excellent Azure extensions there.
We'll use a mix of the above in the work that follows below.
MQTT server using Azure Event Grid
While it may seem like overkill to use Azure Event Grid as an MQTT Broker it's actually quite nice.
Event Grid is built for very large message volumes and Microsoft offers a pricing model that is quite good for our use case:
At the time of this writing the first one million MQTT messages per month in Azure Event Grid are free.
That's a lot of started Sense reload tasks...
Steps to cover
- Generate client certificates used by devices connecting to Event Grid MQTT.
- Create an Event Grid namespace with MQTT enabled.
- Register clients with the namespace. Only pre-approved clients will be able to connect to the namespace.
- Verify that clients can connect and send/receive MQTT messages.
References
- MQTT using Event Grid is very well documented by Microsoft, here is a good starting point.
- This blog post extend the Microsoft documentation in some areas, and is worth a read too. Note that this text does more around security than we'll use for our use case, but it's a good source of information if you want to deploy the MQTT-start-Sense-tasks solution on your own, and require additional security.
- Examples on how to configure MQTT in Event Grid can be found here.
Create certificates
The two references above describe very nicely how to set things up.
Some steps will be described here, but for details please refer to those texts and adapt as needed to your own naming conventions, Azure subscription etc.
The clients connecting to Event Grid will authenticate using certificates, and those certificates are created off a Certificate Authority (CA).
Let's first create that CA (using the step command line tool, in this case on macOS). Here I've entered a password of my own rather than leaving it empty (a pwd will be created for you then):
➜ step ca init --deployment-type standalone --name AzMqttQsTaskDemo1CA --dns localhost --address 127.0.0.1:443 --provisioner AzMqttQsTaskDemo1Provisioner --context azmqttqstaskdemo1
Choose a password for your CA keys and first provisioner.
✔ [leave empty and we'll generate one]:

Generating root certificate... done!
Generating intermediate certificate... done!

✔ Root certificate: /Users/goran/.step/authorities/azmqttqstaskdemo1/certs/root_ca.crt
✔ Root private key: /Users/goran/.step/authorities/azmqttqstaskdemo1/secrets/root_ca_key
✔ Root fingerprint: <root cert fingerprint>
✔ Intermediate certificate: /Users/goran/.step/authorities/azmqttqstaskdemo1/certs/intermediate_ca.crt
✔ Intermediate private key: /Users/goran/.step/authorities/azmqttqstaskdemo1/secrets/intermediate_ca_key
✔ Database folder: /Users/goran/.step/authorities/azmqttqstaskdemo1/db
✔ Default configuration: /Users/goran/.step/authorities/azmqttqstaskdemo1/config/defaults.json
✔ Default profile configuration: /Users/goran/.step/profiles/azmqttqstaskdemo1/config/defaults.json
✔ Certificate Authority configuration: /Users/goran/.step/authorities/azmqttqstaskdemo1/config/ca.json

Your PKI is ready to go. To generate certificates for individual services see 'step help ca'.
Now create two different client certificates, one for each of the clients we will connect to Event Grid with. Make the client certificates last 365 days.
➜ step certificate create user1-id user1-id.pem user1-id.key --ca ~/.step/authorities/azmqttqstaskdemo1/certs/intermediate_ca.crt --ca-key ~/.step/authorities/azmqttqstaskdemo1/secrets/intermediate_ca_key --no-password --insecure --not-after 8760h
Please enter the password to decrypt /Users/goran/.step/authorities/azmqttqstaskdemo1/secrets/intermediate_ca_key:
Your certificate has been saved in user1-id.pem.
Your private key has been saved in user1-id.key.
Repeat for second user:
➜ step certificate create user2-id user2-id.pem user2-id.key --ca ~/.step/authorities/azmqttqstaskdemo1/certs/intermediate_ca.crt --ca-key ~/.step/authorities/azmqttqstaskdemo1/secrets/intermediate_ca_key --no-password --insecure --not-after 8760h
Please enter the password to decrypt /Users/goran/.step/authorities/azmqttqstaskdemo1/secrets/intermediate_ca_key:
Your certificate has been saved in user2-id.pem.
Your private key has been saved in user2-id.key.
We now have two sets of certificate files:
➜ ls -la
total 32
drwxr-xr-x  6 goran  staff  192 Jan 19 17:08 .
drwxr-xr-x  6 goran  staff  192 Jan 19 16:09 ..
-rw-------  1 goran  staff  227 Jan 19 17:06 user1-id.key
-rw-------  1 goran  staff  717 Jan 19 17:06 user1-id.pem
-rw-------  1 goran  staff  227 Jan 19 17:08 user2-id.key
-rw-------  1 goran  staff  717 Jan 19 17:08 user2-id.pem
Get the fingerprint for the two client certificates (these fingerprints will be used to authenticate with Event Grid):
➜ step certificate fingerprint user1-id.pem
<fingerprint...>
➜
➜ step certificate fingerprint user2-id.pem
<fingerprint...>
Create Event Grid namespace
Let's use Azure CLI (=command line tools for this). If you prefer to use Azure web portal there are good examples in the second reference mentioned above, or on this page).
This page is also useful when dealing with configuring MQTT in Event Grid.
The following assumes Azure CLI is installed and that you have authenticated it with Azure.
First create an Azure resource group in which we can then create other resources:
➜ az group create --name 'azmqttqstaskdemo1' --location 'swedencentral'
{
  "id": "/subscriptions/...../resourceGroups/azmqttqstaskdemo1",
  "location": "swedencentral",
  "managedBy": null,
  "name": "azmqttqstaskdemo1",
  "properties": {
    "provisioningState": "Succeeded"
  },
  "tags": null,
  "type": "Microsoft.Resources/resourceGroups"
}
To see a list of available locations (if you want to use something else than Central Sweden) you can use az account list-locations.
Let's then create an Event Grid namespace called mqttqsdemo1 with MQTT enabled:
➜ az eventgrid namespace create --resource-group 'azmqttqstaskdemo1' --name 'mqttqsdemo1' --topic-spaces-configuration "{state:Enabled,maximumClientSessionsPerAuthenticationName:1}"
This command is in preview and under development. Reference and support levels: https://aka.ms/CLI_refstatus
{
  "id": "/subscriptions/.../resourceGroups/azmqttqstaskdemo1/providers/Microsoft.EventGrid/namespaces/mqttqsdemo1",
  "isZoneRedundant": true,
  "location": "swedencentral",
  "minimumTlsVersionAllowed": "1.2",
  "name": "mqttqsdemo1",
  "provisioningState": "Succeeded",
  "publicNetworkAccess": "Enabled",
  "resourceGroup": "azmqttqstaskdemo1",
  "sku": {
    "capacity": 1,
    "name": "Standard"
  },
  "topicSpacesConfiguration": {
    "hostname": "mqttqsdemo1.swedencentral-1.ts.eventgrid.azure.net",
    "maximumClientSessionsPerAuthenticationName": 3,
    "maximumSessionExpiryInHours": 1,
    "state": "Enabled"
  },
  "topicsConfiguration": {
    "hostname": "mqttqsdemo1.swedencentral-1.eventgrid.azure.net"
  },
  "type": "Microsoft.EventGrid/namespaces"
}
We will need the value of topicSpacesConfiguration.hostname, i.e. mqttqsdemo1.swedencentral-1.ts.eventgrid.azure.net later when connecting our MQTT clients to Event Grid.
Register clients with Event Grid namespace
Register user1 with the namespace:
➜ az eventgrid namespace client create --resource-group 'azmqttqstaskdemo1' --namespace-name 'mqttqsdemo1' --client-name 'user1'  --authentication-name 'user1-id' --client-certificate-authentication "{validationScheme:ThumbprintMatch,allowed-thumbprints:[...user 1 thumbprint...]}"
This command is in preview and under development. Reference and support levels: https://aka.ms/CLI_refstatus
{
  "authenticationName": "user1-id",
  "clientCertificateAuthentication": {
    "allowedThumbprints": [
      "...user 1 thumbprint..."
    ],
    "validationScheme": "ThumbprintMatch"
  },
  "id": "/subscriptions/.../resourceGroups/AZMQTTQSTASKDEMO1/providers/Microsoft.EventGrid/namespaces/mqttqsdemo1/clients/user1",
  "name": "user1",
  "provisioningState": "Succeeded",
  "resourceGroup": "AZMQTTQSTASKDEMO1",
  "state": "Enabled",
  "type": "Microsoft.EventGrid/namespaces/clients"
}
Repeat for user2, using that user's thumbprint.
Set up MQTT topic permissions
Both users are automatically added to the MQTT broker's $all client group.
Now create a simple topic space called AllTopics (MQTT topics are grouped into topic spaces in Event Grid).
Include a single topic qliksense/# in the topic space:
➜ az eventgrid namespace topic-space create --resource-group 'azmqttqstaskdemo1' --namespace-name 'mqttqsdemo1' --topic-space-name 'AllTopics' --topic-templates '['qliksense/#']'
This command is in preview and under development. Reference and support levels: https://aka.ms/CLI_refstatus
{
  "id": "/subscriptions/.../resourceGroups/AZMQTTQSTASKDEMO1/providers/Microsoft.EventGrid/namespaces/mqttqsdemo1/topicSpaces/AllTopics",
  "name": "AllTopics",
  "provisioningState": "Succeeded",
  "resourceGroup": "AZMQTTQSTASKDEMO1",
  "topicTemplates": [
    "qliksense/starttask"
  ],
  "type": "Microsoft.EventGrid/namespaces/topicSpaces"
}
Add a "permission binding" that gives the $all client group publish permissions to the created topic space:
➜ az eventgrid namespace permission-binding create --resource-group 'azmqttqstaskdemo1' --namespace-name 'mqttqsdemo1' --permission-binding-name 'AllClientsCanPublishOnAllTopics' --client-group-name '$all' --permission publisher --topic-space-name 'AllTopics'
This command is in preview and under development. Reference and support levels: https://aka.ms/CLI_refstatus
{
  "clientGroupName": "$all",
  "id": "/subscriptions/.../resourceGroups/AZMQTTQSTASKDEMO1/providers/Microsoft.EventGrid/namespaces/mqttqsdemo1/permissionBindings/AllClientsCanPublishOnAllTopics",
  "name": "AllClientsCanPublishOnAllTopics",
  "permission": "Publisher",
  "provisioningState": "Succeeded",
  "resourceGroup": "AZMQTTQSTASKDEMO1",
  "topicSpaceName": "AllTopics",
  "type": "Microsoft.EventGrid/namespaces/permissionBindings"
}
Do the same again, but for subscribe permissions:
➜ az eventgrid namespace permission-binding create --resource-group 'azmqttqstaskdemo1' --namespace-name 'mqttqsdemo1' --permission-binding-name 'AllClientsCanSubscribeToAllTopics' --client-group-name '$all' --permission subscriber --topic-space-name 'AllTopics'
This command is in preview and under development. Reference and support levels: https://aka.ms/CLI_refstatus
{
  "clientGroupName": "$all",
  "id": "/subscriptions/.../resourceGroups/AZMQTTQSTASKDEMO1/providers/Microsoft.EventGrid/namespaces/mqttqsdemo1/permissionBindings/AllClientsCanSubscribeToAllTopics",
  "name": "AllClientsCanSubscribeToAllTopics",
  "permission": "Subscriber",
  "provisioningState": "Succeeded",
  "resourceGroup": "AZMQTTQSTASKDEMO1",
  "topicSpaceName": "AllTopics",
  "type": "Microsoft.EventGrid/namespaces/permissionBindings"
}Client groups, topic spaces and permissions bindings can be combined in more sophisticated ways, creating configurations where some clients can only publish and/or subscribe to certain topics.
This can be useful if MQTT is used for various kinds of data transfers, but only some MQTT clients should be allowed to start reloads in Qlik Sense.
At this point the MQTT broker is up and running, with two users configured to use it.
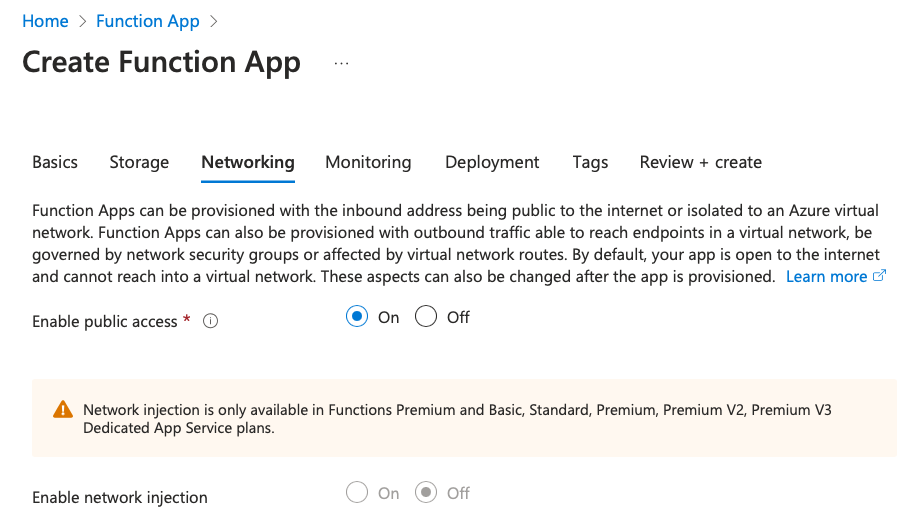
Internet facing webhook using Function Apps
We also want a simple, Internet facing http endpoint (=webhook) that when called will result in a Qlik Sense reload task to be started.
If there isn't a need for the webhook to be Internet facing it can be deployed on Azure internal networks instead.
Steps to cover
- Create Function App in Azure, using the Azure web portal.
- This will also create a storage account, an app service plan etc. Everything needed to get a working Function App.
- Create local Function App project using Visual Studio Code
- Add Javascript code to local project.
- The function will forward http call parameters (e.g. a Qlik Sense task ID) to MQTT.
- Deploy local Function App project to Azure.
- Verify that a call to the webhook results in MQTT message being published
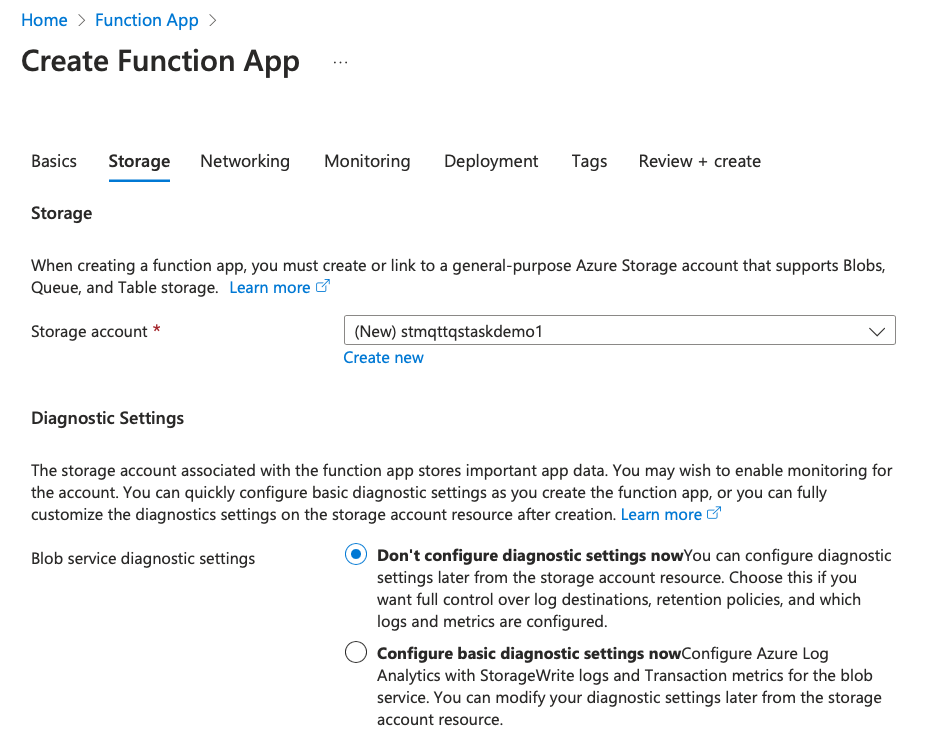
Create Azure storage account
The Function App (=FA) that will be created in next step needs a storage account for keeping logs etc.
If the FA is created via the Azure web UI, the storage account can be created as part of the FA creating process. If using az CLI command we first have to create a storage account.
This command will create a storage account called "stmqttqstaskdemo1" and also limit access to it so only specific IP addresses can address the account from Internet.
az storage account create --name stmqttqstaskdemo1 --resource-group 'azmqttqstaskdemo1' --sku Standard_LRS --min-tls-version TLS1_2 --allow-blob-public-access false --public-network-access enabled --default-action denyInitially the approved IP list is empty, easiest is to add new IPs via the Azure web UI. But it's also possible to use az command to do this.
Create Azure Function App
It's certainly possible to create a new FA using az CLI, but let's use the Azure web UI this time (the web UI automatically creates various resources the FA needs, which is convenient).
The result will be an FA in Azure that will host the webhook function that will eventually be used to start Qlik Sense reload tasks.
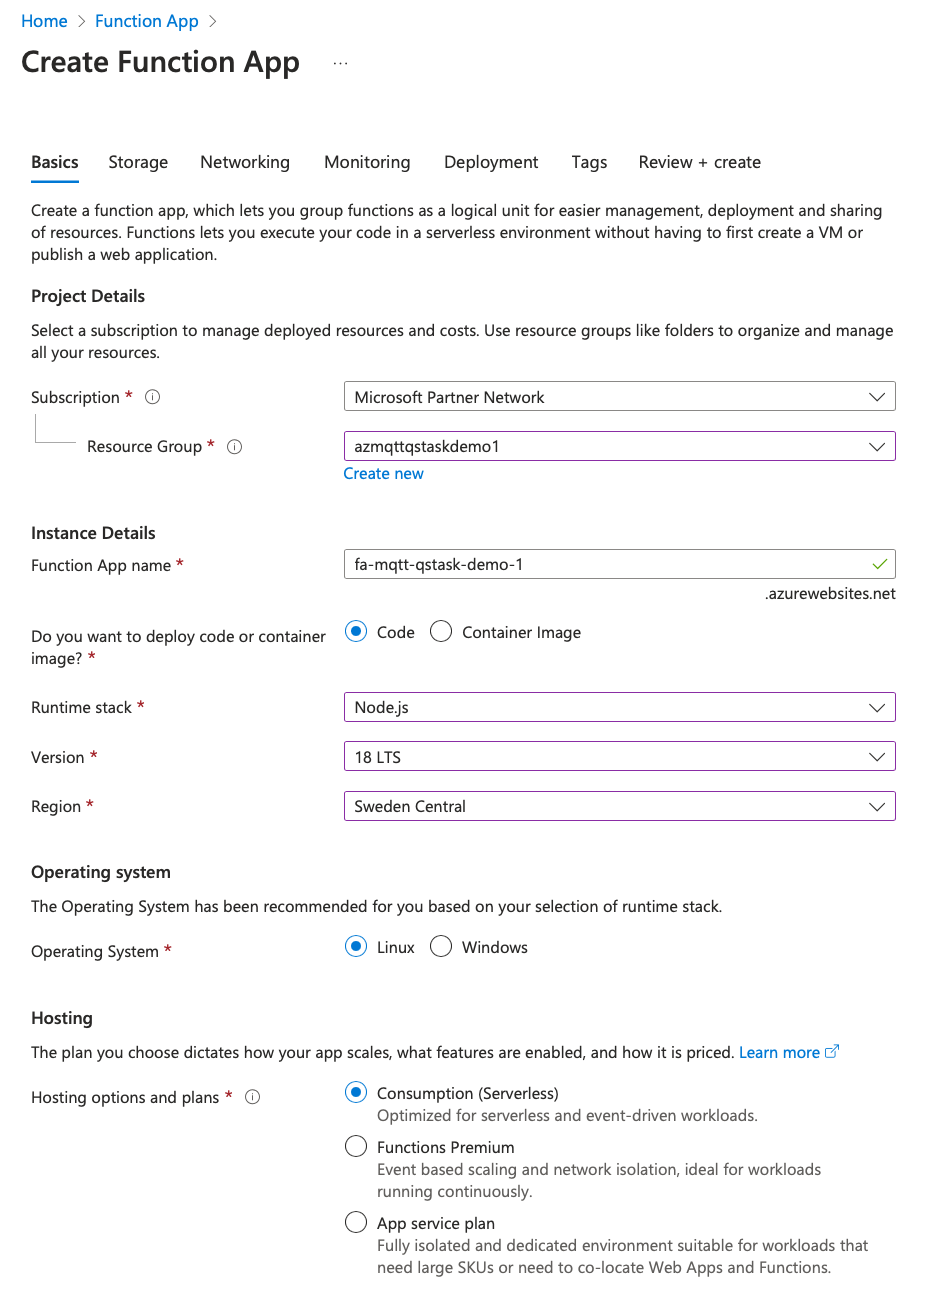
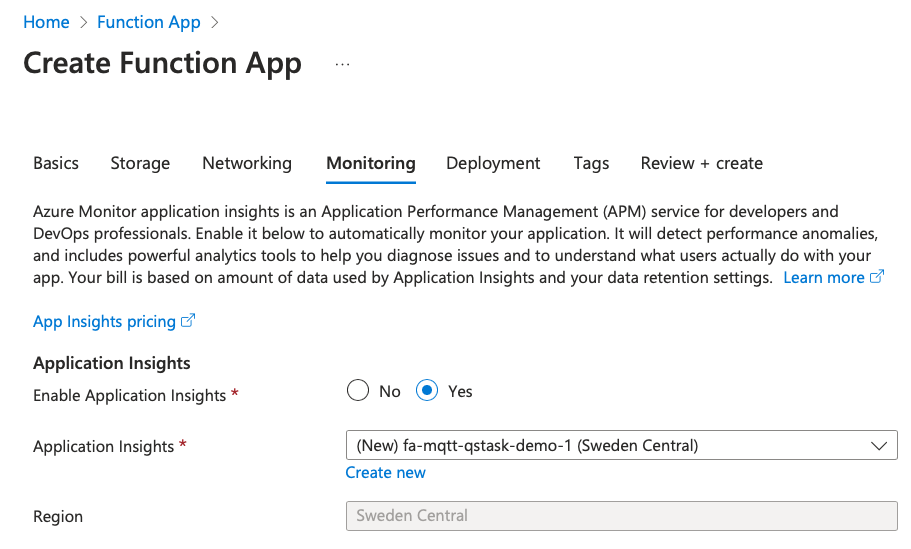
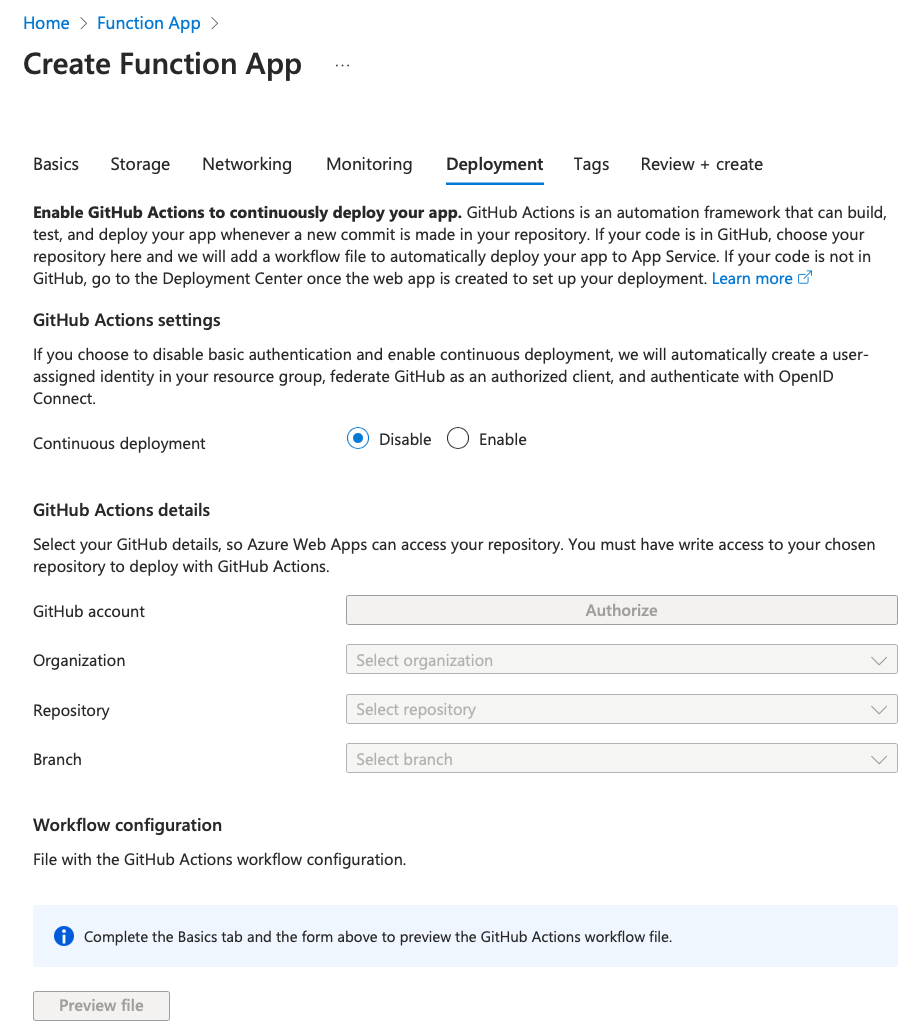
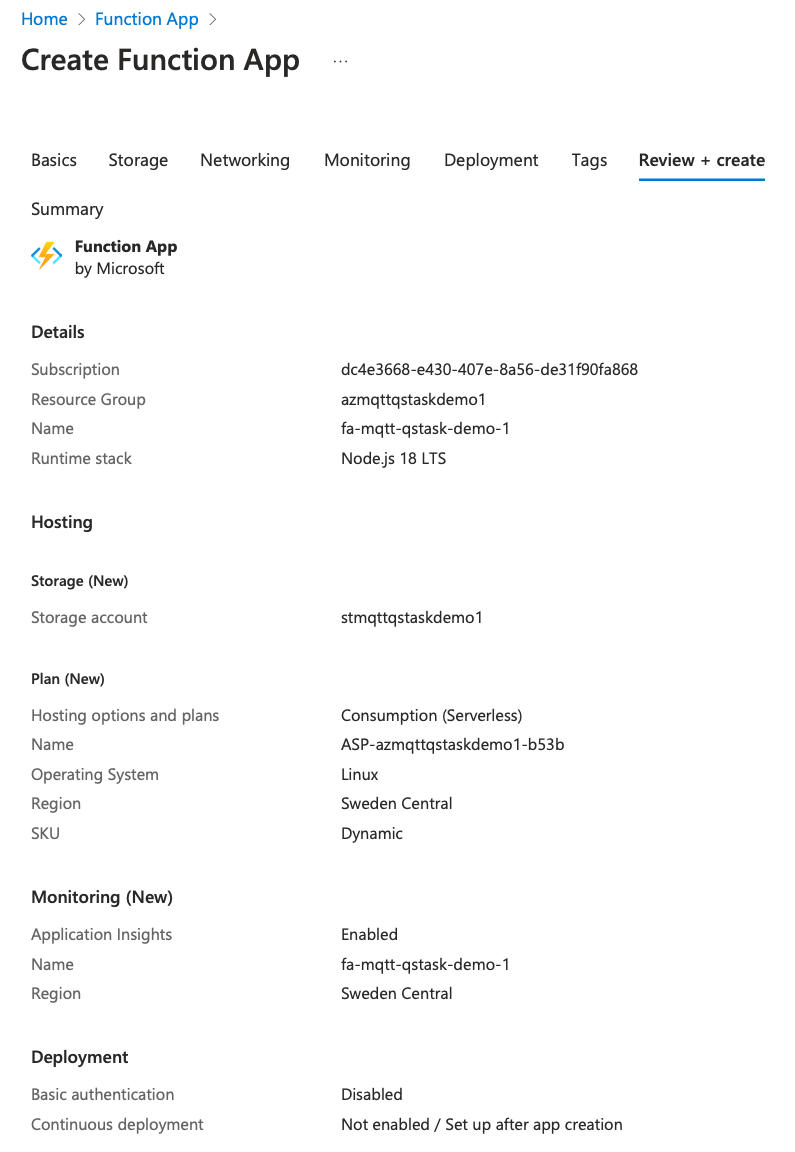
The new FA still does not have any functions in it. In fact, we created it just to have a placeholder FA which we can later replace/overwrite with the local FA we will create in next step.
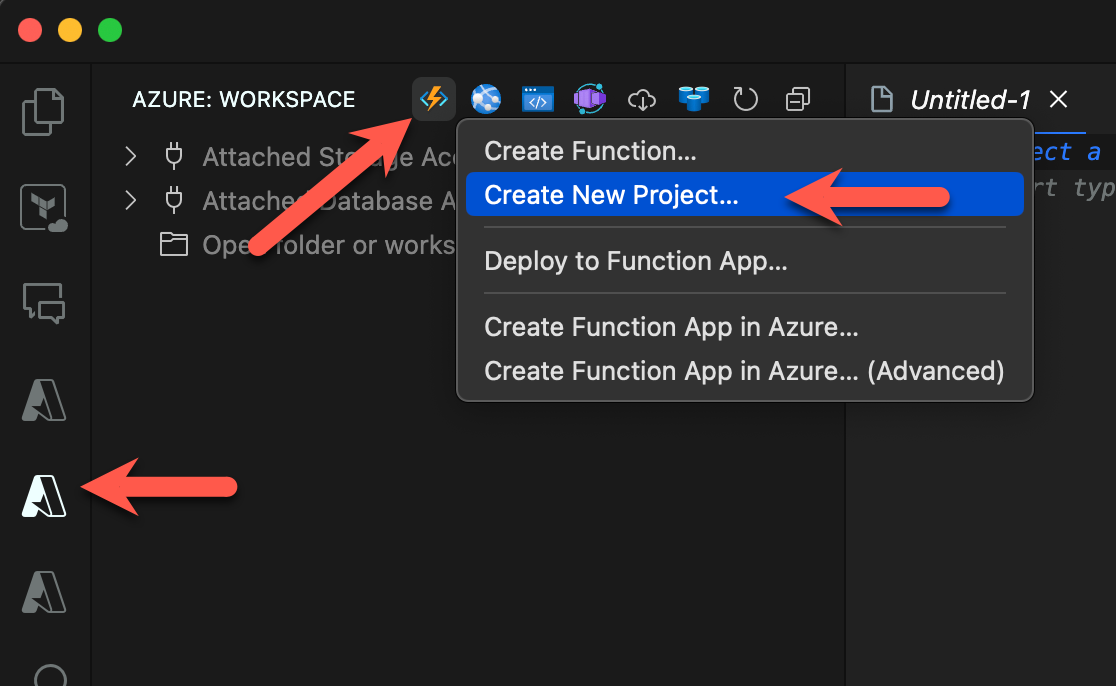
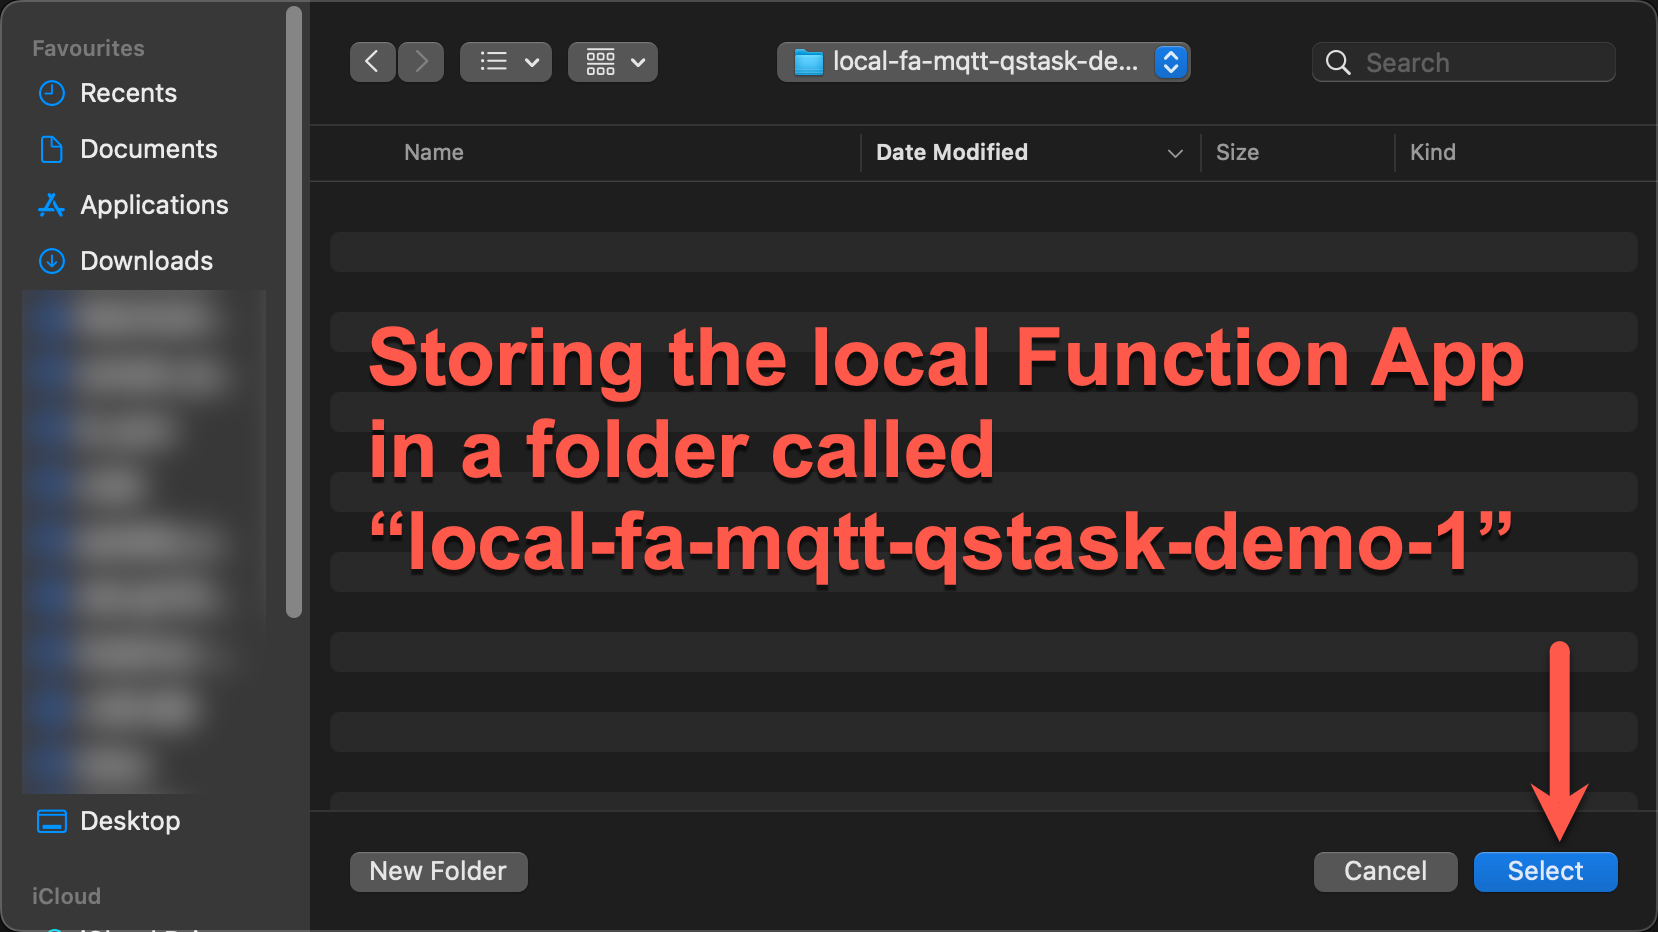
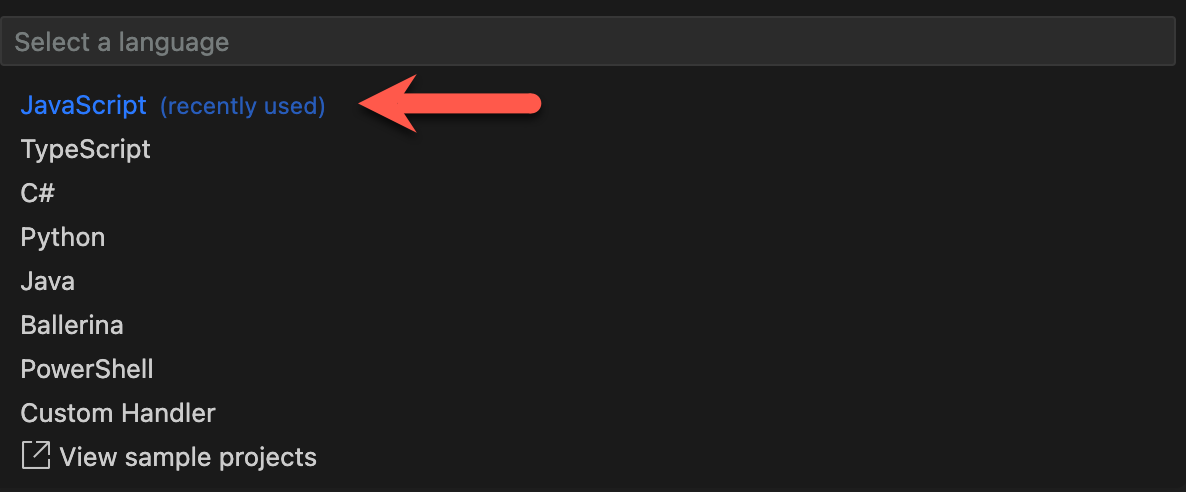
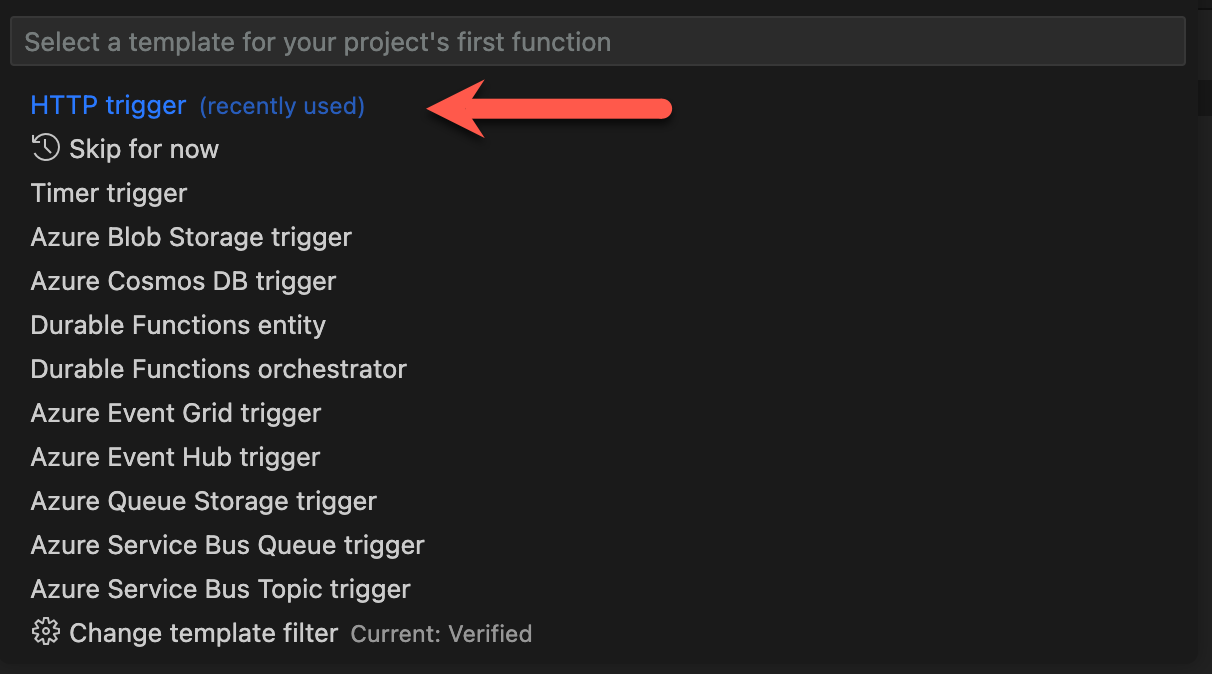
Create local Function App
Here we use Visual Studio Code (=VSC, make sure to have the Azure Function App extension installed) to create a local FA project, to which we'll add a function that will provide the webhook logic we need.


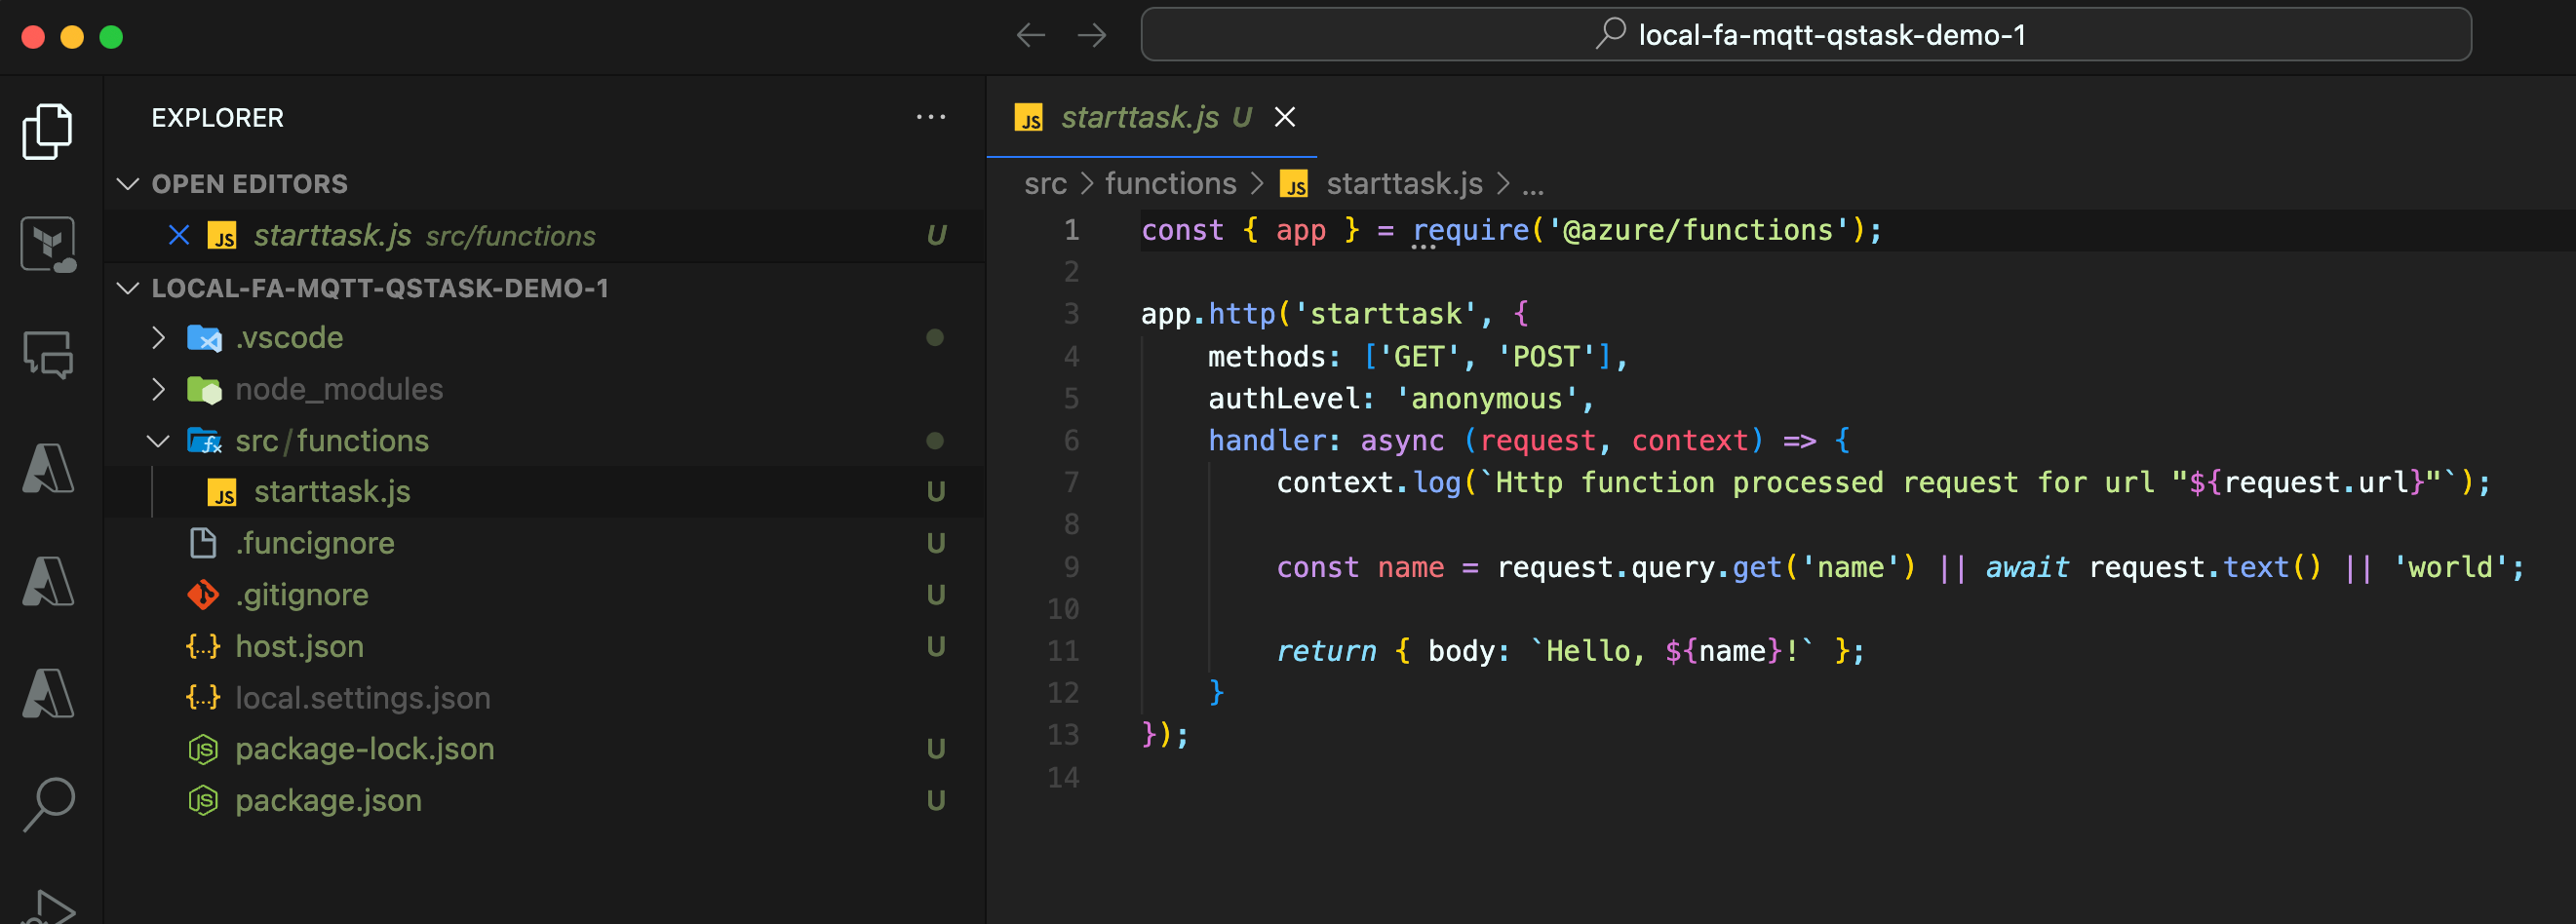
We can test the new local FA from within VSC.
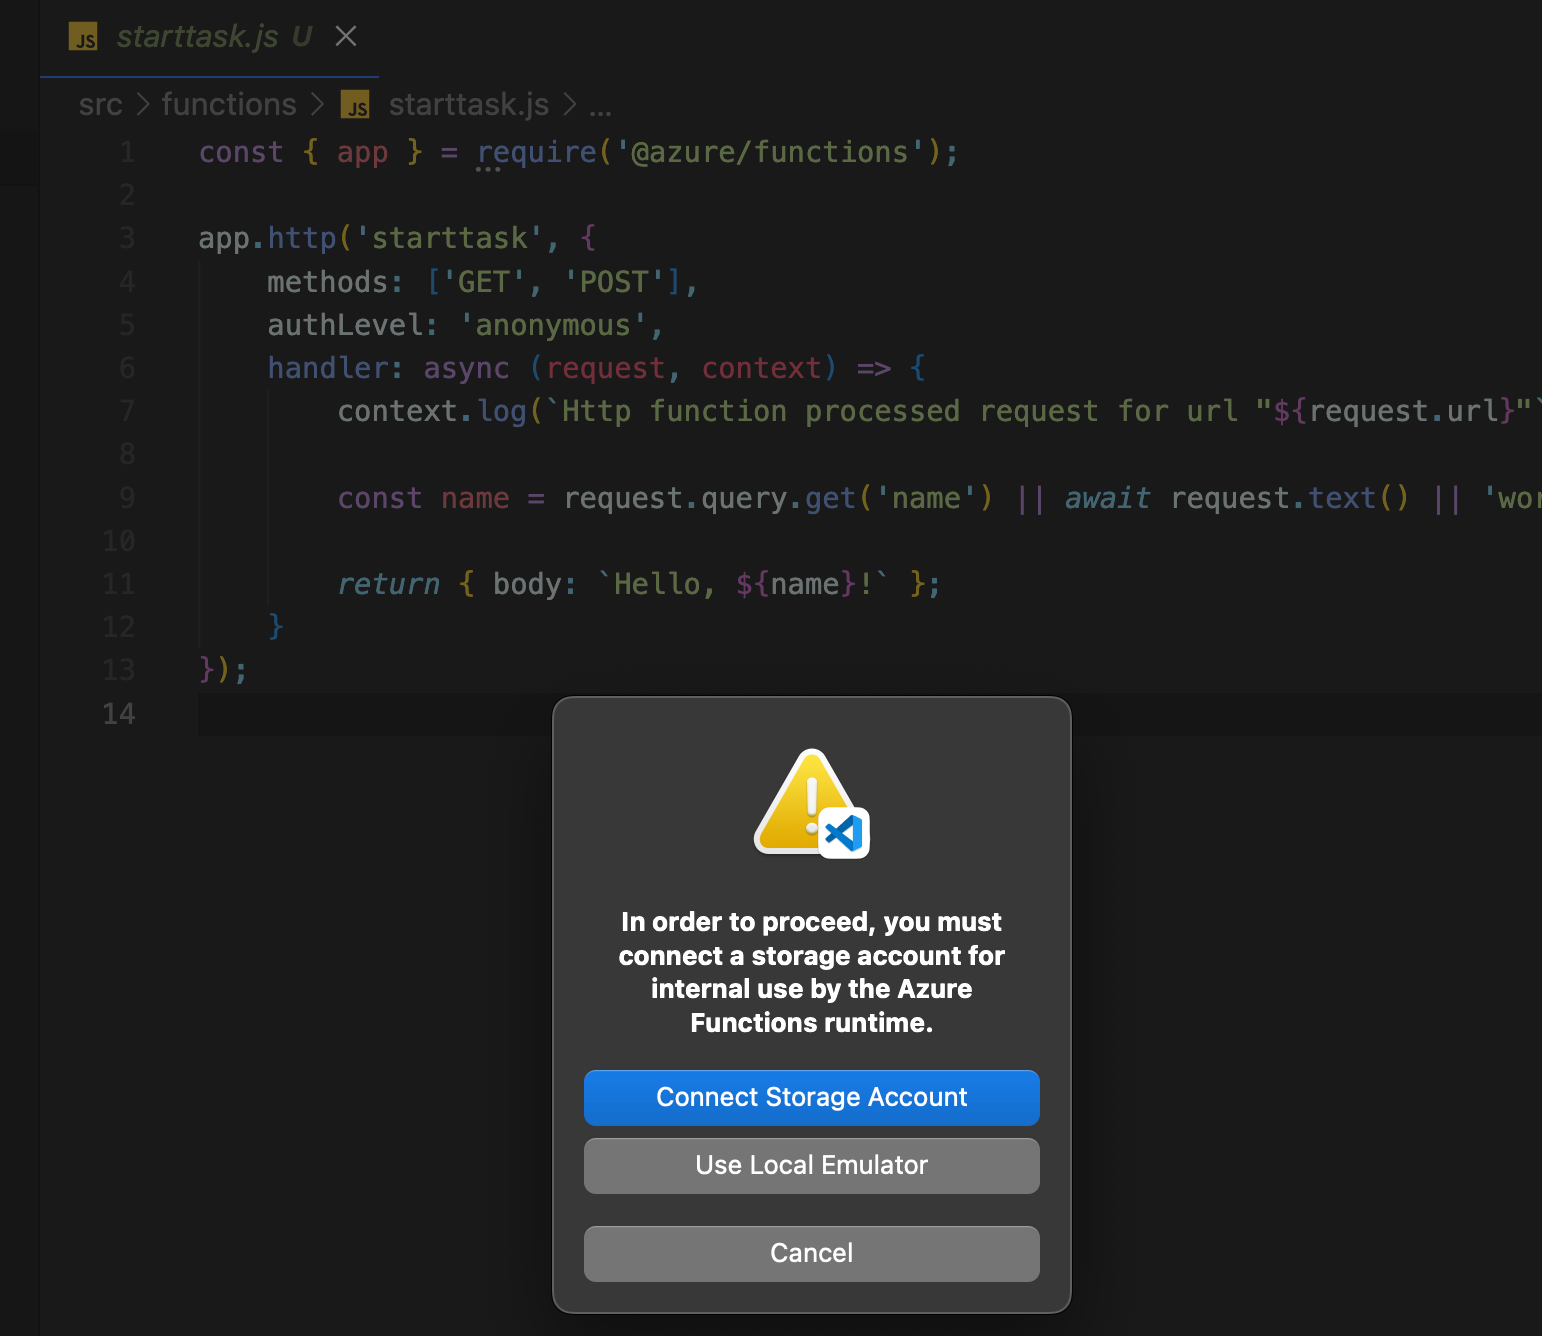
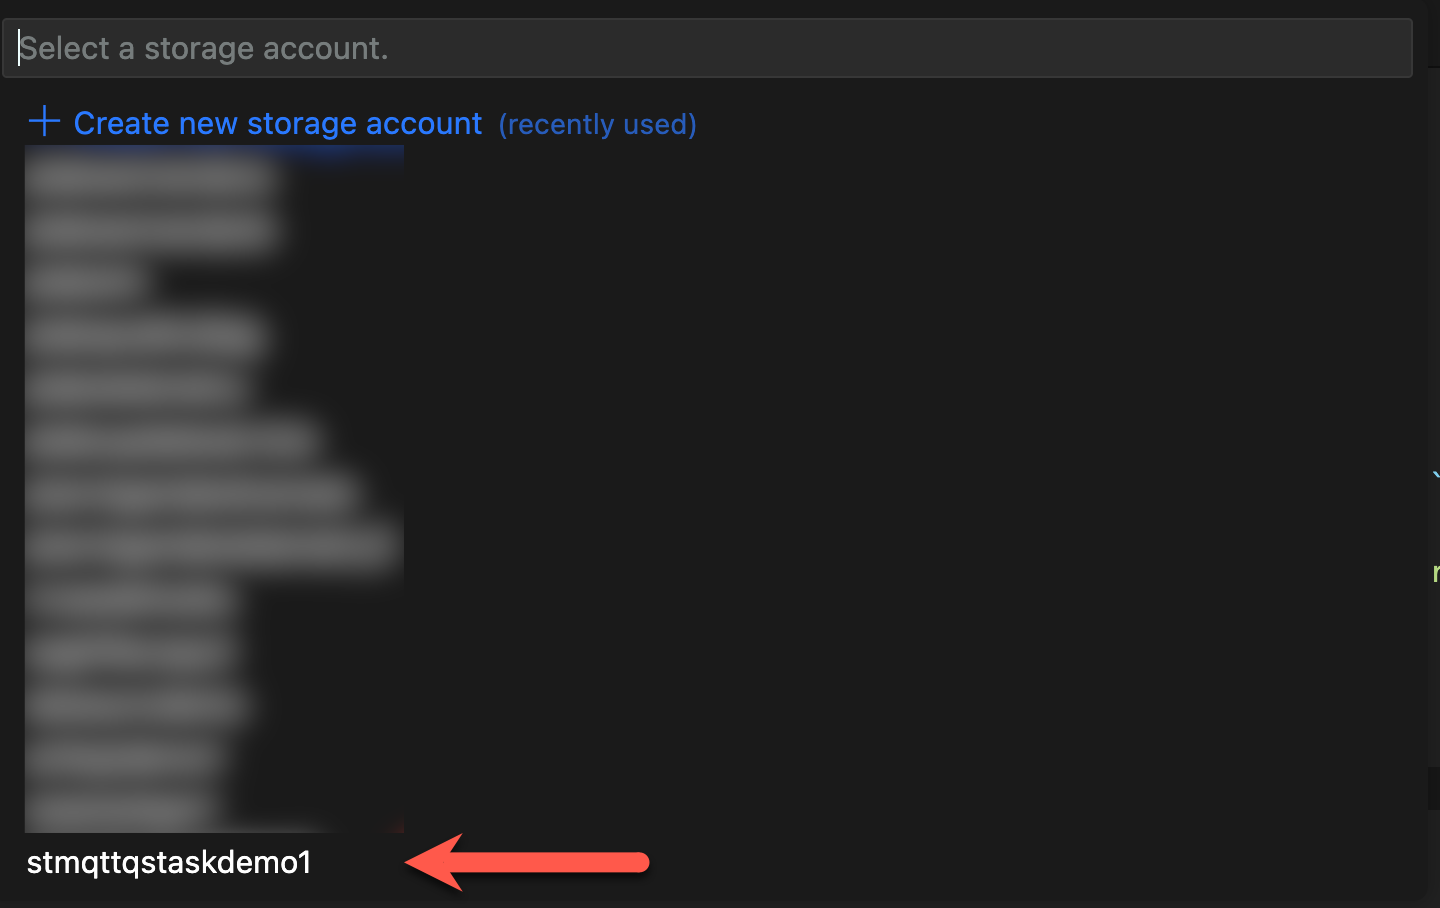
Press F5 to start debugging your project, then connect the storage account that was created as part of the Azure FA (or use a local emulator, either works).
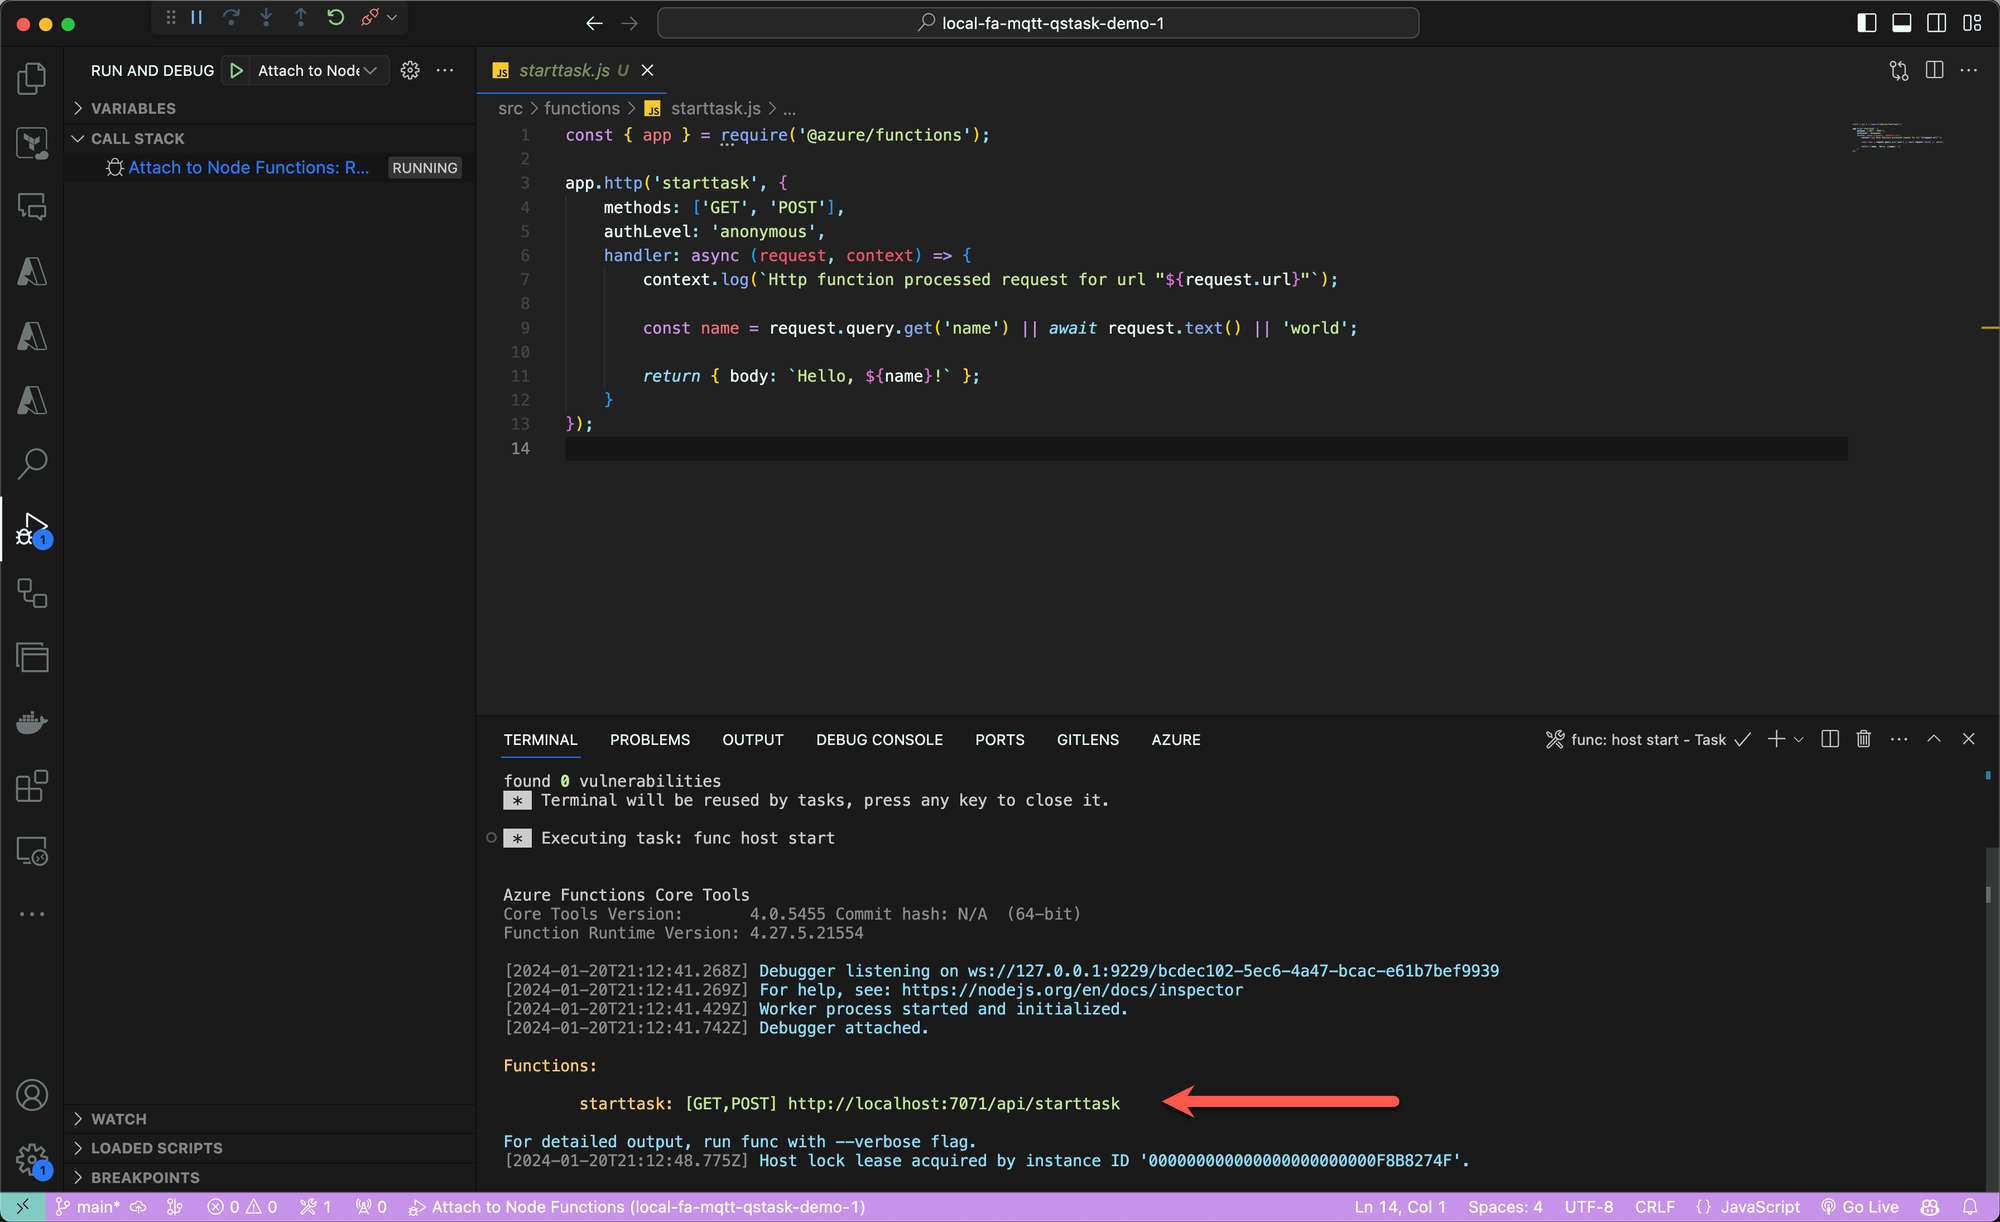
Let's try doing a GET call to the URL/webhook shown above:
➜ curl http://localhost:7071/api/starttask
Hello, world!
Great, this confirms the local Function App works (in its default version).
Add new code to local project
Each FA in Azure can contain one or more functions, each doing different things. We'll only use a single function in this demo, but other functions can be added if needed.
We already have a function starttask, but it doesn't do what we want. Let's change that.
The function should
- Accept POST calls with a text body. The body should be a Qlik Sense task ID.
- Connect to the newly created Event Grid MQTT broker, authenticating as
user1-id. - Forward the POST payload/body to a pre-defined MQTT topic
Let's update our local FA project accordingly.
First install the mqtt library from npm:
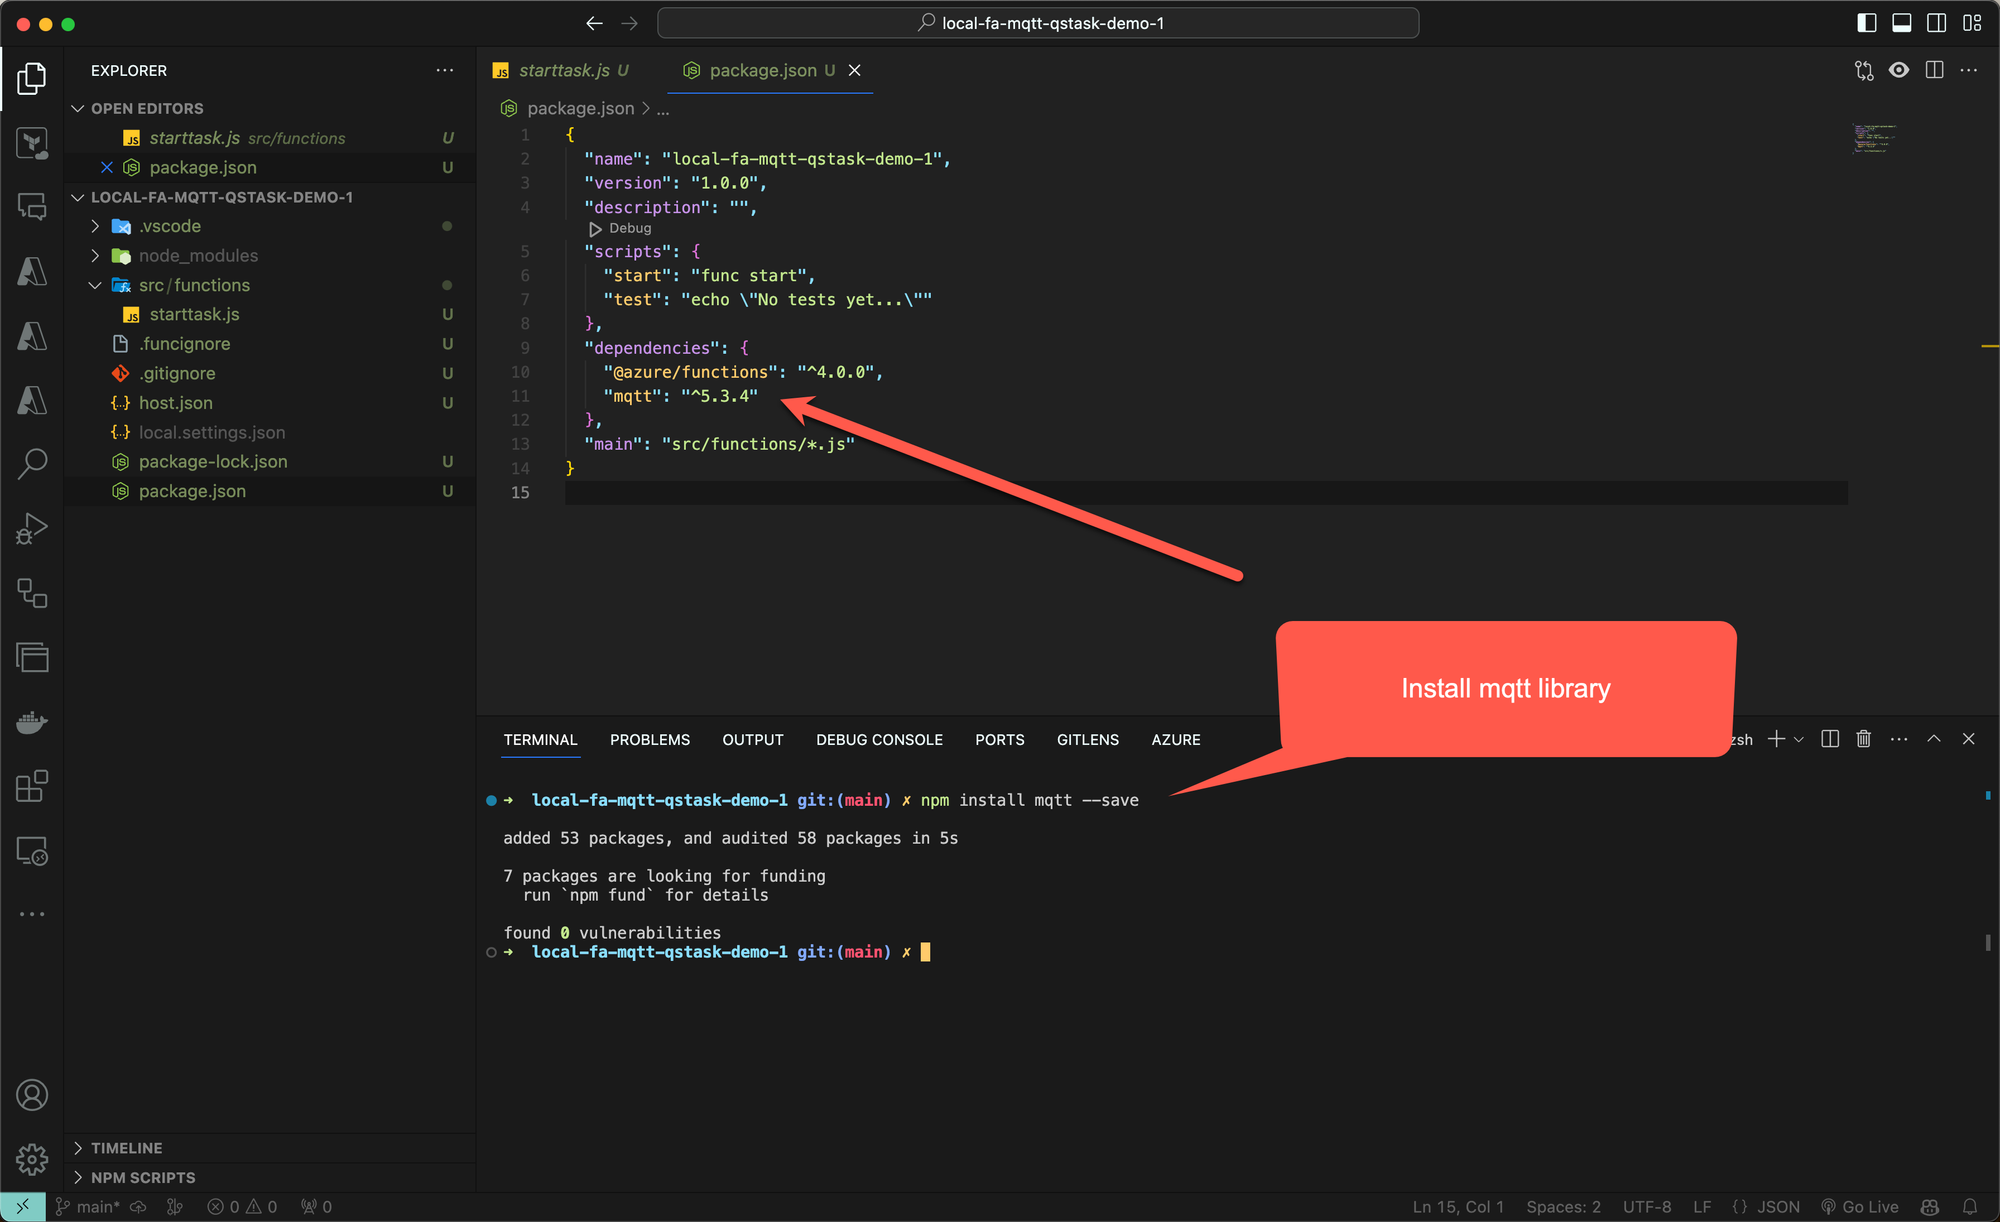
Then update the Javascript code in the function that will handle incoming http calls:
const { app } = require('@azure/functions');
var mqtt = require('mqtt');
const fs = require('fs');

app.http('starttask', {
  methods: ['POST'],
  authLevel: 'anonymous',
  handler: async (request, context) => {
    context.log(`Http function processed request for url "${request.url}"`);

    // Read certificate and key from files
    const cert = fs.readFileSync('./cert/user1-id.pem');
    const key = fs.readFileSync('./cert/user1-id.key');

    // MQTT options
    const mqttOptions = {
      clientId: 'fa-mqtt-qstask-demo1', username: 'user1-id',
      key,
      cert,
      rejectUnauthorized: true,
    }

    // Log request details
    const headers = Object.fromEntries(request.headers.entries());
    const url = request.url;
    const body = await request.text();
    context.log('POST body: ' + body);
    context.log('POST headers: ' + JSON.stringify(headers, null, 2));
    context.log('POST url: ' + JSON.stringify(url, null, 2));

    // Connect to MQTT broker
    var client = await mqtt.connectAsync('mqtts://mqttqsdemo1.swedencentral-1.ts.eventgrid.azure.net:8883', mqttOptions);
    context.log("MQTT client connected flag: " + client.connected);

    // Publish message
    await client.publishAsync('qliksense/starttask', body, { qos: 1 });

    // Disconnect from MQTT broker
    await client.endAsync();

    return { body: `Thanks, message received.` };
  }
});
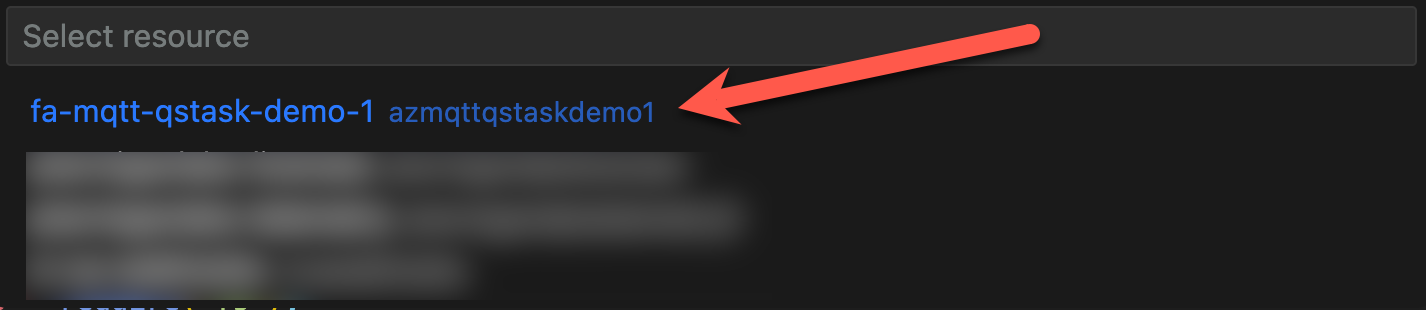
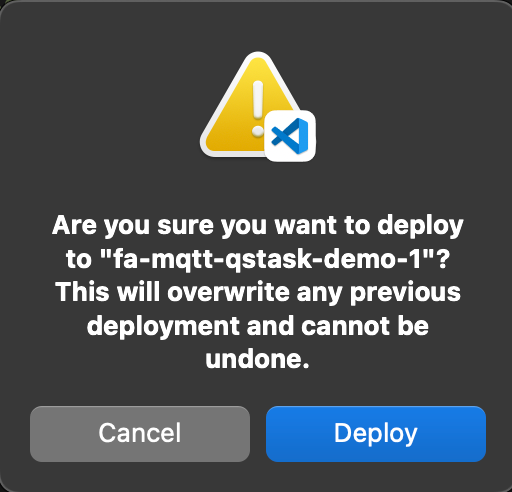
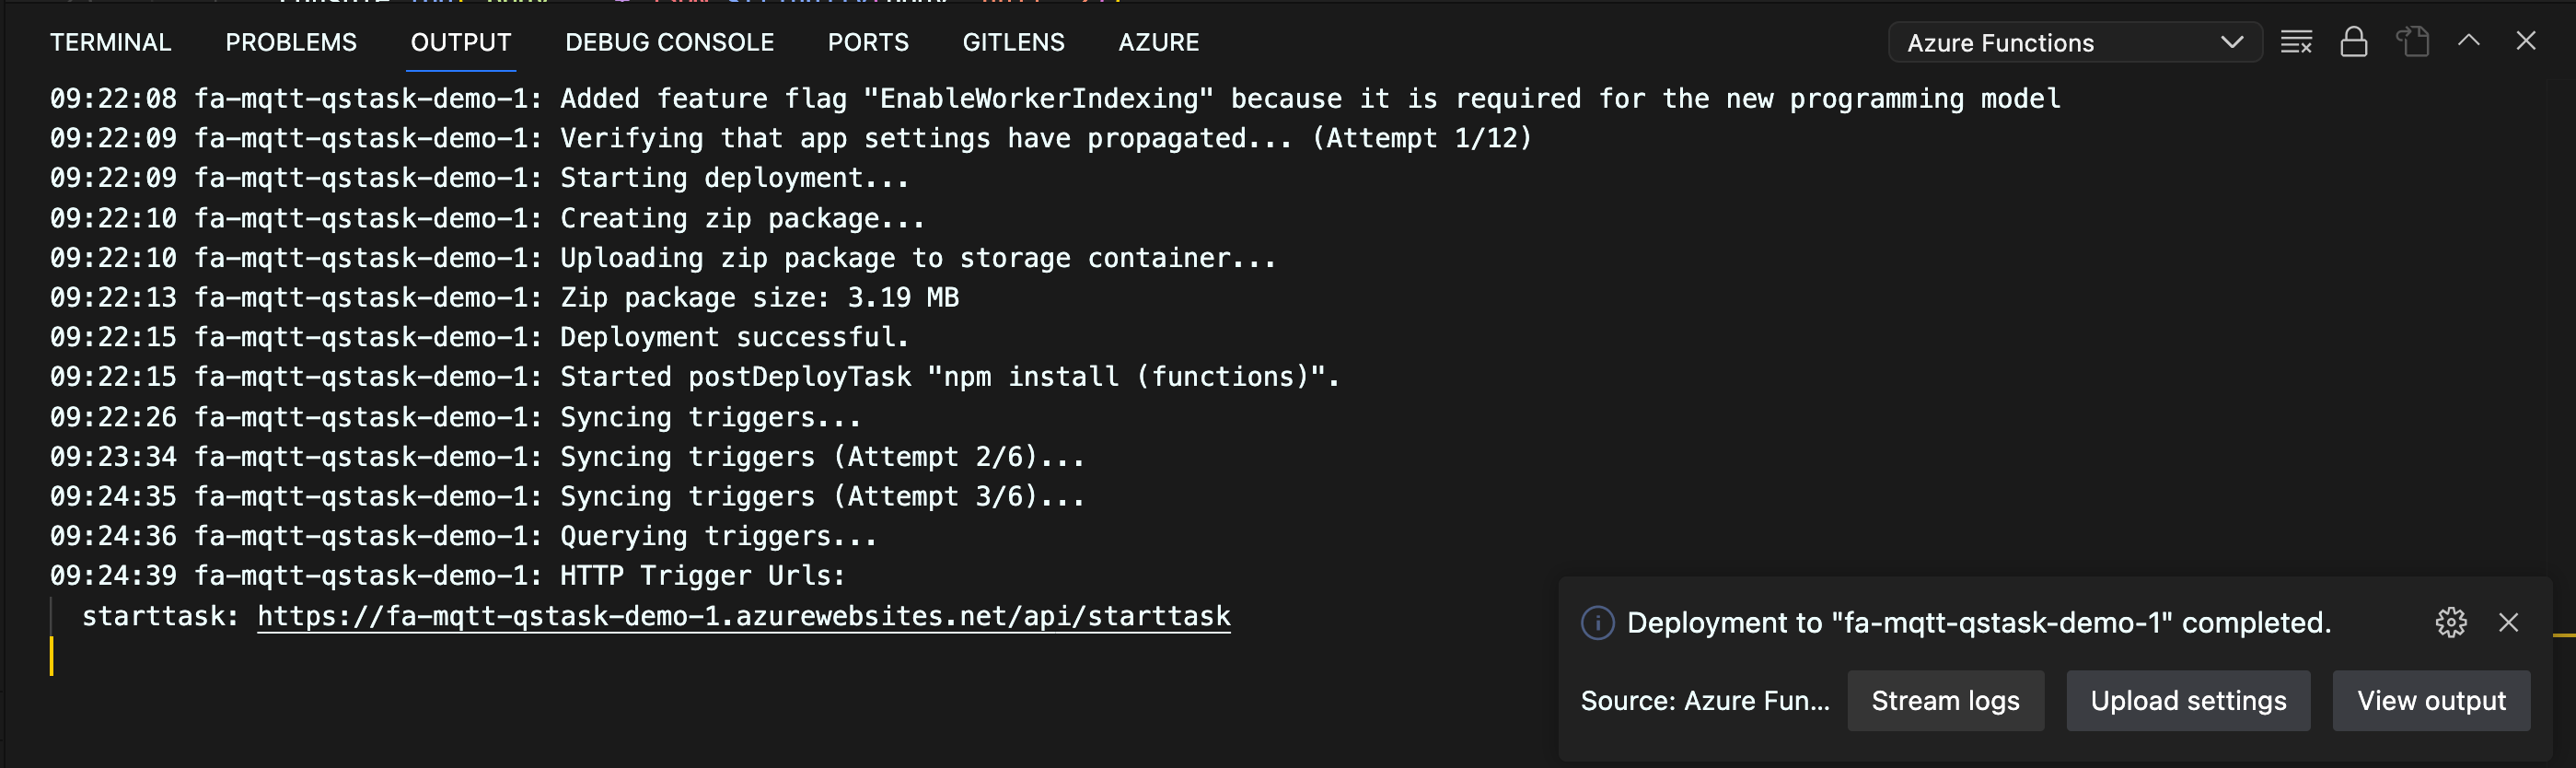
Deploy local Function App project to Azure
With the final code in place, let's deploy the local Function App to Azure, overwriting the FA that already exists there.

Demo of Function App being called from Internet
Let's test the final Function App running in Azure by calling the webhook and then trace the call all the way through the Function App and the MQTT broker, to the MQTT topic qliksense/starttask.
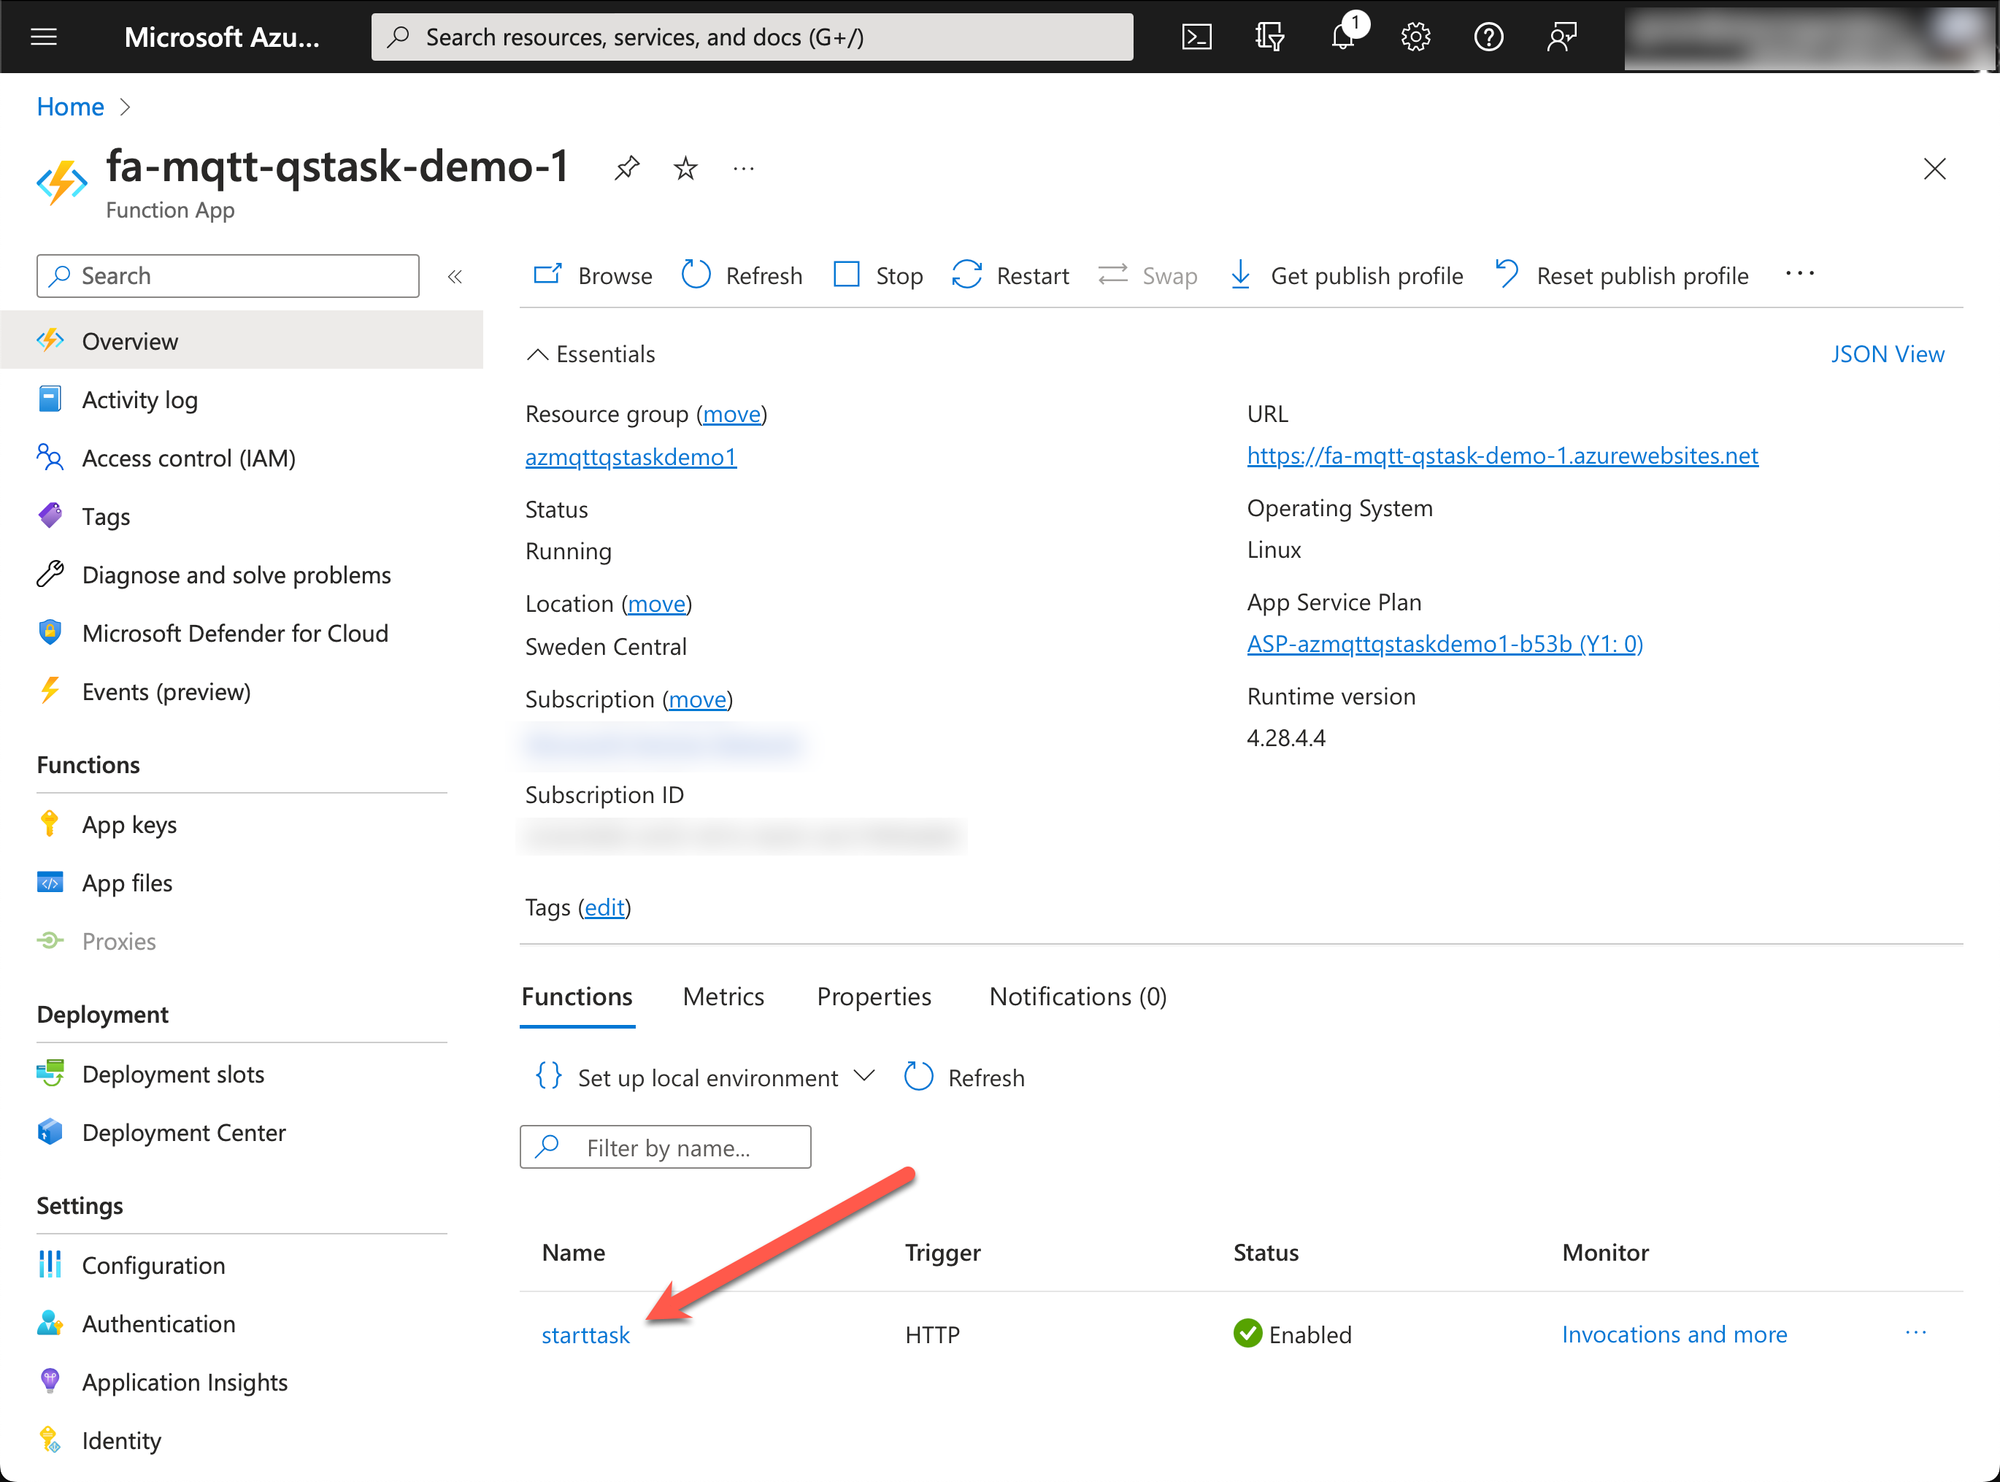
- Open the functions page (click on "starttask" in screen shot above, at red arrow).
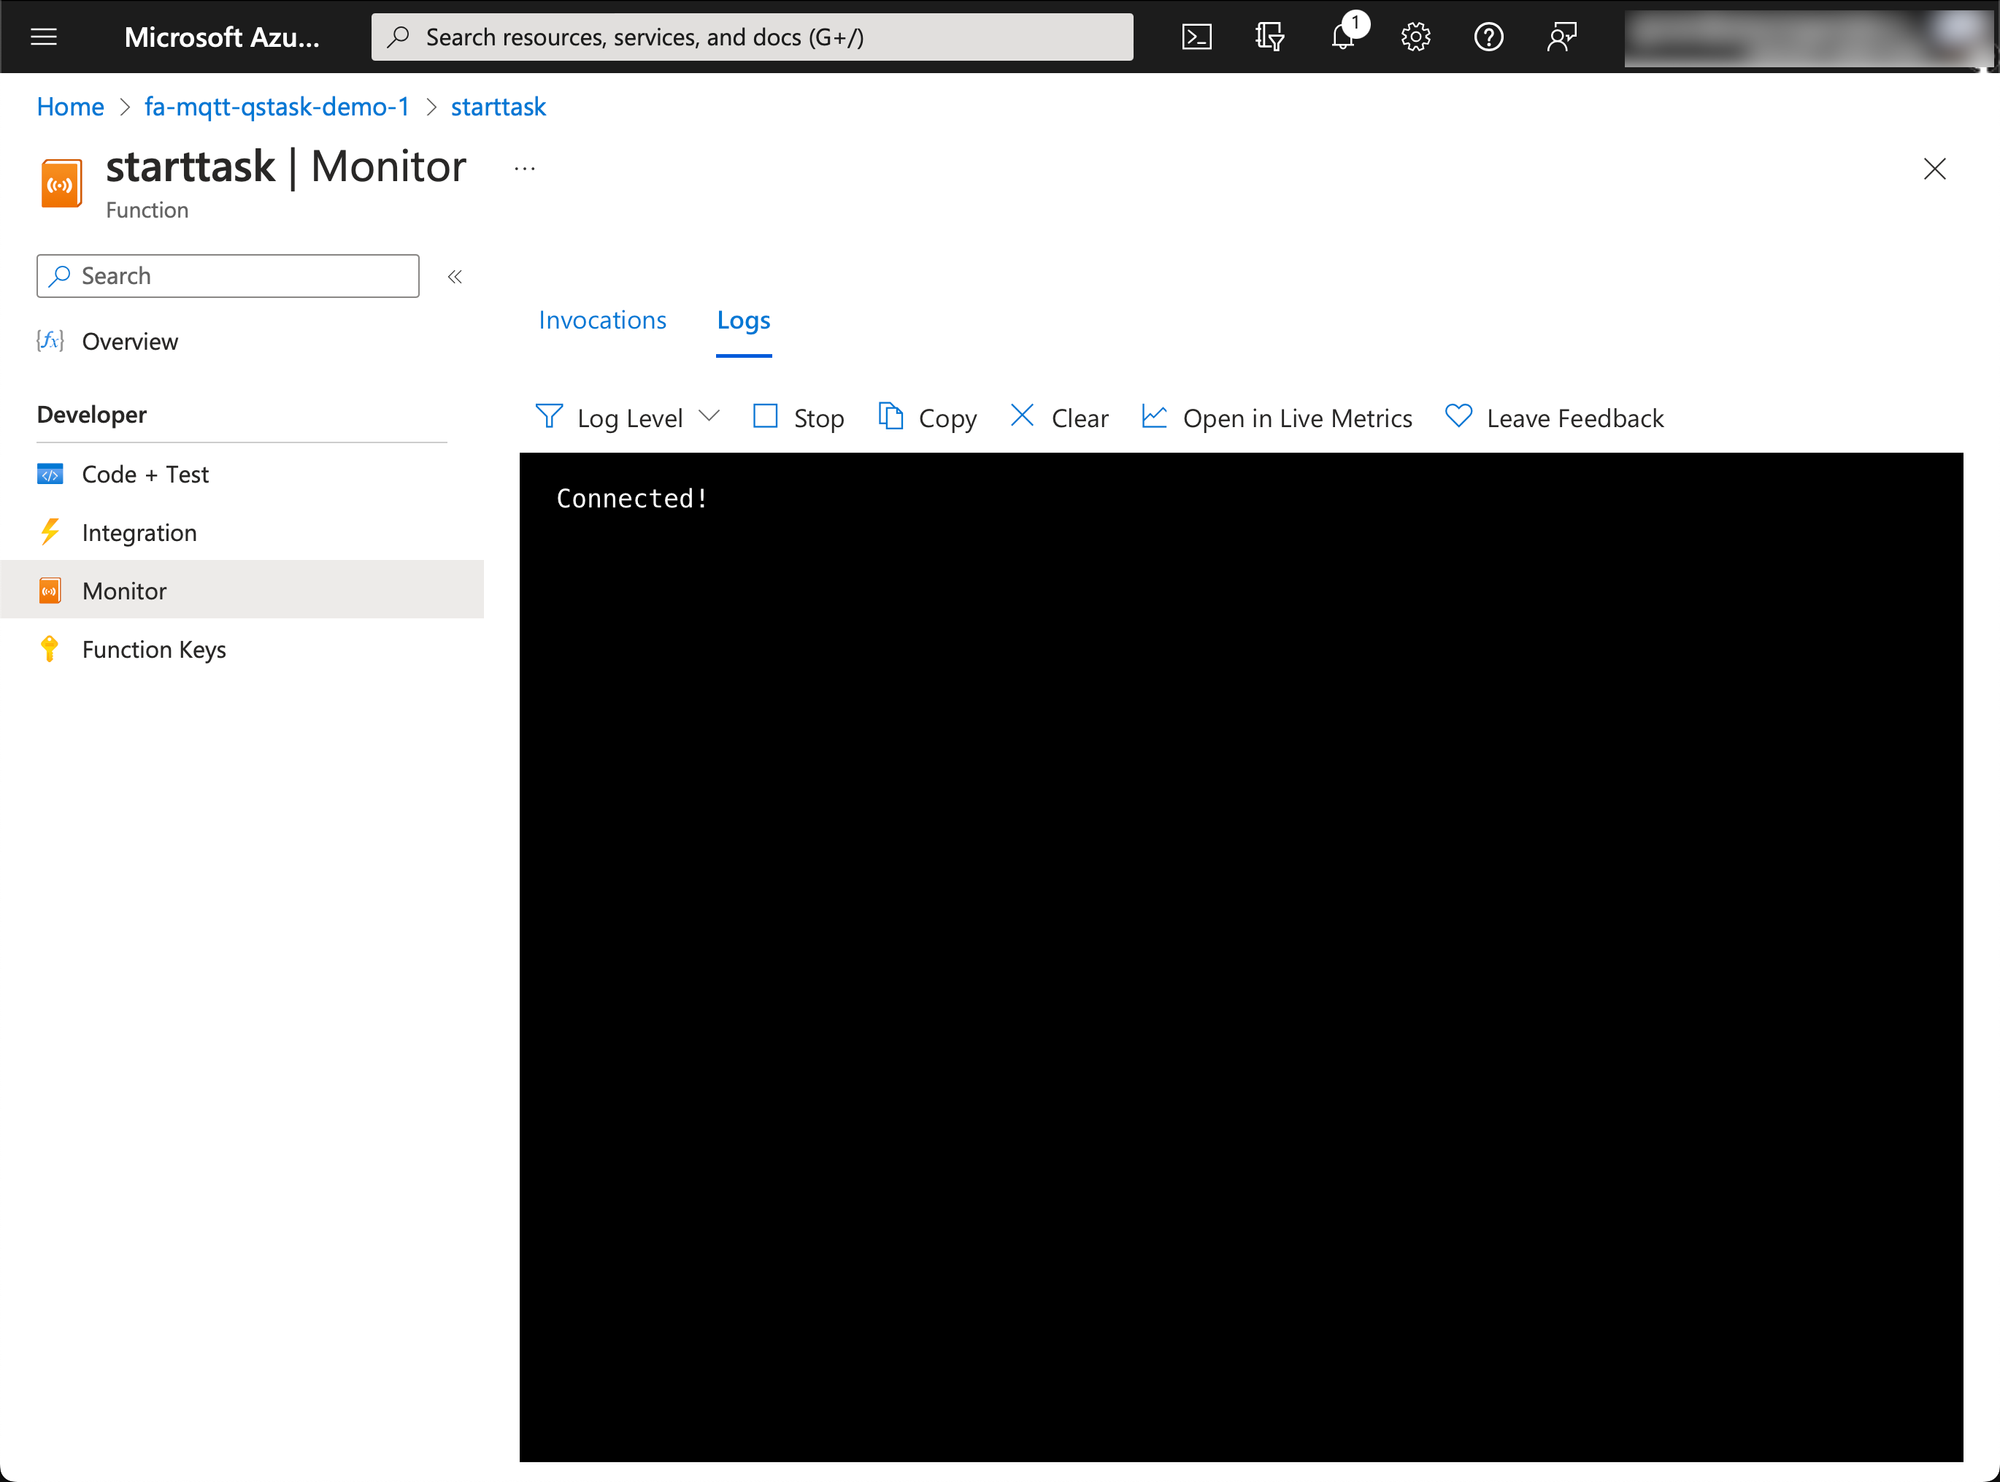
- Click on "Monitor" in menu on the left, then open the "Logs" tab.
- Wait a few seconds, then you will be connected to the function log output.
Now let's call the https endpoint (i.e. the "webhook"), again using curl on macOS.
We're sending a simple JSON for this test.
➜ curl -X "POST" "https://fa-mqtt-qstask-demo-1.azurewebsites.net/api/starttask" -H 'Content-Type: application/json; charset=utf-8' -d $'Testing webhook'
Thanks, message received.
Looking good, let's see what the logs in Azure shows:
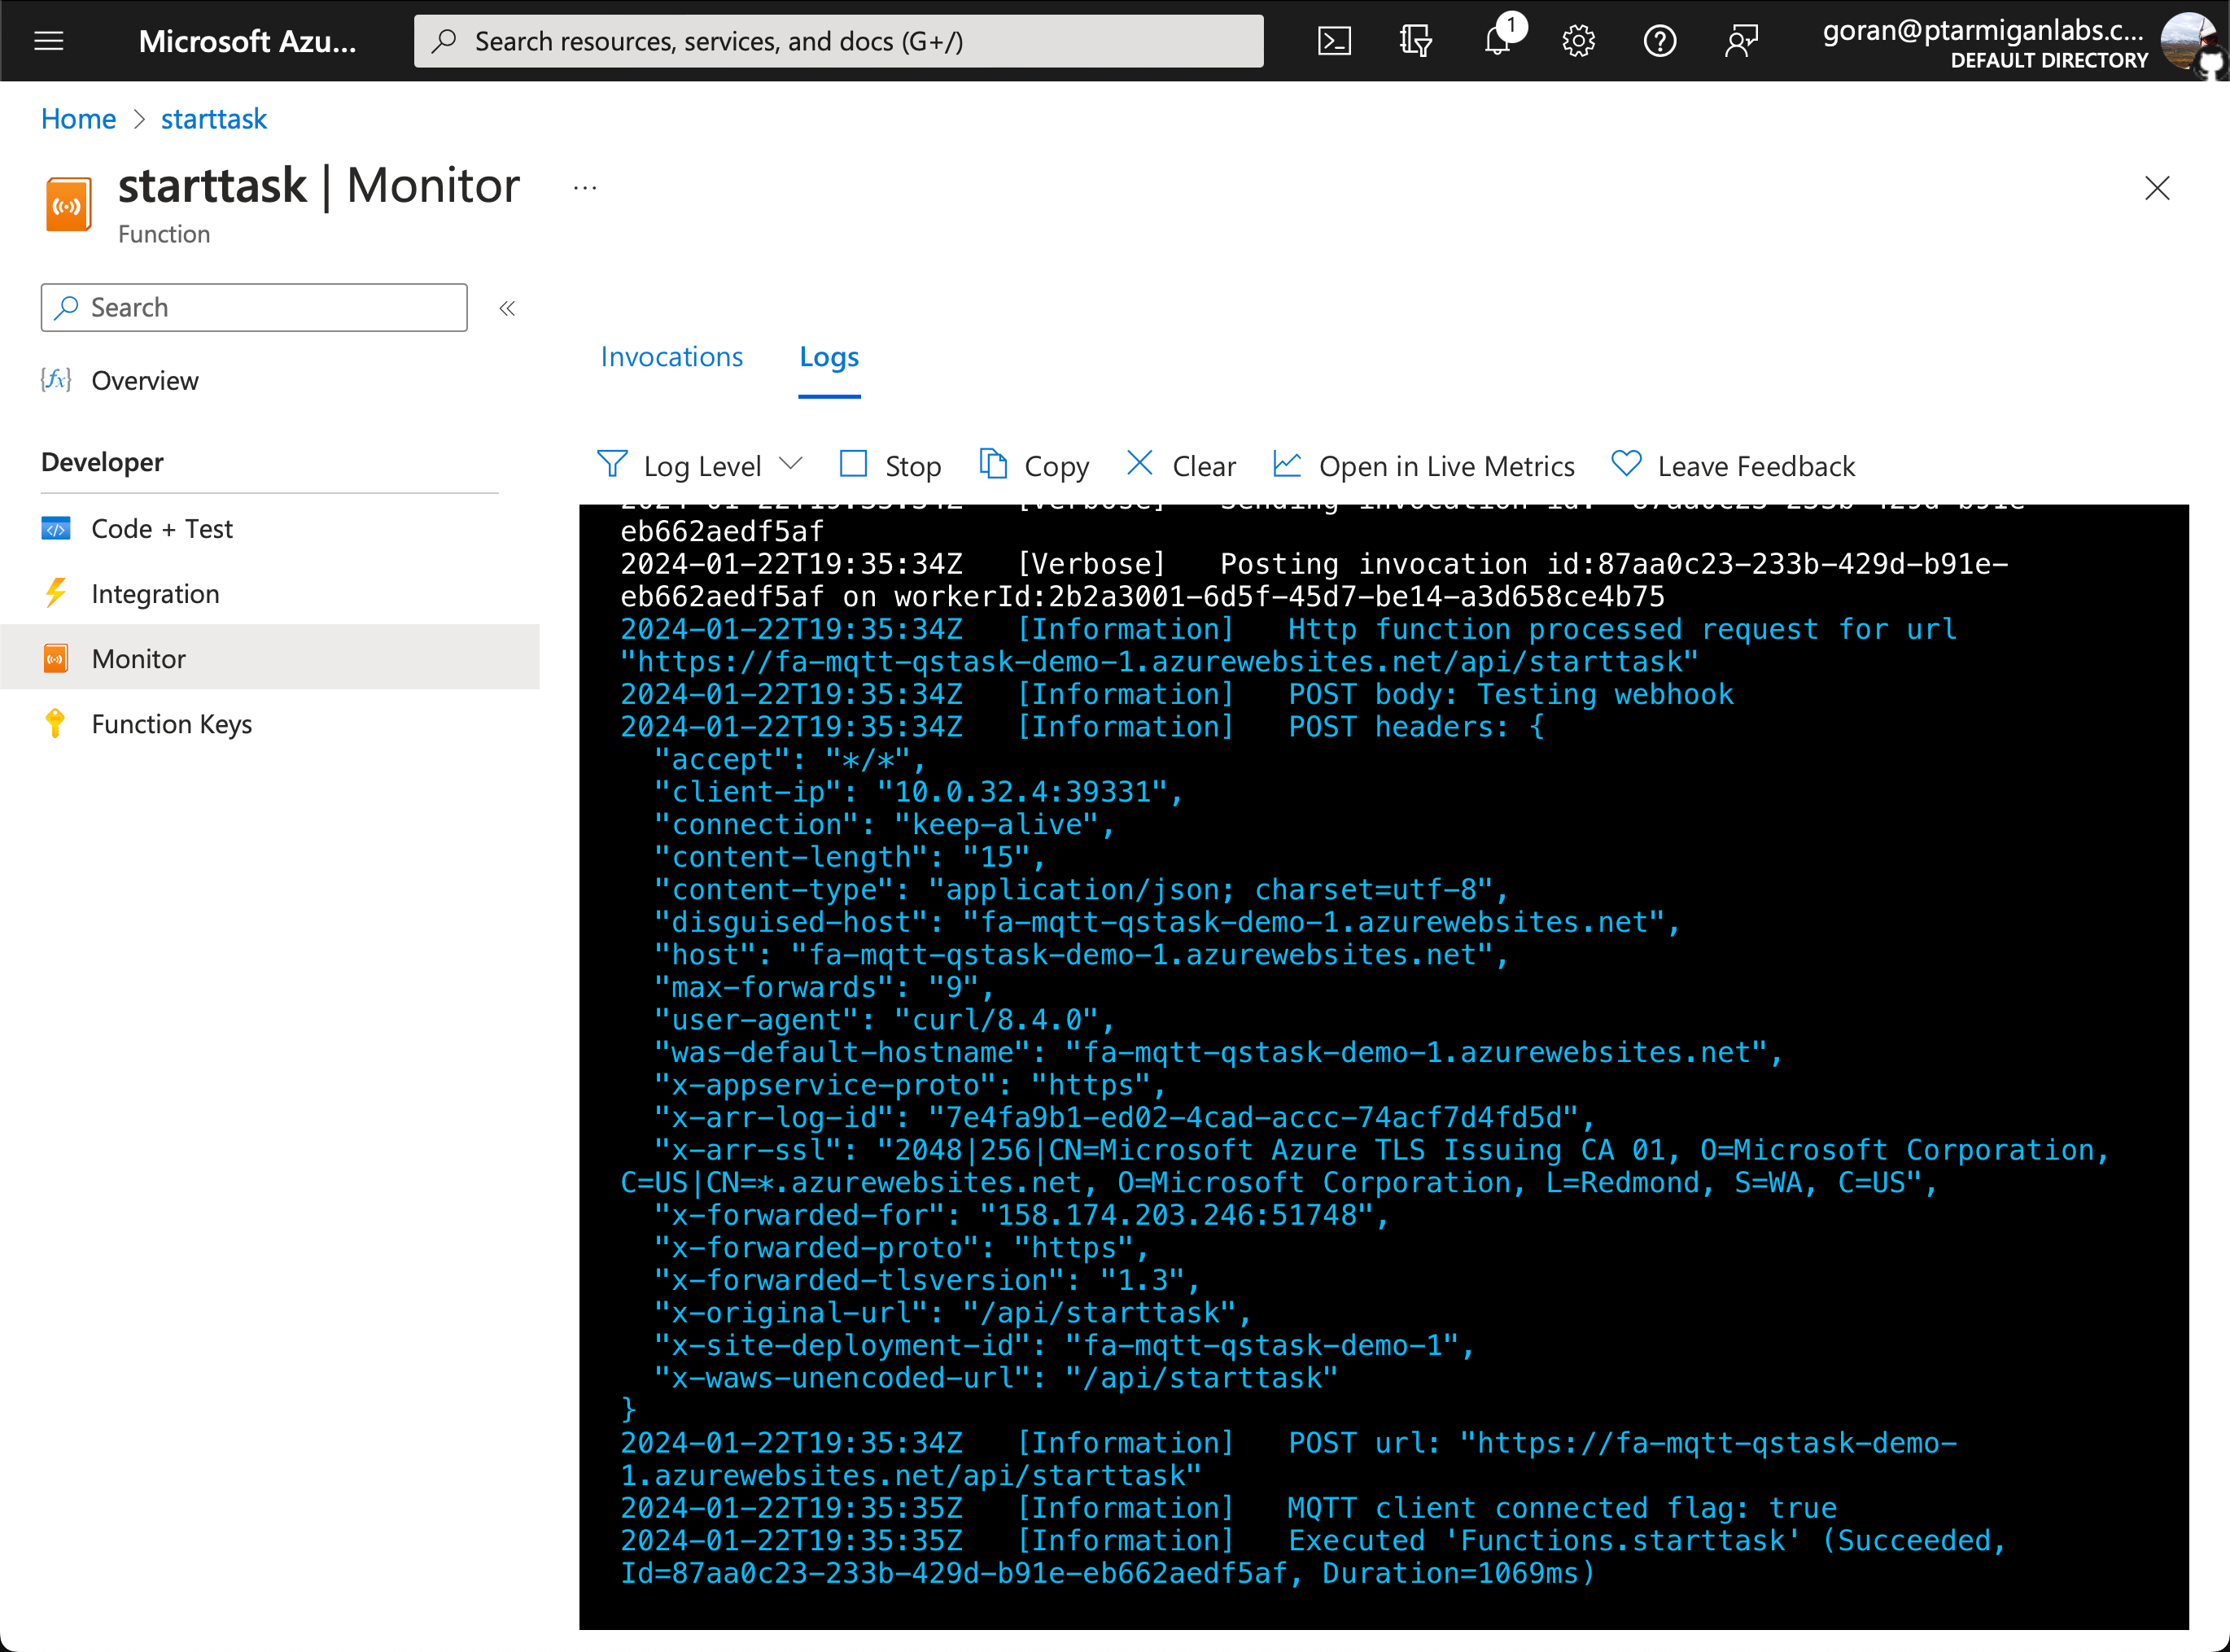
Also looking good.
Finally, let's see what showed up in the MQTT client I also had running, subscribed to the qliksense/starttask topic while connected as user2-id.
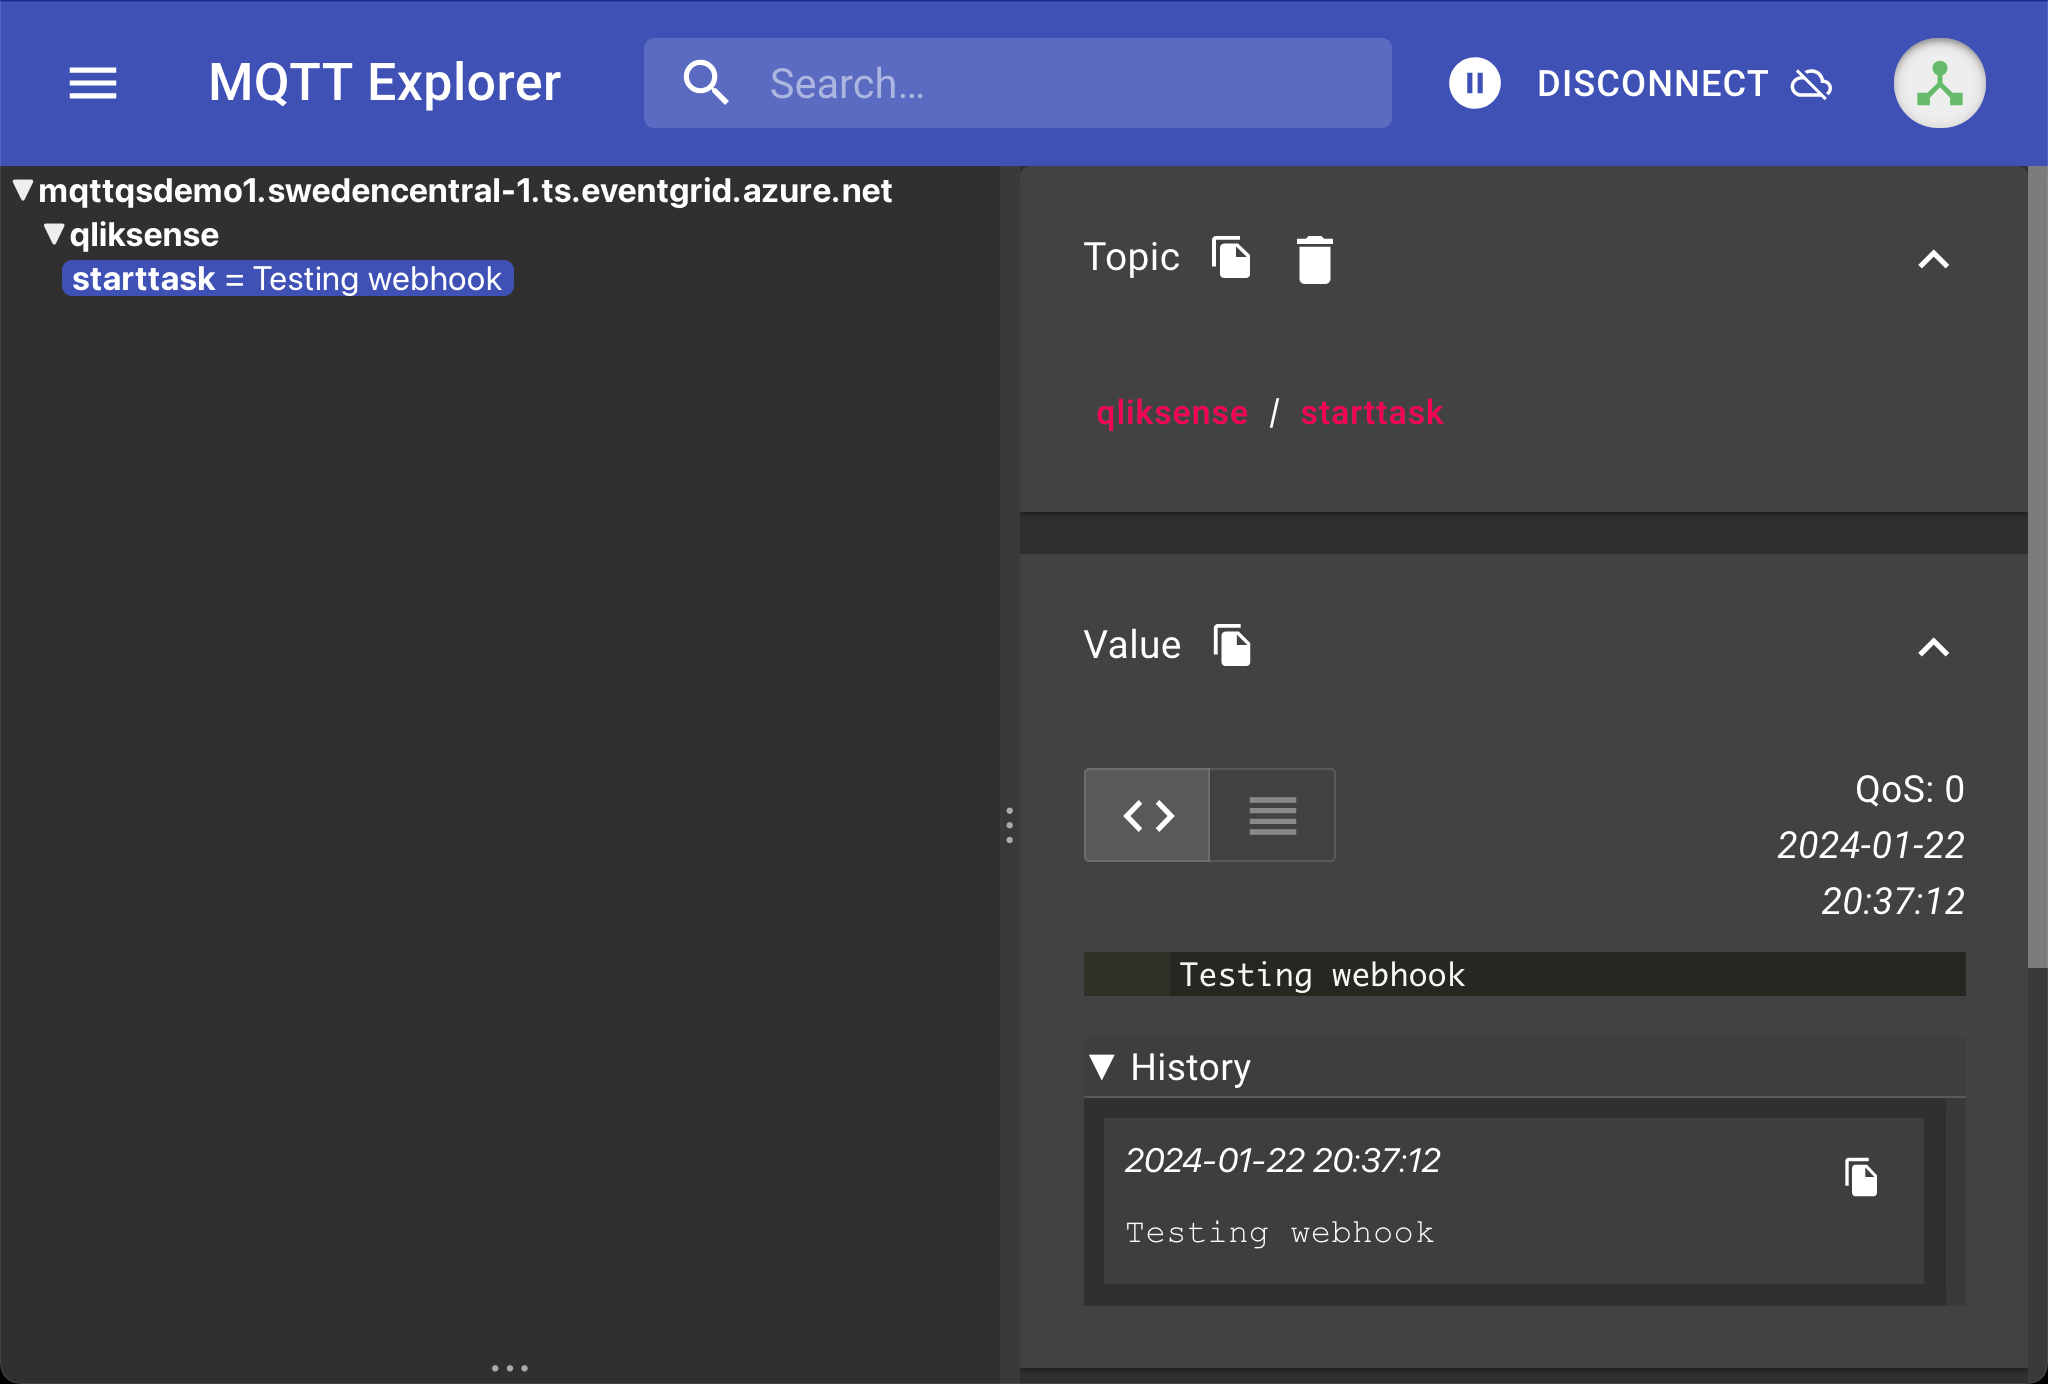
Excellent, we have now verified that the Function App can forward the contents of a http POST call to a specific MQTT topic.
This is exactly what Butler expects in order to start Qlik Sense reload tasks.
Setting up Butler
Steps to cover
- Configure Butler to subscribe to the correct MQTT topic and start reload tasks based on the task IDs received on that topic.
- Create Docker compose stack that will start Butler.
- Verify that Butler is running and reacts to the correct MQTT messages.
References
- This GitHub repository has a sample Docker
compose.yamlfile that will bring up Butler. There is also a sample Butler config file there.
Make sure to check out the README file in that repo! - Butler documentation site at https://butler.ptarmiganlabs.com.
- Butler docs around starting reload tasks by sending MQTT messages.
Starting Butler in a Docker container
Butler can be run as a standalone app, as a Windows service, as a Node.js application, in Docker or in Kubernetes.
Using Docker is a good idea, it's then easy to create dependencies on other micro services that should run alongside Butler (for example InfluxDB and Grafana).
In this case we'll just use Butler, a docker compose file to start Butler is found in the GitHub repository linked in the reference section above.
There you also find a working config file for Butler (working, except that you have to add the IP/host name for your own Sense server, where certificates are stored etc).
Let's start Butler by running docker compose up in the directory where the compose.yaml file is stored:
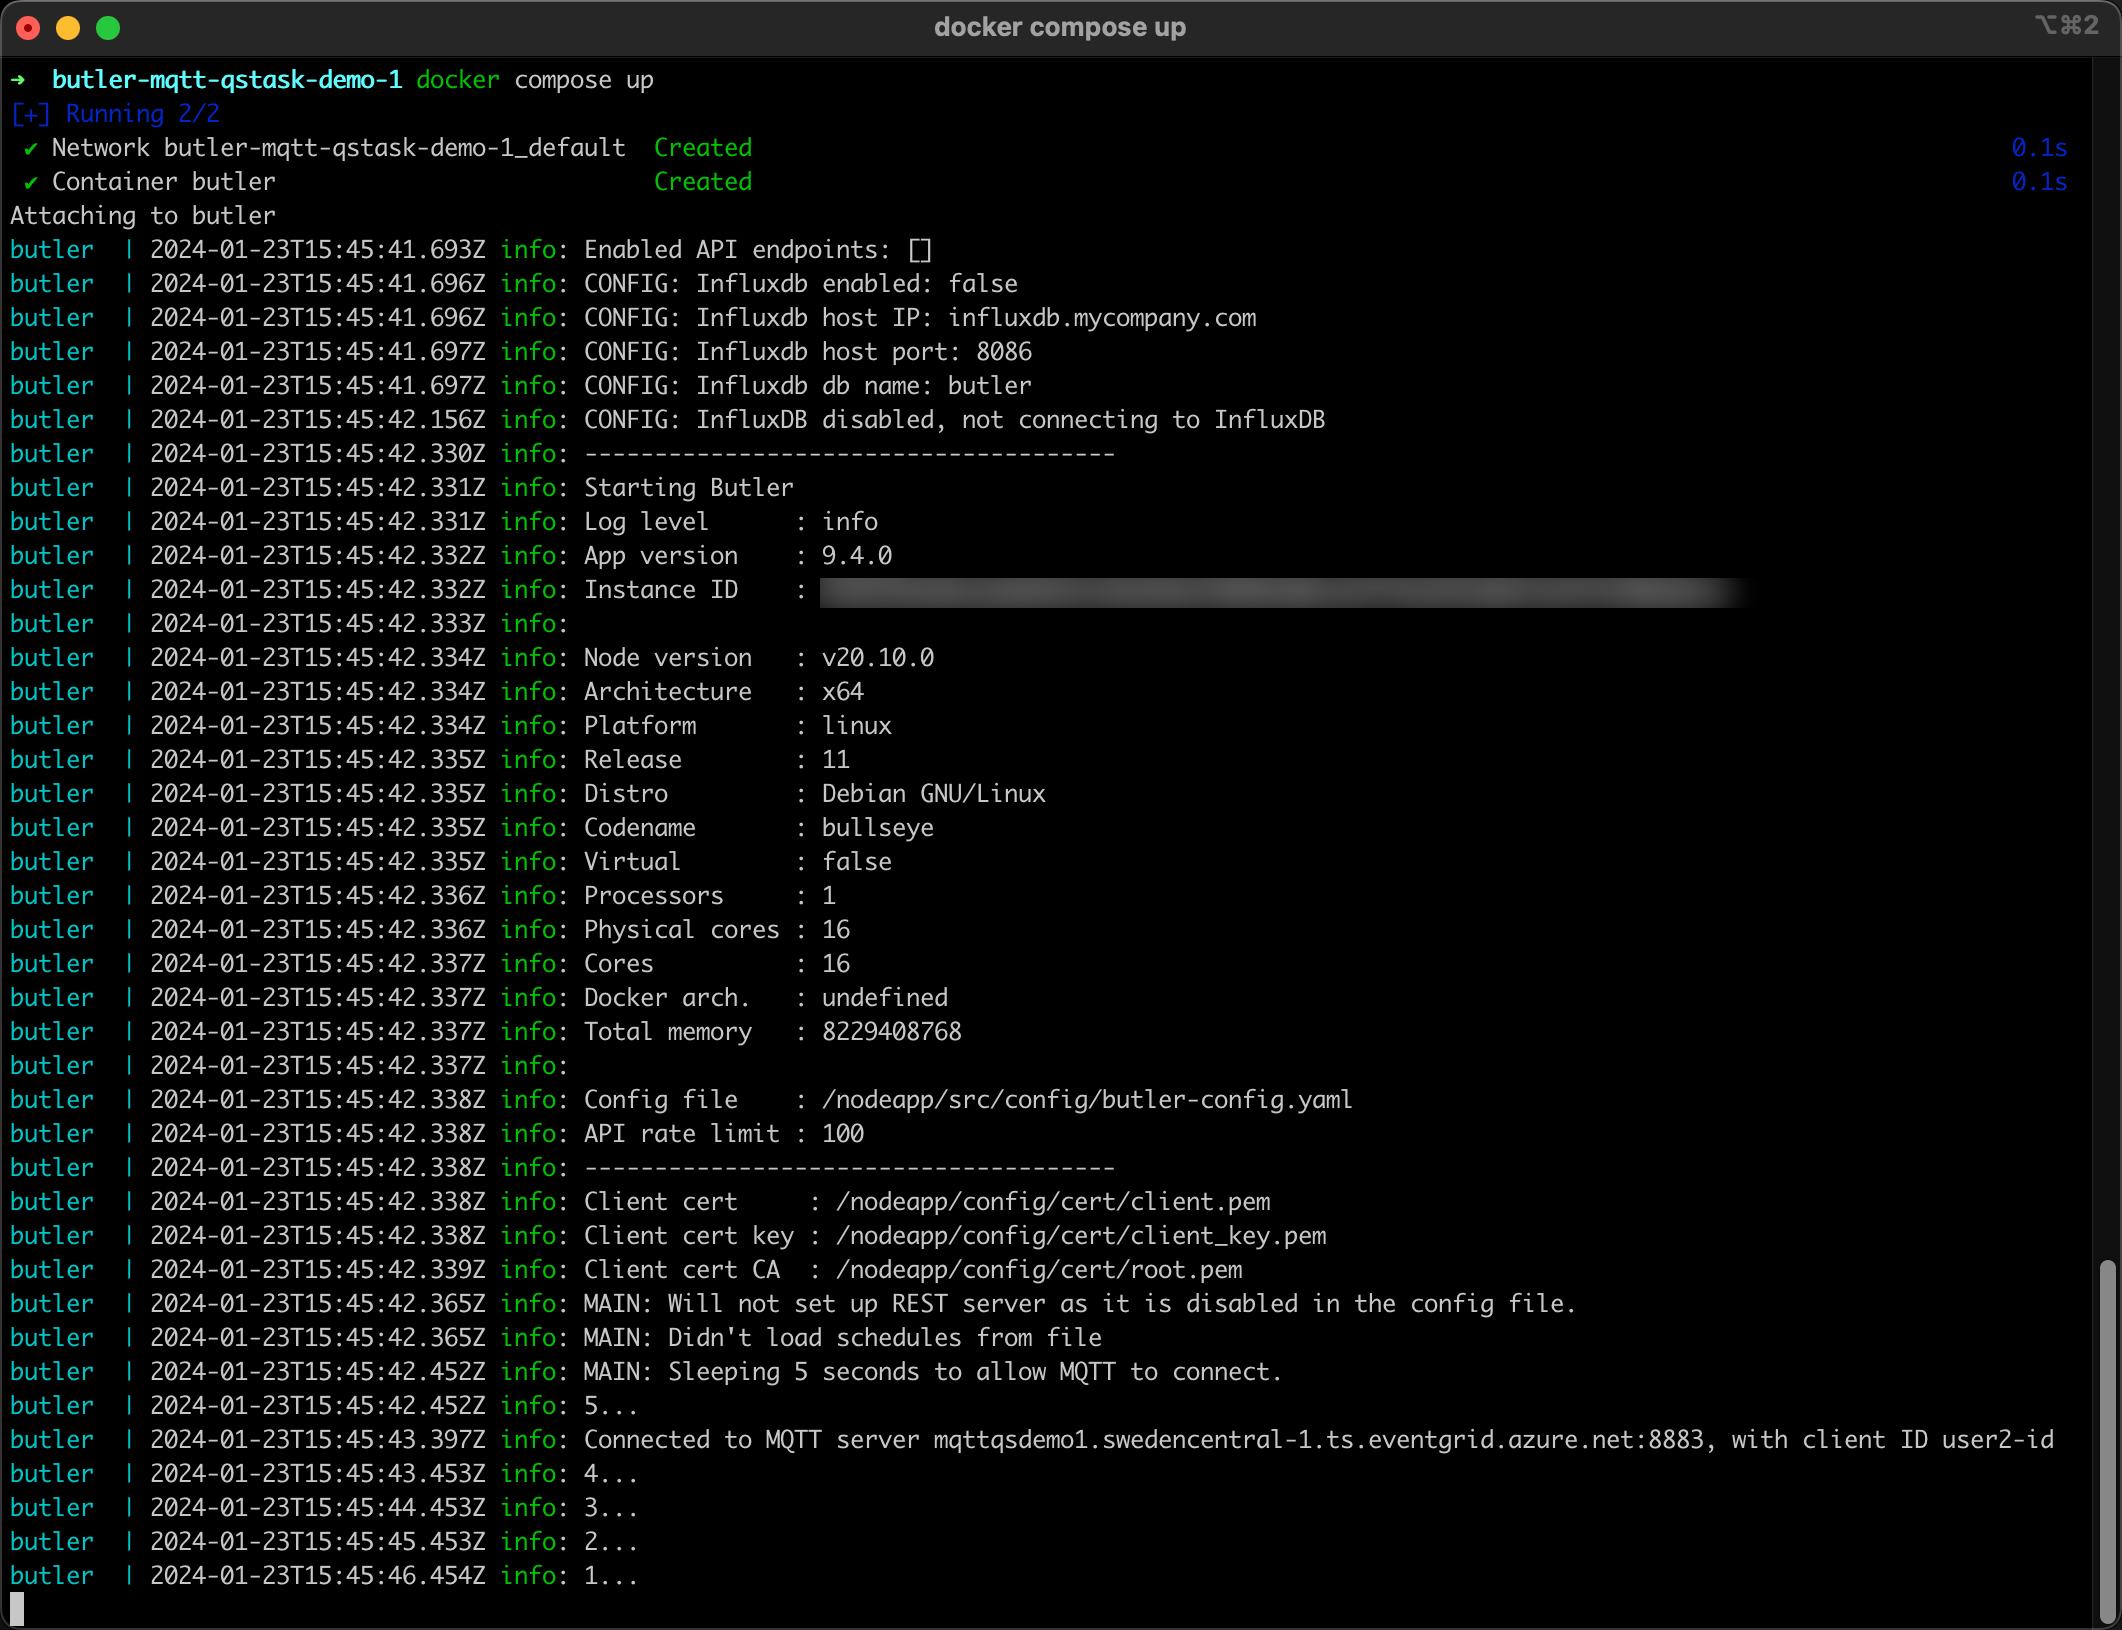
Good, Butler is now running and also connected to the MQTT broker.
Time for a final, full scale test.
Seeing is believing - full demo
Start Qlik Sense reload tasks by calling Internet webhook.