
Running Butler tools as Windows services
Several of the Butler family of open source tools for Qlik Sense Enterprise are intended to run 24/7. This article looks at how to achieve enterprise grade deployment of Butler & friends using standard Windows services.


The Butler family of tools are cross platform and run on Windows, macOS, Linux and (in most cases) as containers in Docker or Kubernetes.
Given that they all deal with client-managed Qlik Sense Enterprise in some way, most people will use them on Windows computers/servers.
While some of the tools (Ctrl-Q, Butler Sheet Icons and qs-jwt) are intended to be used on-demand, several other tools (Butler, Butler SOS, Butler CW) will be running 24/7. The best way to do this on Windows is to use regular Windows services - these are part of the operating system and come with restart-on-failure, auto-start on boot and a built-in app that let you manage them.
The tricky part is that the Butler tools are not Windows services - they are stand-alone apps that happen to run well on Windows.
Enter NSSM.
Run any Windows app as a service
NSSM has been around for a long time but it's a solid tool that does what it promises: Install any Windows app as a service.
It can be used in interactive UI mode or via the command line - we'll look at both options below, using the original Butler tool as an example.
Adapt as needed for other tools in the Butler family.
Let's get a few things in place first.
Download NSSM
The latest stable version from the download page works well on all Windows versions I've tested (2016, 2019, 2022, Windows 10). The downloaded ZIP file has a bunch of subdirectories in it, but let's extract it into a c:\tools\nssm directory.
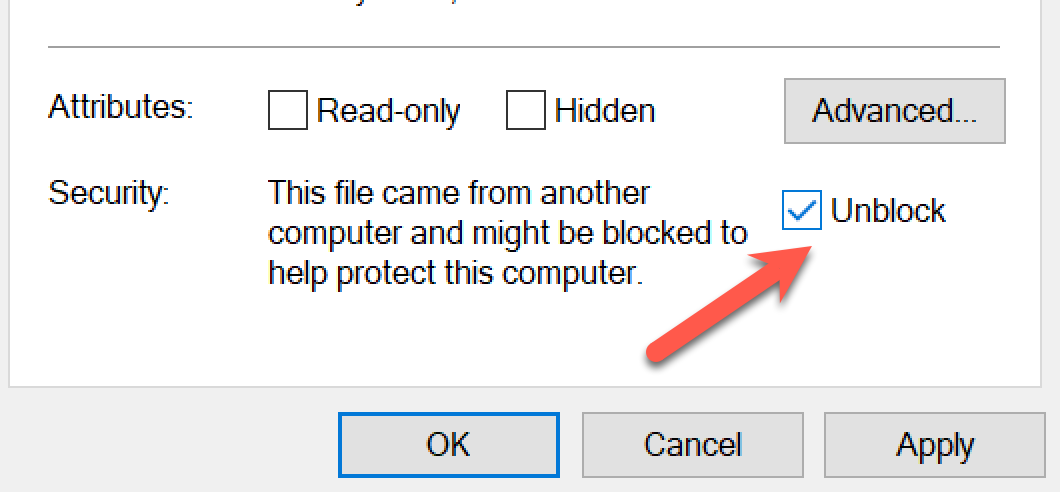
After downloading the ZIP you probably have to unblock it before unzipping it:
Then unzip the ZIP file using your preferred tool.
Or right click the file in File Explorer > Extract All... > Extract to "c:\tools".
Should look like this once done:
PS C:\tools\nssm-2.24> tree /f
Folder PATH listing
Volume serial number is EC08-C763
C:.
│   ChangeLog.txt
│   README.txt
│
├───src
│       account.cpp
│       account.h
│       console.cpp
│       console.h
│       env.cpp
│       env.h
│       event.cpp
│       event.h
│       gui.cpp
│       gui.h
│       imports.cpp
│       imports.h
│       io.cpp
│       io.h
│       messages.mc
│       nssm.cpp
│       nssm.h
│       nssm.ico
│       nssm.rc
│       nssm.sln
│       nssm.vcproj
│       process.cpp
│       process.h
│       registry.cpp
│       registry.h
│       resource.h
│       service.cpp
│       service.h
│       settings.cpp
│       settings.h
│       version.cmd
│
├───win32
│       nssm.exe
│
└───win64
        nssm.exe
Lots of files in there, including all source code.
The only file we actually need is the nssm.exe file in the win64 directory. Feel free to delete everything else if you want to keep your disk clean.
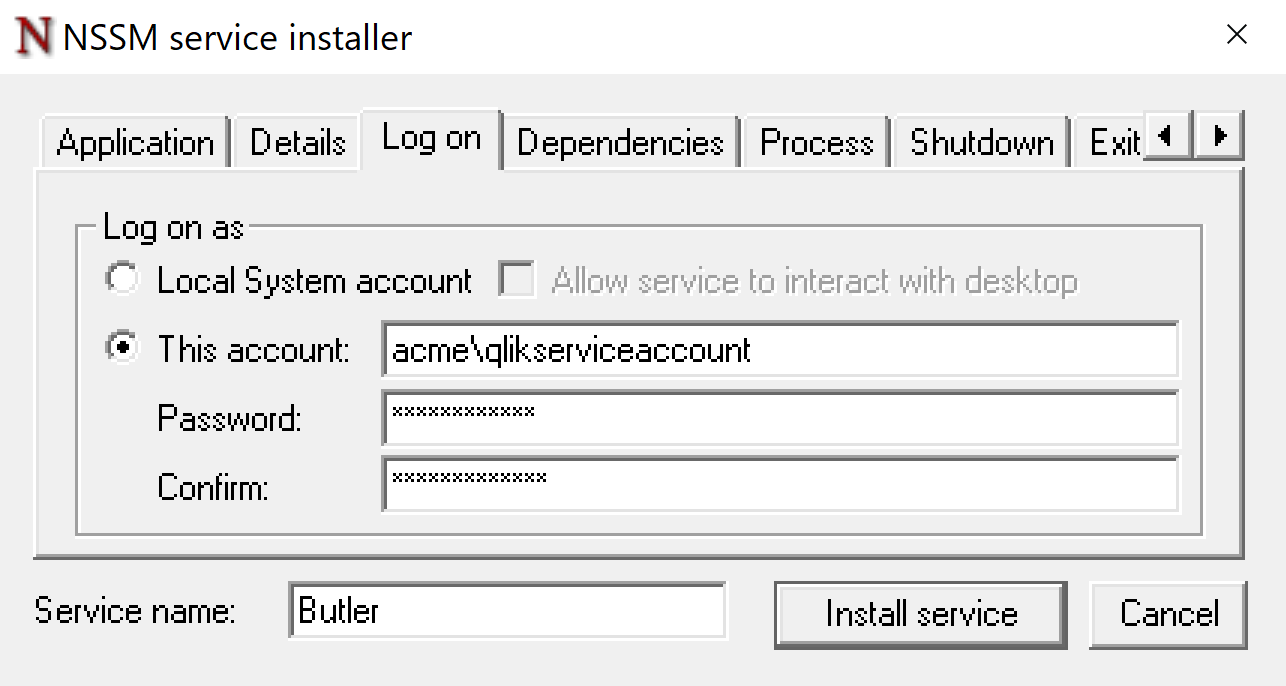
2. It is not possible (?) to set a service's Log on setting (i.e. which account the service will run as) via NSSM command line. This has to be done using NSSM's UI config option.
NSSM doesn't have an installer so we're now done here.
Download & configure Butler
Get the latest Butler version from the download page, unblock the ZIP as described above.
Given that Butler is a rather flexible and versatile tool its config file contains quite a few settings. Please refer to the Butler site for getting-started instructions.
In the example below we'll be using a bare-bones config file where most Butler features are disabled.
The same applies if you are using some other tool - check out the tool's documentation site/page for instructions on how to set up the tool in question.
Let's assume you place the Butler executable in "c:\tools\butler\butler.exe" and the Butler config file is called "c:\tools\butler\butler-config.yaml".
Should look like this:
PS C:\tools\butler> tree /f
Folder PATH listing
Volume serial number is EC08-C763
C:.
    butler-config.yaml
    butler.exe

No subfolders exist
It's a good idea to start Butler from a PowerShell or cmd window before installing it as a service. Make sure to use the same account that will be used when running Butler as a Windows service.
If Butler won't run when started manually from the command line it won't run as a service either.
PS C:\tools\butler> .\butler.exe -c .\butler-config.yaml
2023-05-01T19:14:09.810Z info: Enabled API endpoints: [
  "butlerping"
]
2023-05-01T19:14:09.810Z info: CONFIG: Influxdb enabled: true
2023-05-01T19:14:09.826Z info: CONFIG: Influxdb host IP: 10.11.12.13
2023-05-01T19:14:09.826Z info: CONFIG: Influxdb host port: 8086
2023-05-01T19:14:09.826Z info: CONFIG: Influxdb db name: butler
2023-05-01T19:14:10.685Z info: CONFIG: Found InfluxDB database: butler
2023-05-01T19:14:15.393Z info: --------------------------------
2023-05-01T19:14:15.393Z info: Iteration # 1, Uptime: 5 seconds, Heap used 37.71 MB of total heap 72.53 MB. External (off-heap): 12.8 MB. Memory allocated to process: 97.18 MB.
2023-05-01T19:14:18.284Z info: --------------------------------------
2023-05-01T19:14:18.284Z info: Starting Butler
2023-05-01T19:14:18.299Z info: Log level      : info
2023-05-01T19:14:18.299Z info: App version    : 8.6.2
2023-05-01T19:14:18.299Z info: Instance ID    : c473b6c518f8f041f28523919013c9ee5f3771670f588d92032daba6fd5e7cb2
2023-05-01T19:14:18.299Z info:
2023-05-01T19:14:18.299Z info: Node version   : v16.16.0
2023-05-01T19:14:18.299Z info: Architecture   : x64
2023-05-01T19:14:18.299Z info: Platform       : Windows
2023-05-01T19:14:18.299Z info: Release        : 10.0.19045
2023-05-01T19:14:18.299Z info: Distro         : Microsoft Windows 10 Pro
2023-05-01T19:14:18.299Z info: Codename       :
2023-05-01T19:14:18.299Z info: Virtual        : false
2023-05-01T19:14:18.299Z info: Processors     : 1
2023-05-01T19:14:18.299Z info: Physical cores : 2
2023-05-01T19:14:18.299Z info: Cores          : 2
2023-05-01T19:14:18.299Z info: Docker arch.   : undefined
2023-05-01T19:14:18.299Z info: Total memory   : 6418677760
2023-05-01T19:14:18.299Z info: --------------------------------------
2023-05-01T19:14:18.299Z info: Client cert     : C:\path\to\client.pem
2023-05-01T19:14:18.314Z info: Client cert key : C:\path\to\client_key.pem
2023-05-01T19:14:18.314Z info: Client cert CA  : C:\path\to\root.pem
2023-05-01T19:14:18.330Z info: REST API documentation available at http://0.0.0.0:8081/documentation
2023-05-01T19:14:18.330Z info: --> Note re API docs: If the line above mentions 0.0.0.0, this is the same as ANY server IP address.
2023-05-01T19:14:18.330Z info: --> Replace 0.0.0.0 with one of the Butler host's IP addresses to view the API docs page.
2023-05-01T19:14:18.503Z info: MAIN: Didn't load schedules from file
2023-05-01T19:14:18.519Z info: CONFIG: MQTT disabled, not connecting to MQTT broker
2023-05-01T19:14:18.519Z info: TASKFAILURE: UDP server listening on 0.0.0.0:9998
2023-05-01T19:14:18.534Z info: MAIN: REST server listening on http://0.0.0.0:8081
2023-05-01T19:14:30.475Z info: --------------------------------
2023-05-01T19:14:30.476Z info: Iteration # 2, Uptime: 20 seconds, Heap used 52.35 MB of total heap 75.03 MB. External (off-heap): 14.27 MB. Memory allocated to process: 106.49 MB.
2023-05-01T19:14:45.501Z info: --------------------------------
2023-05-01T19:14:45.503Z info: Iteration # 3, Uptime: 35 seconds, Heap used 38.71 MB of total heap 46.53 MB. External (off-heap): 1.35 MB. Memory allocated to process: 74.7 MB.
Looks like Butler has started and reported (so far) three uptime messages, each 15 seconds apart.
This means Butler has a working configuration file and runs on this computer - and can be installed as a service.
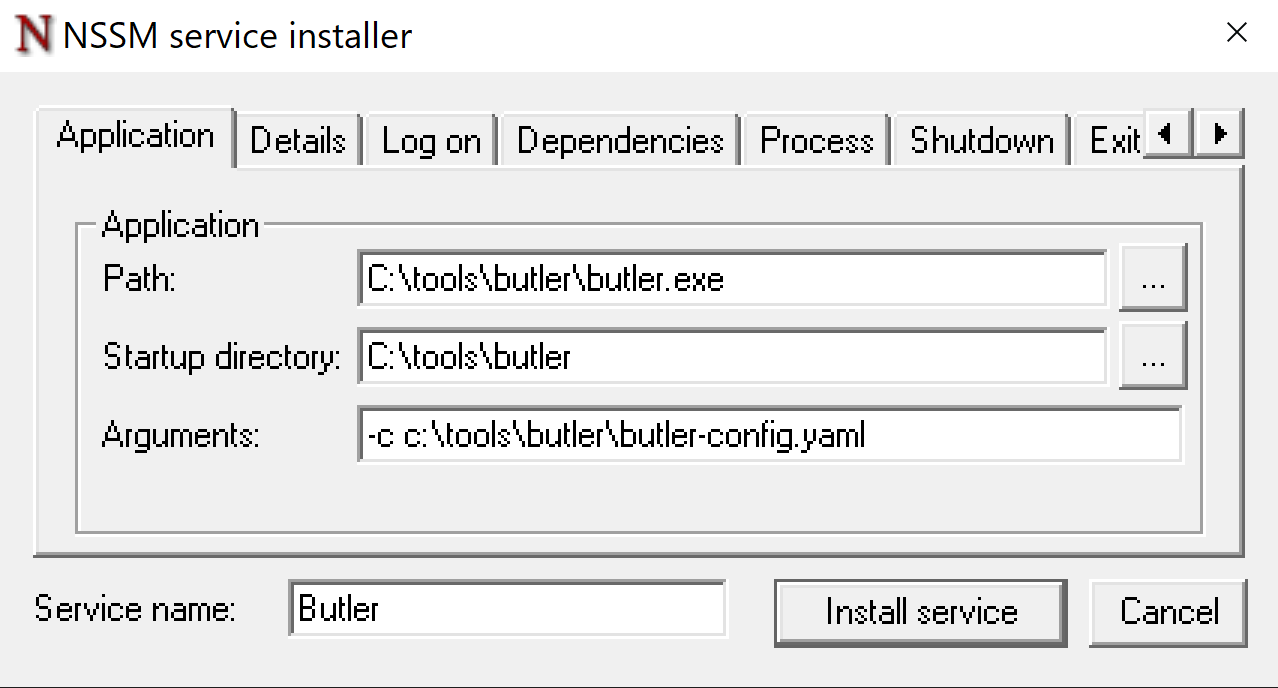
Create a Butler service using the NSSM interactive UI
First start a PowerShell or cmd window with admin permissions.
Then run
C:\tools\nssm-2.24\win64\nssm.exe install "Butler"
A few comments:
- It is recommended to use a service name without too fancy characters. Underscore and hyphen are both ok.
You will later get a chance to give the service a "display name" that can be fancier. - The quotes around the service name are optional, but a good idea as they allow you to use service names that contain dashes, spaces etc. For example "Butler-SOS" if (when?!) you are installing Butler SOS.
- Once you have created a service its name cannot be changed. The only option is then to delete the service and create it again with another name.
The service's "display name" can be changed though (this is the name that shows in the list of installed services).
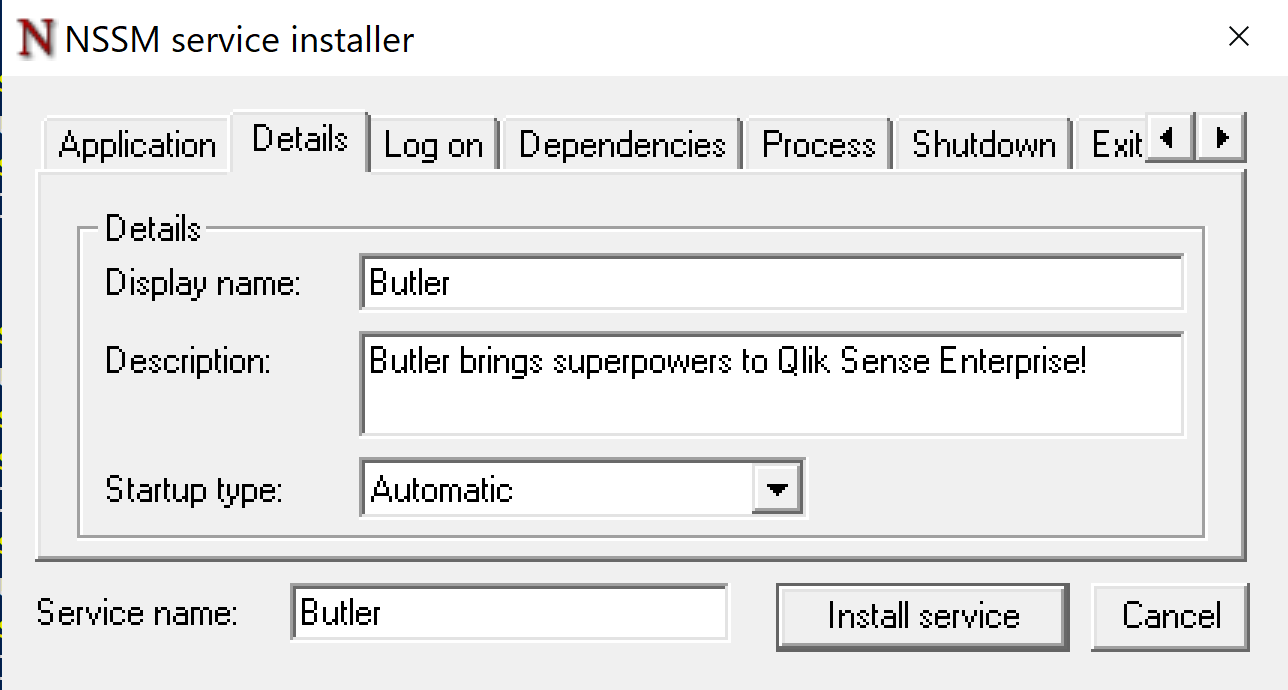

2. NSSM lets you configure lots of other options for the service, for the purpose of running Butler as a service the above should be enough though.

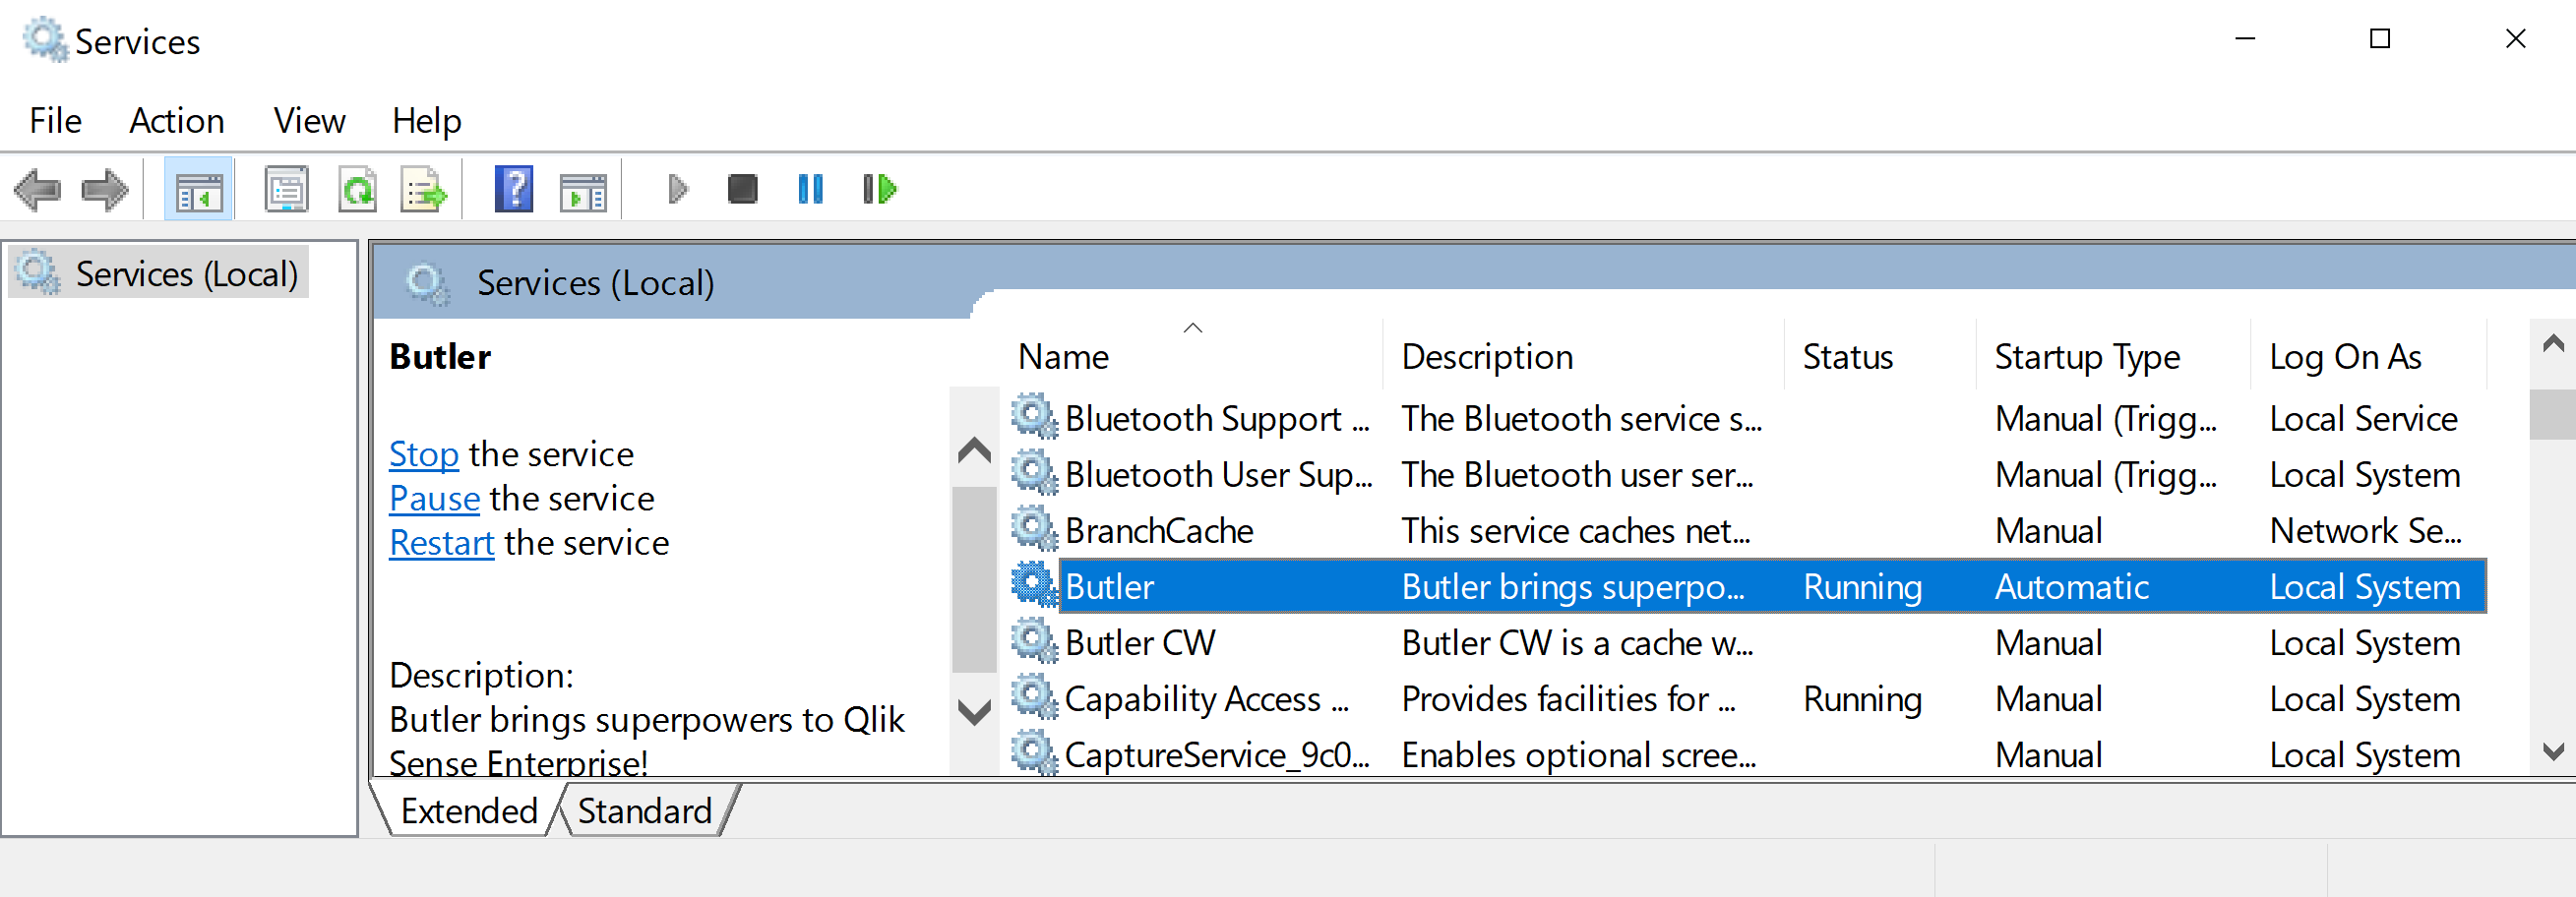
At this point the Butler service has been created, but is still stopped:

Right click the Butler service > Start. Give it a couple of seconds and Butler should then be running as a service. Check the log files in the c:\tools\butler\log directory (or whatever log directory was configured in the YAML config file) to verify that Butler is indeed running.
Editing and deleting a NSSM service by NSSM
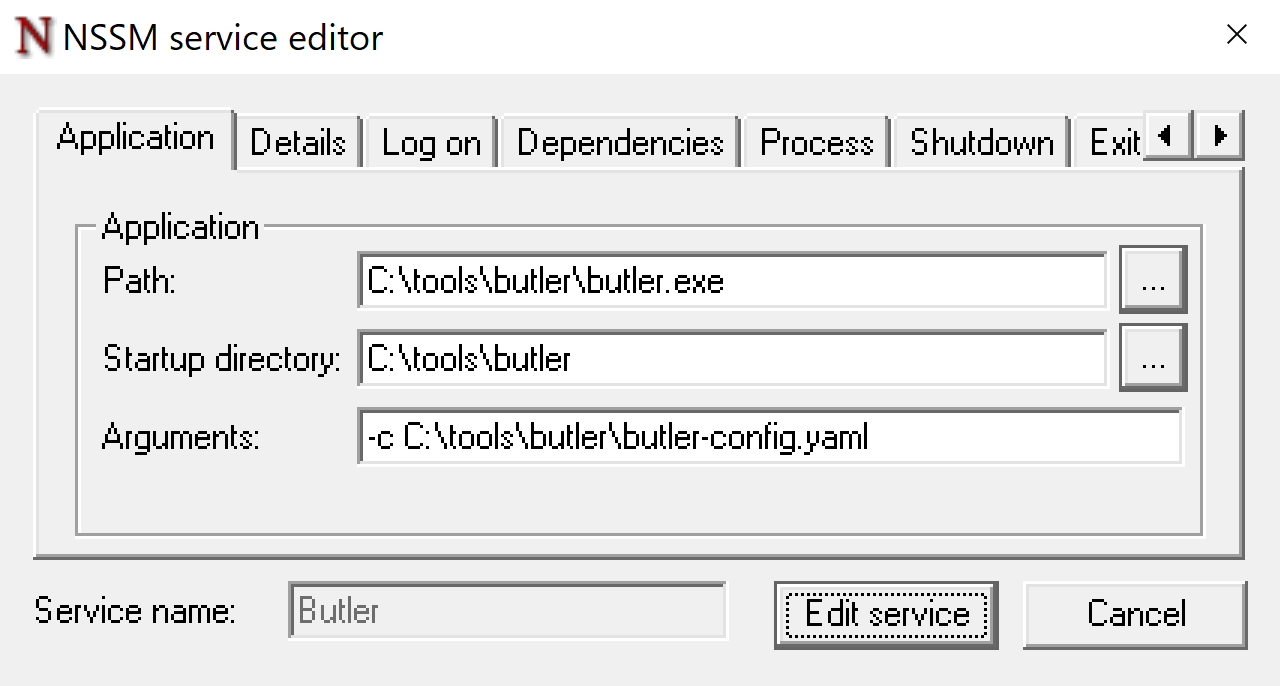
NSSM makes this easy. Click the "Edit service" button once changes are done.
C:\tools\nssm-2.24\win64\nssm.exe edit "Butler"
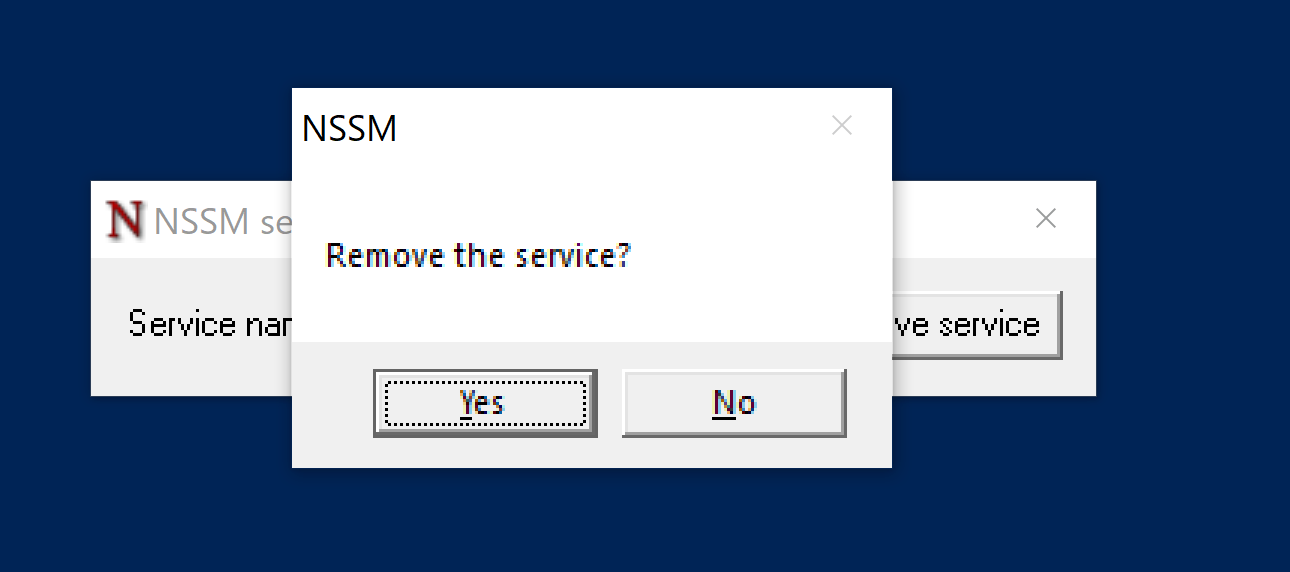
Deleting a service:
C:\tools\nssm-2.24\win64\nssm.exe remove "Butler"
Create a Butler service using NSSM command line interface
In some cases it is easier to use NSSM's command line interface rather than the graphical UI described above.
An example can be if you need to install Butler (and/or other tools) on many servers and want to use PowerShell scripts to automate the whole process.
Creating the same service as above can be done using these commands:
c:\tools\nssm-2.24\win64\nssm.exe install "Butler" c:\tools\butler\butler.exe
c:\tools\nssm-2.24\win64\nssm.exe set Butler Description "Butler brings superpowers to Qlik Sense Enterprise!"
c:\tools\nssm-2.24\win64\nssm.exe set Butler DisplayName "Butler"
c:\tools\nssm-2.24\win64\nssm.exe set Butler Start SERVICE_AUTO_START
c:\tools\nssm-2.24\win64\nssm.exe set Butler AppParameters "-c c:\tools\butler\butler-config.yaml"
Butler can now be started just as in the previous example.
Butler SOS
Butler SOS can be installed as a service using the exact same concept as Butler, with one small addition needed.
An environment variable has to be set before Butler SOS is started:
ALLOW_CONFIG_MUTATIONS=1This can be done using the NSSM UI or via command line:
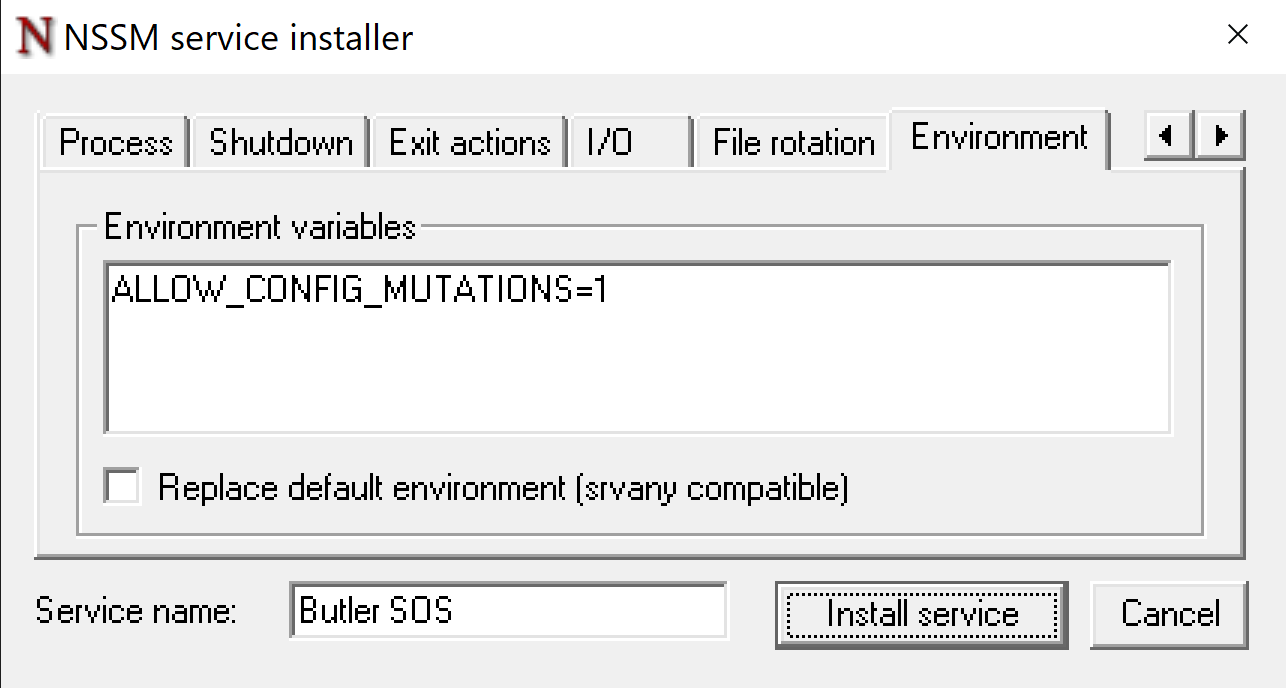
c:\tools\nssm-2.24\win64\nssm.exe set "Butler SOS" AppEnvironmentExtra "ALLOW_CONFIG_MUTATIONS=1"Boring disclaimer
NSSM is an open source tool and as such you must yourself decide if it's the right tool for you. Your employer may have policies against (or for!) open source software, you may have to run it through some security scanner etc.
The point is that you should always - both when software is open and closed source - consider the options and decide yourself whether some specific software is right for you.
All that said, NSSM and the Butler family of tools have many times over proven to be a stable and functional combo. People out there have good experiences, so the odds are that you will too.
Feel free to share with them!
Signing up to the newsletter is super quick - and free.