
The beauty of Docker - how to run all Butler tools with a single command

Docker is great.
Docker is one of those tools that have the potential to fundamentally transform how you develop and run software – once you have tried Docker it is hard to imagine going back to something else.
In previous posts we have seen how Butler, Butler SOS and Butler CW can be run as Docker containers.
But we can do even better – why not control all the Butler tools from a single docker-compose file? Maybe even specifying the dependencies on influxdb and mqtt in there too?
Setting this up is incredibly easy – a single docker-compose file tells Docker what containers to use, and some config files tells the Butler tools where to find things.
Let’s get started!
Setting things up
Docker containers can be started and managed in different ways. We will use the docker-compose command to create and start the containers, as it uses an use easy to understand YAML syntax to define what containers to create, and what parameters to send to them.
The scaffolding
First, let’s create some directories where we can store configuration files for the different Butler tools.
If you just want to try this out, these directories can be on your local computer.
If doing this in a real Qlik Sense environment, you should of course place these directories on a suitable server. The interesting thing is that you have a lot of freedom here: if you have an existing Docker infrastructure the Butler tools can happily run there.
In the examples below I have used my regular 3-year old Apple laptop that sits on the same network as the Qlik Sense server.
Directories
Let’s create some directories first:
proton:code goran$ mkdir butler-docker
proton:code goran$ cd butler-docker/
proton:butler-docker goran$ mkdir certificate config_butler config_butler-cw config_butler-sos log_butler-cw
proton:butler-docker goran$ tree
.
├── certificate
├── config_butler
├── config_butler-cw
├── config_butler-sos
└── log_butler-cw

5 directories, 0 files
proton:butler-docker goran$
Next, copy the config files from each Butler tool into their respective directories above. Also place the certificates exported from the QMC in the certificate directory.
Now we have something like this:
proton:butler-docker goran$ tree
.
├── certificate
│   ├── client.pem
│   ├── client_key.pem
│   └── root.pem
├── config_butler
│   └── production.yaml
├── config_butler-cw
│   ├── apps.yaml
│   └── production.yaml
├── config_butler-sos
│   └── production.yaml
└── log_butler-cw

5 directories, 7 files
proton:butler-docker goran$
Config files
The YAML config files above are the same ones that were used in the various standalone Butler tools (see previous posts [1], [2], [3]). This is the beauty of Docker – the container contains everything that the software inside needs, and the configuration is the same no matter if used on a laptop, on a server or in the cloud.
The docker-compose file
The docker-compose.yml file is where we tell Docker what containers should be created and how to configure them.
The file should be created in the main directory (one level up from the config directories) and is basically just a combination of the docker-compose files used in previous blog posts:
proton:butler-docker goran$ cat docker-compose.yml
# docker-compose.yml
version: '2.2'
services:
  butler-sos:
    image: ptarmiganlabs/butler-sos:latest
    init: true
    container_name: butler-sos
    restart: always
    volumes:
      # Make config file accessible outside of container
      - "./config_butler-sos:/nodeapp/config"
      - "./certificate:/nodeapp/config/certificate"
    environment:
      - "NODE_ENV=production"
    logging:
      driver: json-file

  butler-cw:
    image: ptarmiganlabs/butler-cw:latest
    init: true
    container_name: butler-cw
    restart: always
    volumes:
      # Make config file accessible outside of container
      - "./config_butler-cw:/nodeapp/config"
      - "./log_butler-cw:/nodeapp/log"
      - "./certificate:/nodeapp/config/certificate"
    environment:
      - "NODE_ENV=production"
    logging:
      driver: json-file

  butler:
    image: ptarmiganlabs/butler:latest
    container_name: butler
    restart: always
    ports:
      - "8180:8080" # REST API available on port 8180 to services outside the container
      - "9997:9997" # UDP port for session connection events
      - "9998:9998" # UDP port for task failure events
    volumes:
      # Make config file accessible outside of container
      - "./config_butler:/nodeapp/config"
      - "./certificate:/nodeapp/config/certificate"
    environment:
      - "NODE_ENV=production"
    logging:
      driver: json-file
proton:butler-docker goran$
The only difference compared to the docker-compose.yml file used for running the tools stand-alone is how the certificate folder is mapped.
In the file above there is an extra volume mapping for each service, this is just so we get a single/shared certificate directory where the QMC certificates can be placed.
Start things up
Now comes the magic. A single command, and everything starts.
It’s even better than that, as Docker will also pull the latest versions of the Butler images from Docker Hub. No need to manually download anything.
Docker then creates containers based on these images and finally start the containers.
The whole thing looks like this:
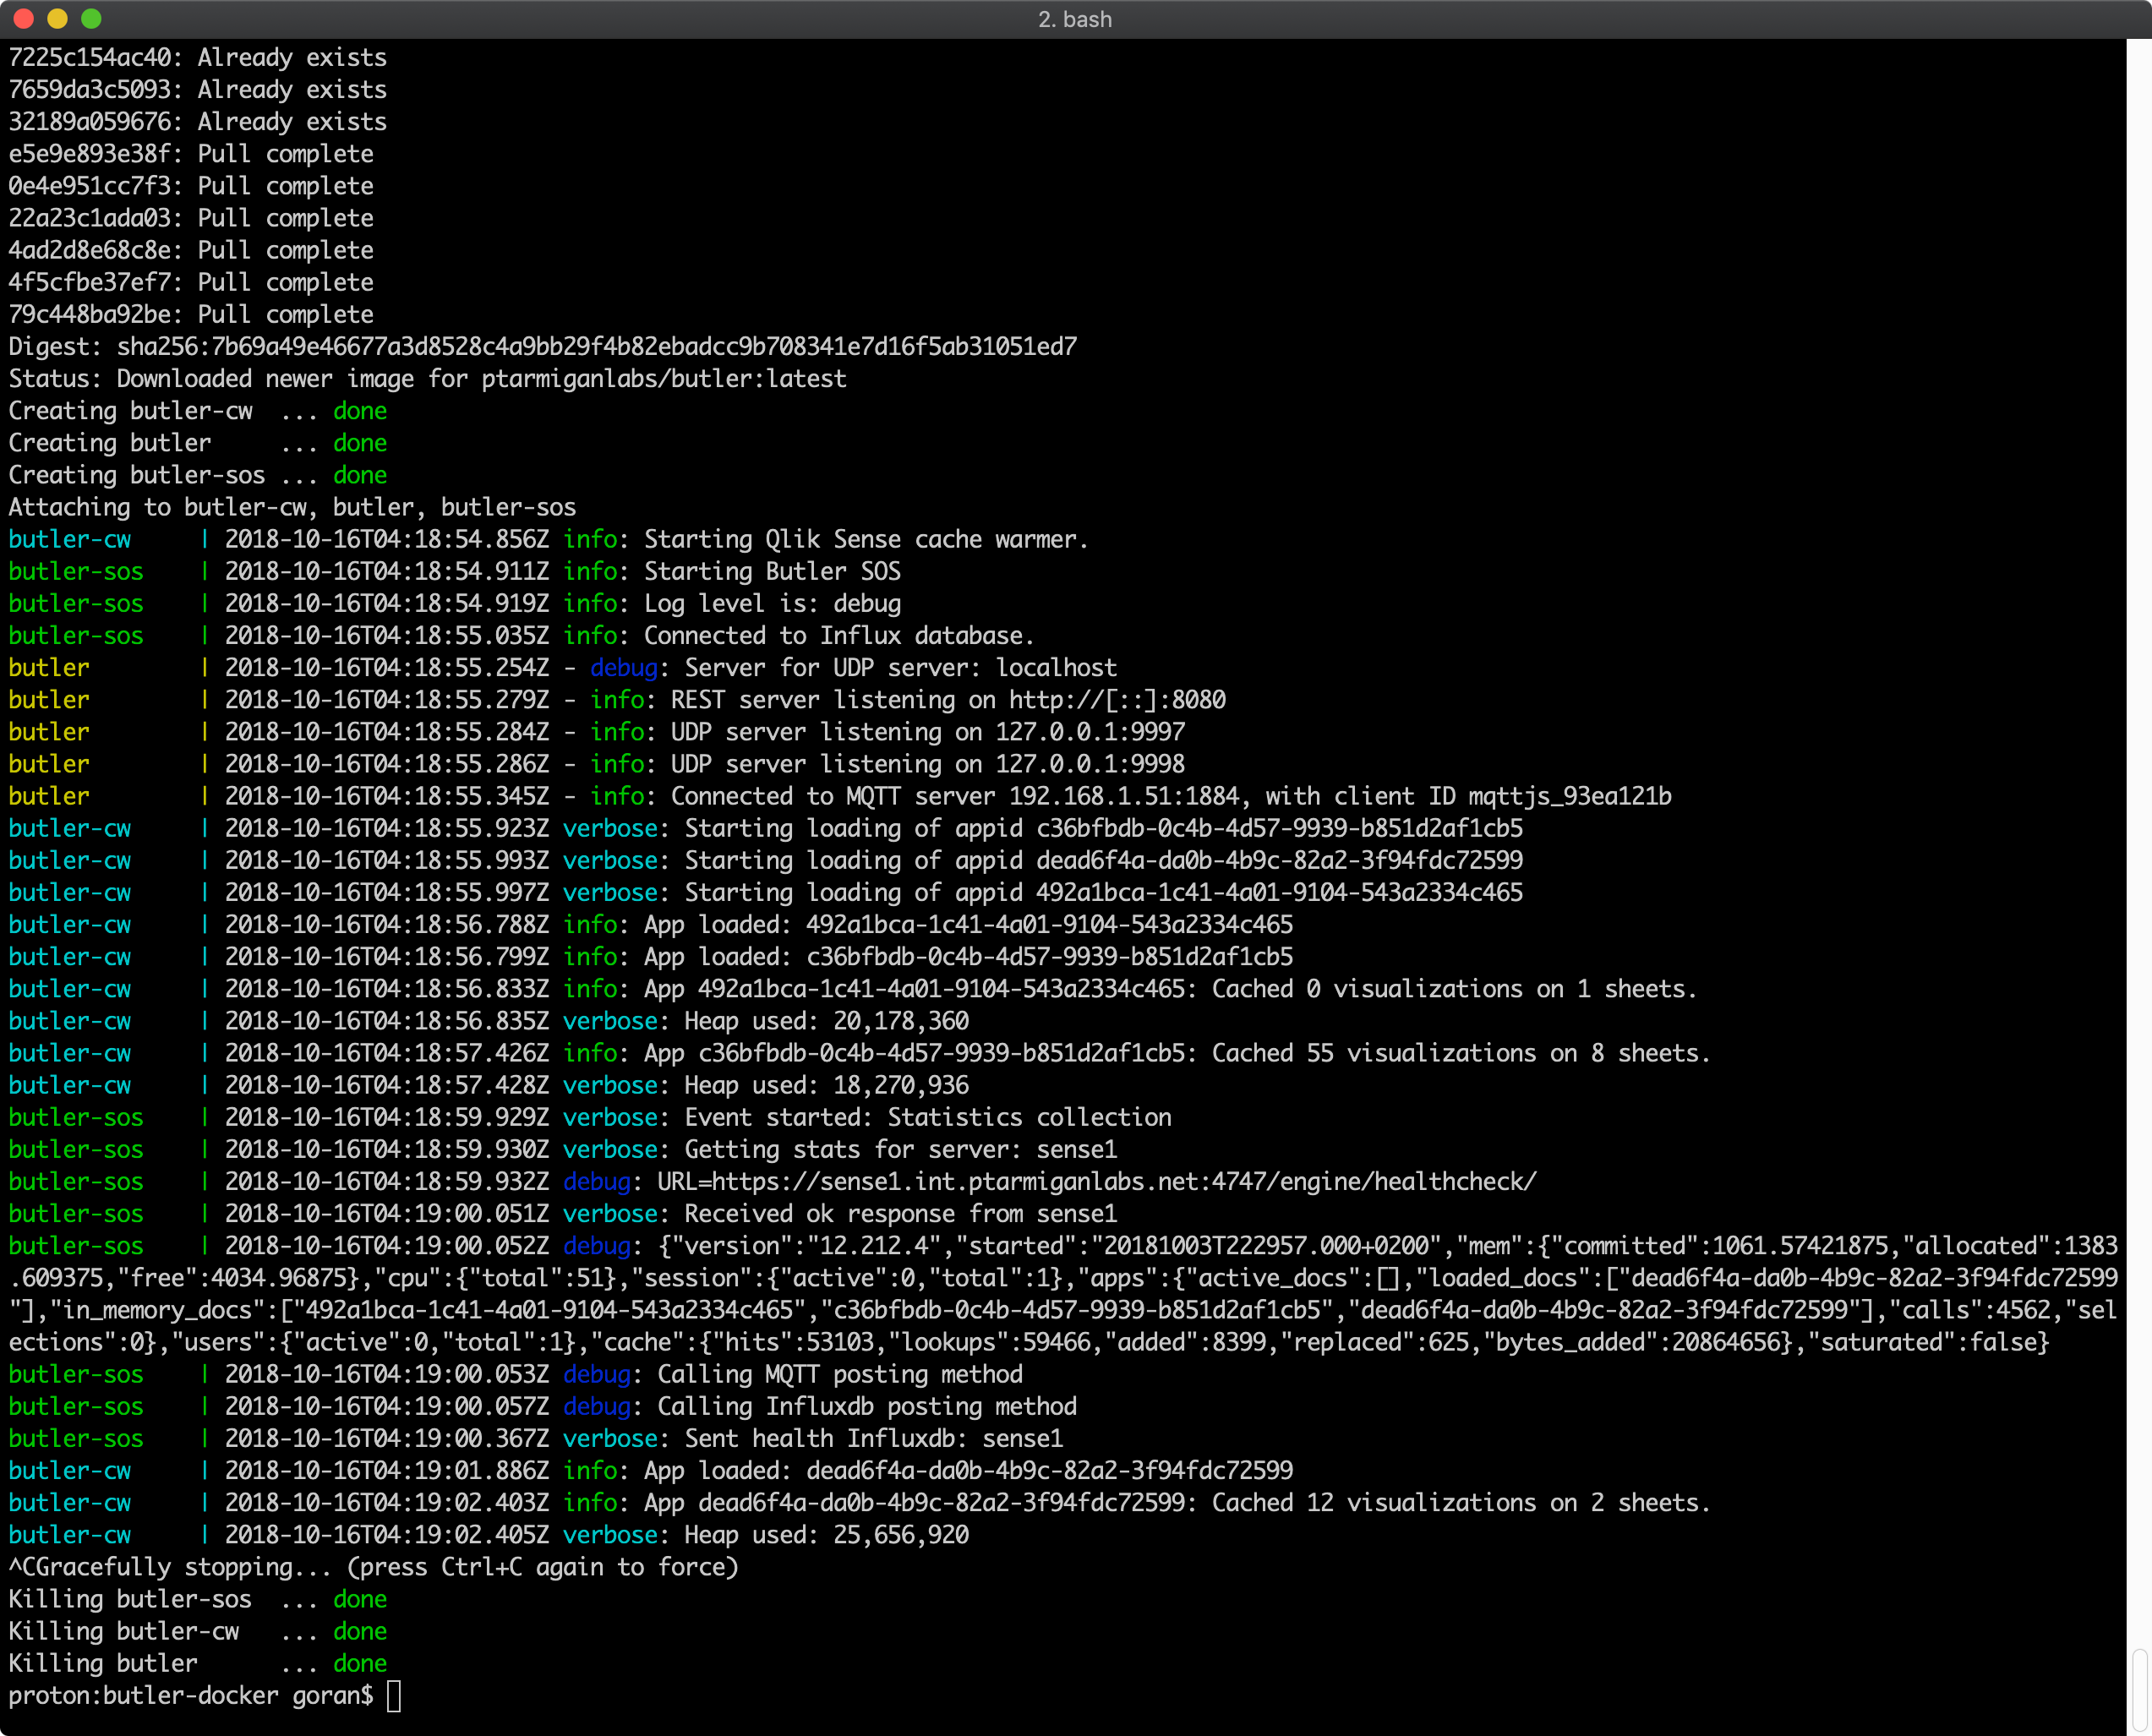
That’s pretty neat…
Adding MQTT, Influxdb and Grafana
We can do even better though.
Let’s also start some other tools from the docker-compose file:
- Mosquitto (which is a very good MQTT broker used by most of the Butler tools)
- Influxdb (time series database used by Butler SOS)
- Grafana (real-time charts used by Butler SOS)
The docker.compose.yml file now looks like this:
# docker-compose.yml
version: '2.2'
services:
  butler-sos:
    image: ptarmiganlabs/butler-sos:latest
    depends_on:
      - mqtt
      - influxdb
      - grafana
    init: true
    container_name: butler-sos
    restart: always
    volumes:
      # Make config file accessible outside of container
      - "./config_butler-sos:/nodeapp/config"
      - "./certificate:/nodeapp/config/certificate"
    environment:
      - "NODE_ENV=production"
    networks:
      - senseops
    logging:
      driver: json-file

  butler-cw:
    image: ptarmiganlabs/butler-cw:latest
    init: true
    container_name: butler-cw
    restart: always
    volumes:
      # Make config file accessible outside of container
      - "./config_butler-cw:/nodeapp/config"
      - "./log_butler-cw:/nodeapp/log"
      - "./certificate:/nodeapp/config/certificate"
    environment:
      - "NODE_ENV=production"
    networks:
      - senseops
    logging:
      driver: json-file

  butler:
    image: ptarmiganlabs/butler:latest
    depends_on:
      - mqtt
    container_name: butler
    restart: always
    ports:
      - "8180:8080" # REST API available on port 8180 to services outside the container
      - "9997:9997" # UDP port for session connection events
      - "9998:9998" # UDP port for task failure events
    volumes:
      # Make config file accessible outside of container
      - "./config_butler:/nodeapp/config"
      - "./certificate:/nodeapp/config/certificate"
    environment:
      - "NODE_ENV=production"
    networks:
      - senseops
    logging:
      driver: json-file

  mqtt:
    image: eclipse-mosquitto:latest
    container_name: mosquitto
    restart: always
    ports:
      - "1884:1883"
      - "9002:9001"
    volumes:
      - "./mosquitto/data:/mosquitto/data"
      - "./mosquitto/config:/mosquitto/config"
      - "./mosquitto/log:/mosquitto/log"
    networks:
      - senseops
    logging:
      driver: json-file

  influxdb:
    image: influxdb:latest
    container_name: influxdb
    restart: always
    ports:
      - "8086:8086"
    volumes:
      - "./influxdb/datastore:/var/lib/influxdb"
    networks:
      - senseops
    logging:
      driver: json-file

  grafana:
    image: grafana/grafana:latest
    container_name: grafana
    restart: always
    ports:
      - "3001:3000"
    volumes:
      - "./grafana/datastore:/var/lib/grafana"
    networks:
      - senseops
    logging:
      driver: json-file

networks:
  senseops:
    driver: bridge
Note that the config files for the different Butler tools must also be modified to point to the local instances of Mosquitto, Influxdb and Grafana.
For example, the Butler SOS production.yaml file should now use your local computer’s IP as the host IP for Influxdb, MQTT and Grafana.
The complete directory structure needed for the docker-compose file above looks like this:
proton:butler-docker goran$ tree
.
├── certificate
│   ├── client.pem
│   ├── client_key.pem
│   └── root.pem
├── config_butler
│   ├── certificate
│   └── production.yaml
├── config_butler-cw
│   ├── apps.yaml
│   ├── certificate
│   └── production.yaml
├── config_butler-sos
│   ├── certificate
│   └── production.yaml
├── docker-compose.yml
├── grafana
│   └── datastore
├── influxdb
│   └── datastore
├── log_butler-cw
│   ├── debug.log
│   ├── error.log
│   ├── info.log
│   └── verbose.log
└── mosquitto
    ├── config
    ├── data
    └── log

16 directories, 12 files
proton:butler-docker goran$
Running “docker-compose up” starts all 6 services. Nice.
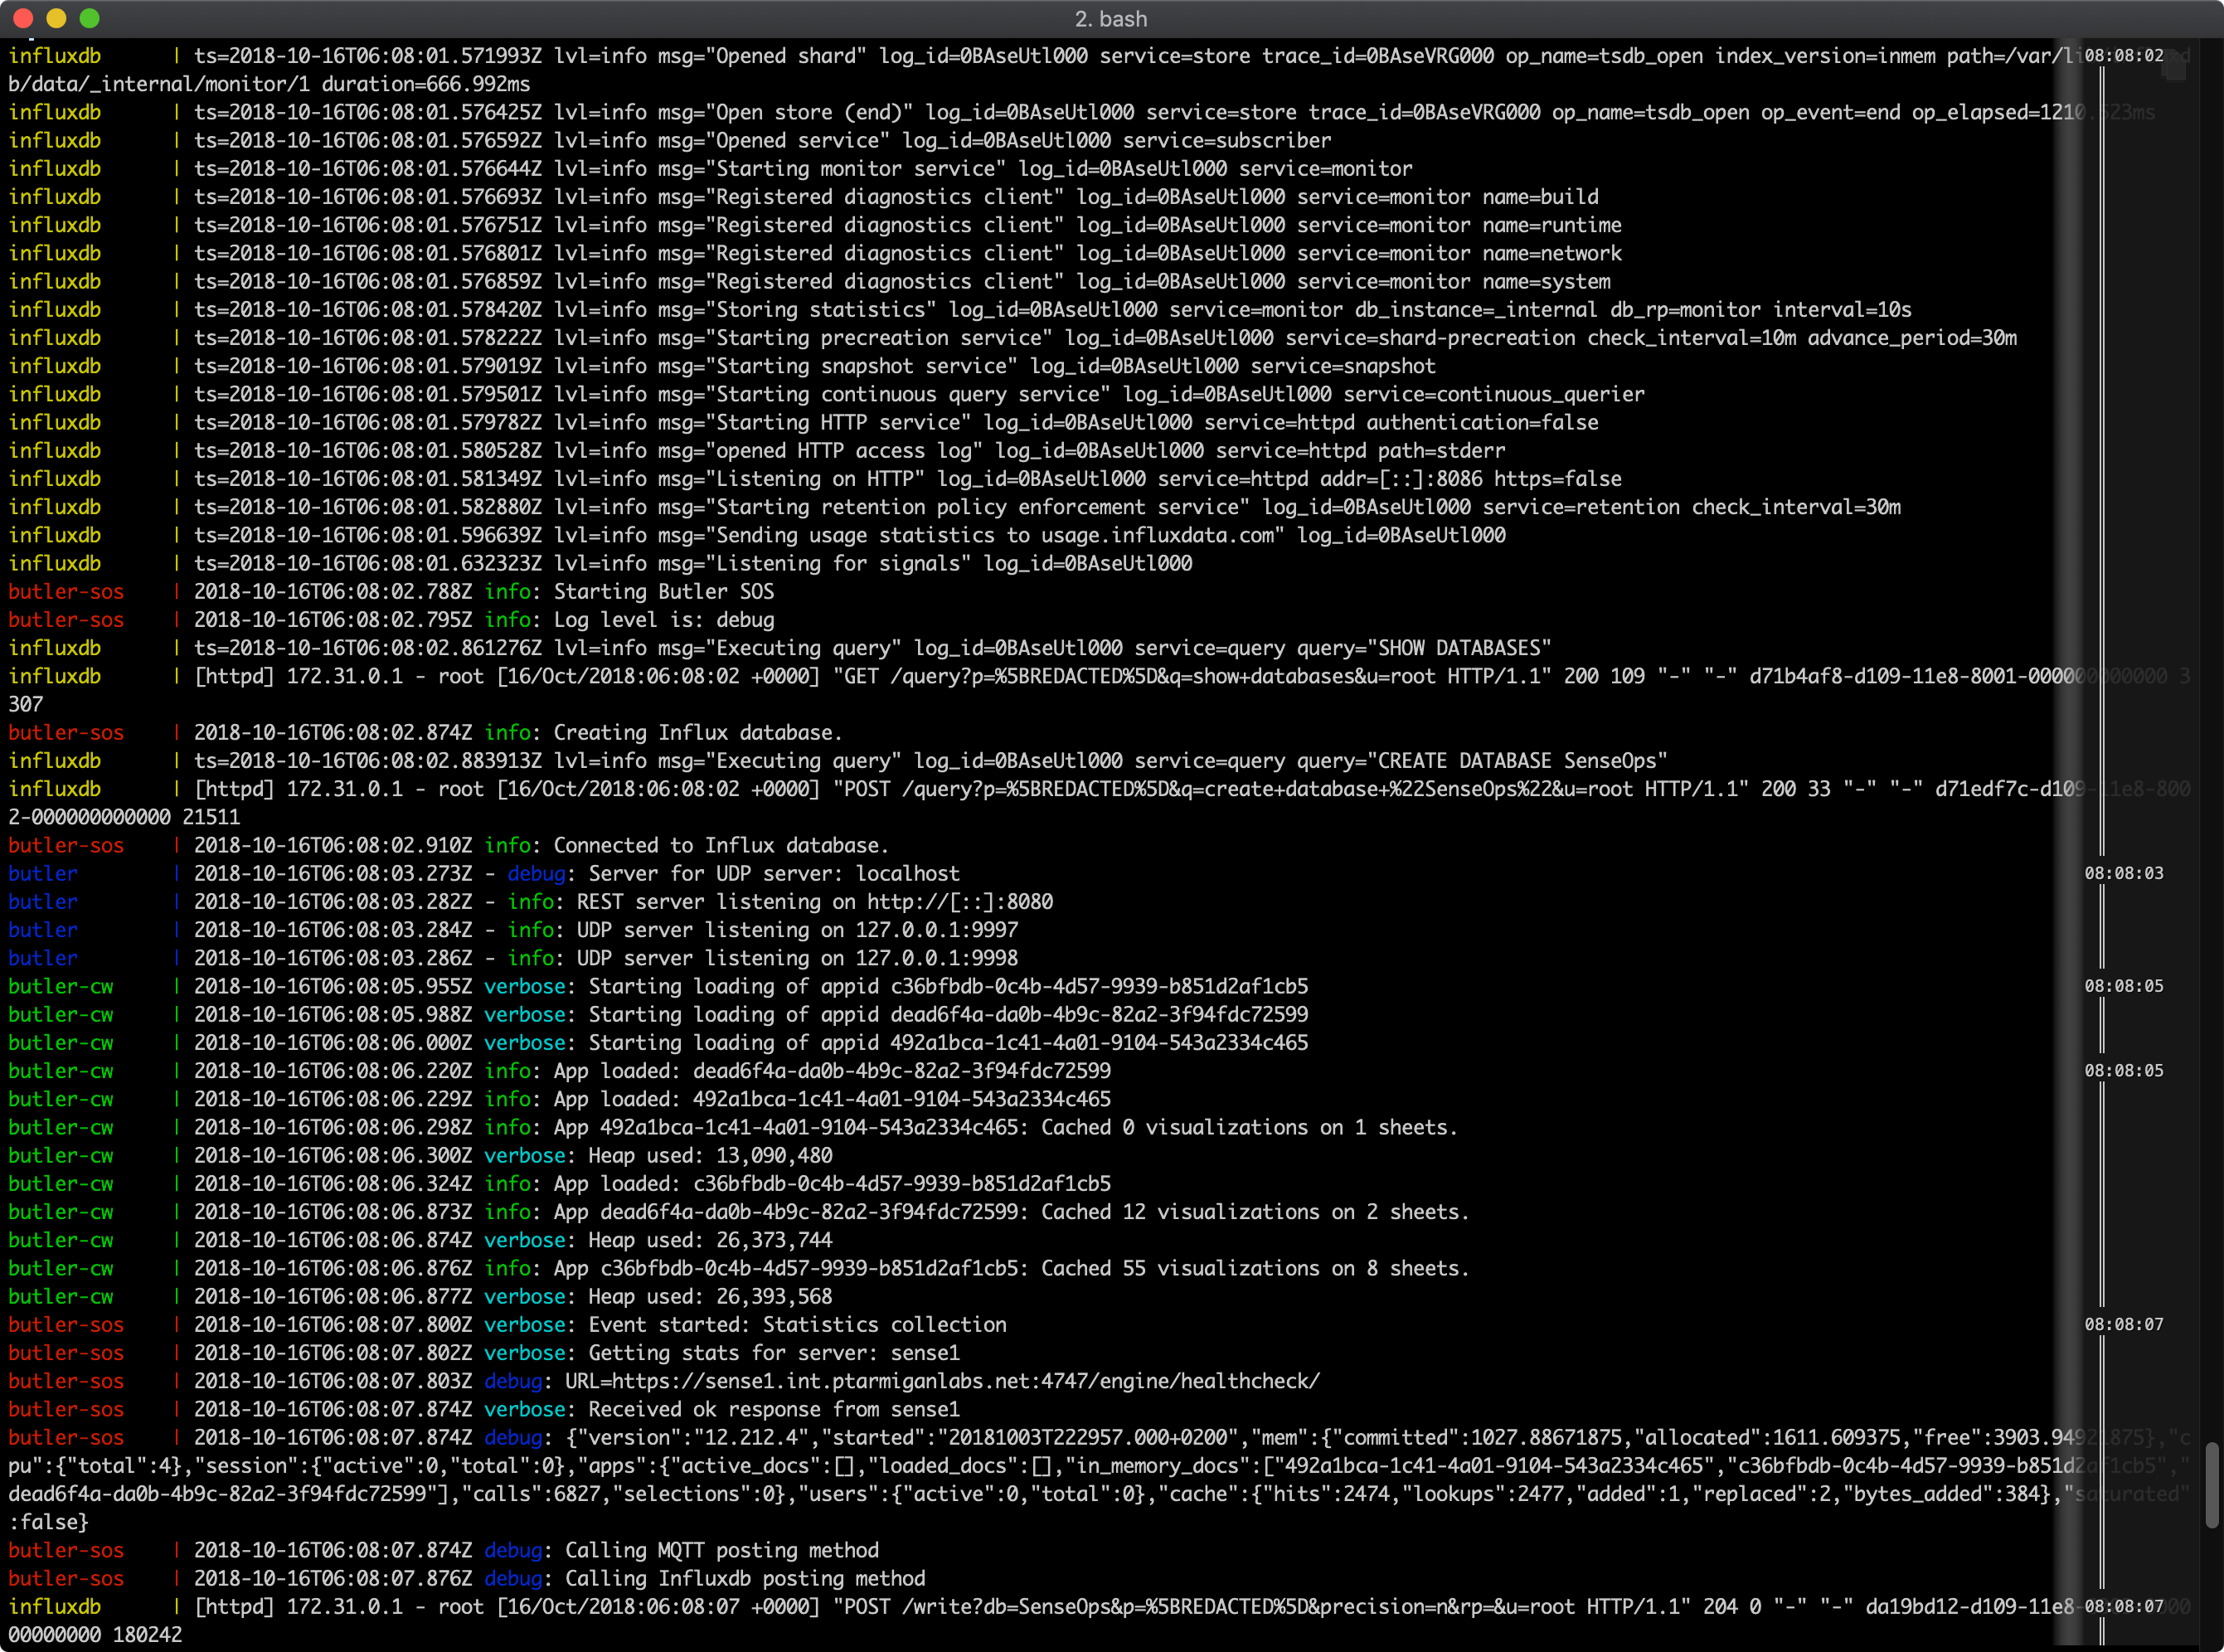
We now have a complete SenseOps environment running locally on our own computer, while at the same time interacting with one or more Qlik Sense servers on the network. This is a really good way to try out the various Butler tools without having to install any software on the servers.
Wrapping up
The mini series of blog posts about running Butler tools as Docker containers is now complete.
There is one tool – the Butler App Duplicator – that has not been discussed so far. There is no reason why this tool cannot be run from a Docker container too, it just hasn’t been a focus so far. Maybe that will change in the future – or you are very welcome to fork the Github repository and contribute to the code!