Superpowers to Qlik Sense Enterprise, part 2: Free https certificates from Let's Encrypt


Security is important – period.
Usability of web based systems is off course important, but so is security. In the previous (first) article in this series we looked at how the Traefik reverse proxy can be used set up end user friendly URLs for Qlik Sense Enterprise (QSE) environments, while at the same time adding a layer of security by hiding the internal structure of the QSE cluster.
Today we’ll look at how you can get free SSL/TLS certificates from Let’s Encrypt and how these are used to provide https for QSE.
Article 1: Superpowers to Qlik Sense Enterprise: The Traefik reverse proxy, part 1
All code, scripts etc used in this article is available in the Part 2 folder in this GitHub repository.
Let’s go!
https: The why and how and where
The “why” part of the topic might seem redundant. Security is important so you should always use https, right?
Well, yes and no.
Security is important, but security comes in different shapes and forms. In the case of https, it should probably always be used when talking about end users accessing some system, or to protect data flowing through insecure networks (public or otherwise).
But what if a network is secure and only used by backend servers that are protected by their own firewalls, and that whole backend network is partitioned off and protected by is own perimeter firewall?
As long as you trust your perimeter firewalls you might not need https in this scenario. Instead your backend services could talk to each other over regular http and other unencrypted protocols.
Disclaimer: This is a general principle and there are certainly scenarios where all communication between all systems should be encrypted. You just have to decide what’s reasonable in your specific case. End disclaimer.
The “how” of https
https certificates (also known as SSL, or more recently TLS certificates) build on the concept of a trust chain. The integrity of the chain is provided by strong cryptography. This is a whole field (and industry!) of its own, but the general principle is:
- Your end users trust the solid padlock in their web browsers. When it’s there, they feel safe.
- Their web browser uses public key cryptography to establish trust in the certificates you set up for your web application.
- Why does the browser trust those certificates? Because the certificates were issued by an organisation that is either directly or through multiple steps trusted by one of the top-level root certificate authorities on the Internet.
- Everyone trusts those top-level certificate authorities – and voilá – we have a trust chain.
In other (very simplified) words: There is a small number of top-level organisations that everyone trust and from these organisations the trust trickles down through the trust chains until it reaches the end user’s browser, which is used to access example your QSE environment.
The funny thing here is that most people don’t realise that what they really trust is some far-away organisation (the top-level certificate authority) they’ve never heard of. Oh well, the concept works, as long as the trust chain isn’t compromised, at least. But that’s a whole different discussion…
Where to get TLS certificates
Historically you had to buy certificates from the certificate authorities (CAs) or their assigned outlets. These are commercial companies that issue certificates as part of their business. Certificates cost money (up to hundreds of USD/EUR per year) and expire after a certain time (usually 1, 2 or 3 years). So you have to renew and replace them every now and then, which can be a real pain if they are used in many places/systems.
Things are changing though. Over the past few years the cost of getting a certificate has dropped and as of today there is even a completely free option: Let’s Encrypt. They are backed/funded by lots of high profile companies, with the goal of making the Internet a more secure and better place. Very cool, and it seems to be working. Hundreds of millions of web sites today use TLS certificates from Let’s Encrypt.
Self-signed certificates
When dealing with Qlik Sense Enterprise you have most likely come across self-signed certificates too. QSE uses these to communicate between nodes in a Sense cluster, as well as the default way of serving https to end users. These certificates were created during the installation of QSE and encrypt the network traffic just fine, it’s just that they are not part of the trust chain originating at a certificate authority (meaning that users don’t know who can read their web traffic). Thus they get the broken padlock in web browsers, accompanied by a warning to end users. Not a good user experience – you need a proper, CA backed TLS certificate.
Traefik + Let’s Encrypt = https for Qlik Sense Enterprise
The solution we’ll implement below uses an actual QSE environment running here at Ptarmigan Labs. It should therefore serve as a good starting point if you want to implement something similar – but you will of course need to change domain names, server names, IP numbers etc to match your own network context. This also applies to some sensitive information (passwords, email addresses etc) that has been removed in the code snippets below. Replace as needed.
Let’s take a look at the solution we’ll implement:

- There are two QSE environments: Production (PROD) and Development (DEV), with URLs https://qliksense.ptarmiganlabs.net and https://qliksensedev.ptarmiganlabs.net.
- The Traefik dashboard is available at https://traefik.ptarmiganlabs.net
- DNS is configured so all three host names point to the 192.168.101.55, which is the server where Traefik is running.
- Traefik runs on a Windows Server. Other options include Docker, Linux, Kubernetes, MacOS, Raspberry Pi.
- Trafik automatically retrieves (and updates well before the certs expire) TLS certificates for qliksense.ptarmiganlabs.net, qliksensedev.ptarmiganlabs.net and traefik.ptarmiganlabs.net.
- We will request three TLS certificates (two for QSE domains and one for Traefik’s dashboard) from Let’s Encrypt, and prove our identity by means of a DNS-01 challenge. We’ll use DigitalOcean’s DNS service, to which we have API login credentials. Traefik knows how to talk to lots of different DNS providers.
- Traefik will terminate https and forward regular http to the QSE servers. Communication between Traefik and the QSE servers is then done over non-encrypted http on port 8088.
- Traefik is outside of the backend network, but can access it via adequate routing and firewall configuration.
- The only traffic allowed by firewalls on the QSE servers is port 8088 between the Traefik server and the QSE servers. Any other incoming traffic from the outside world is blocked.
Now, from an end user’s or developer’s perspective they will always get a solid https connection. They won’t know – and don’t need to know – that Traefik terminates https and forwards plain http. The users and developers most likely doesn’t even know Traefik exists – they just get a https connection to QSE. Cool.
Let’s get started.
Installing Traefik
The previous blog post explains how to install Traefik.
Keep in mind that Traefik has two sets of config files: A single static one that is read when Traefik is started, and zero or more dynamic ones that Traefik can continuously monitor for updates. Parts of the Let’s Encrypt configuration is done in dynamic config file(s), which means that you can add/change/remove TLS configuration for web sites on the fly, without any downtime.
Config 1: Traefik static config
The file c:\tool\traefik\traefik.yaml contains the static configuration. It’s identical to the one we created in the previous article, except for the certificateResolvers section.
In that section you specify how you will prove to Let’s Encrypt that you control a particular Internet domain. In this case we’ll use a DNS-01 challenge, which means that Traefik will connect to our DNS provider and insert a response text to the challenge received from Let’s Encrypt.
The DNS challenge is useful in cases where Qlik Sense is not exposed to the Internet. For systems exposed to the public Internet it might be easier to use a HTTP-01 challenge.
---
global:
  checkNewVersion: true
  sendAnonymousUsage: false

log:
  level: INFO
  filepath: C:\tool\traefik\log\traefik.log

api:
  dashboard: true
  insecure: false
  debug: true

entryPoints:
  web:
    address: ":80"

  websecure:
    address: ":443"

providers:
  file:
    watch: true
    directory: C:\tool\traefik\config_dynamic

certificatesResolvers:
  myDnsChallengeResolver:
    acme:
      email: myemailaddress@company.com     # Change this to your own email address
      storage: acme.json                    # File where certificates, metadata etc will be stored
      # caserver: https://acme-staging-v02.api.letsencrypt.org/directory
                                            # If commented out, the Let's Enrypt PROD server is used. I thas rate limits and will
                                            # block us if we do too many requests in a short time.
                                            # During development their staging server should be used => Uncomment the caserver line
      dnschallenge:                         # We're doing a DNS challenge to prove who we are to Let's Encrypt
        provider: digitalocean              # We're doing the DNS Challenge via DigitalOcean's DNS
        # resolvers: 8.8.8.8:53             # This is Google's standard DNS, but it might take (a long)
                                            # time until the DNS challenge reaches it
        resolvers: ns1.digitalocean.com:53  # .. so I use DigitalOcean's own DNS instead. Much faster in this specific case.
        delayBeforeCheck: 10                # Give the DNS some time to settle before it is queried
Let’s Encrypt enforce rate limiting on their production API. This means that you can only request a certain number of new certificates during a given time period. Check with Let’s Encrypt what the current limits are.
While testing things out you should therefore use their staging API. This is easy: Just uncomment the caserver line in the code above and Traefik will use Let’s Encrypt’s staging service. Once everything is configured correctly and you get the staging certificates as expected, you can switch to the production API.
Config 2: Additional Let’s Encrypt settings
First: Traefik’s documentation around Let’s Encrypt is available here.
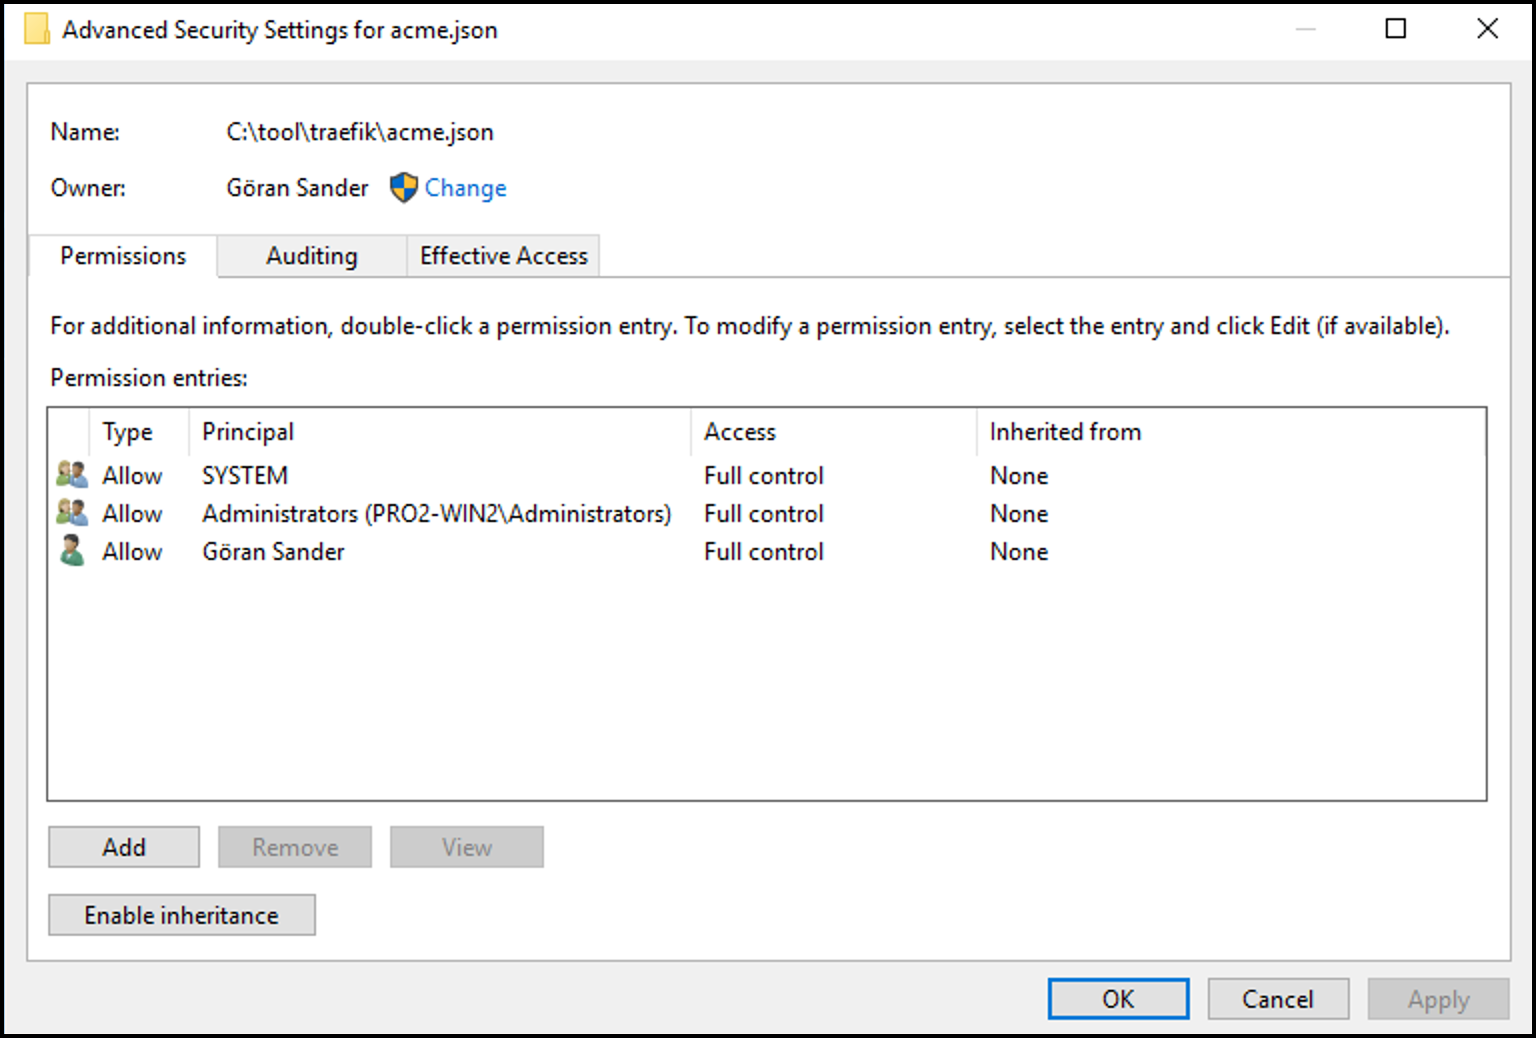
Let’s Encrypt saves its data in a file called C:\tool\traefik\acme.json. As it contains the private key of the issued certificates, it should be keps secret. Traefik checks the permissions of this file and refuses to use it if the permissions are not tight enough. The general idea is that only admins and system should have any kind of access to this file.
First create an empty acme.json file with Notepad or other text editor. Save it in the same folder as traefik.exe. Then set permissions on that file, for example:
As mentioned already, Traefik will connect to you DNS provider and insert a temporary text entry in your domain’s DNS. To do this Traefik needs API credentials for your DNS provider.
The exact method for logging into DNS providers vary a bit, for that reason (and to keep passwords etc out of config files!) environment variables are used to specify credentials for the DNS provider. For DigitalOcean the DO_AUTH_TOKEN environment variable is mandatory, with some others being optional.
The following ones have worked well around here:
set DO_AUTH_TOKEN=<your-auth-token-from-digital-ocean>
set DO_POLLING_INTERVAL=5
set DO_PROPAGATION_TIMEOUT=300
Config 3: Traefik dynamic config file
Again, the file c:\tool\traefik\config_dynamic\traefik_dynamic.yaml is very similar to the previous blog post. The main difference is that it uses the Let’s Encrypt certResolver that we configured in Traefik’s static config file:
---
http:
  routers:
    traefik-http:
      rule: Host(`traefik.ptarmiganlabs.net`)
      entrypoints: web
      service: api@internal
      middlewares:
        - traefik-https-redirect
        - traefikAuth
    traefik-https:
      rule: Host(`traefik.ptarmiganlabs.net`)
      entrypoints: websecure
      tls:
        certResolver: myDnsChallengeResolver
      service: api@internal
      middlewares:
        - traefikAuth
  middlewares:
    traefik-https-redirect:
      redirectScheme:
        scheme: https
        permanent: true
    traefikAuth:
      basicAuth:
        users:
          - "admin:$apr1$c5IwaNCW$VpEXax7LtUneLsElXFWCI."
Config 4: Dynamic config for Qlik Sense
Same thing for c:\tool\traefik\config_dynamic\qliksense_dynamic.yaml – it uses the new certResolver we’ve configured:
---
http:
  routers:
    qliksenseProd-http:
      rule: Host(`qliksense.ptarmiganlabs.net`)
      entrypoints: web
      middlewares:
        - qliksense-https-redirect
      service: qliksenseProdService
    qliksenseProd-https:
      rule: Host(`qliksense.ptarmiganlabs.net`)
      entrypoints: websecure
      service: qliksenseProdService
      middlewares:
        - sslHeader
      tls:
        certResolver: myDnsChallengeResolver

    qliksenseDev-http:
      rule: Host(`qliksensedev.ptarmiganlabs.net`)
      entrypoints: web
      middlewares:
        - qliksense-https-redirect
      service: qliksenseDevService
    qliksenseDev-https:
      rule: Host(`qliksensedev.ptarmiganlabs.net`)
      entrypoints: websecure
      service: qliksenseDevService
      middlewares:
        - sslHeader
      tls:
        certResolver: myDnsChallengeResolver

  middlewares:
    qliksense-https-redirect:
      redirectScheme:
        scheme: https
        permanent: true
    sslHeader:
      headers:
        customRequestHeaders:
          X-Forwarded-Proto: https
  services:
    qliksenseProdService:
      loadBalancer:
        servers:
          - url: "http://192.168.100.112:8088"
    qliksenseDevService:
      loadBalancer:
        servers:
          - url: "http://192.168.100.110:8088"
Config 5: Enable http in Qlik Sense Enterprise
Notice in the previous section how the backend servers used by Traefik’s load balancer use http rather than https. This means we have to enable http in the Qlik Sense servers.
Head over to the QMC, enable http and set the associated port to 8088. Any free port can be used, in this case 8088 is used as port 80 might already be used for some other, non-Sense application/service.

Does it work?
Start Traefik with the command
traefik.exe --configFile=traefik.yaml

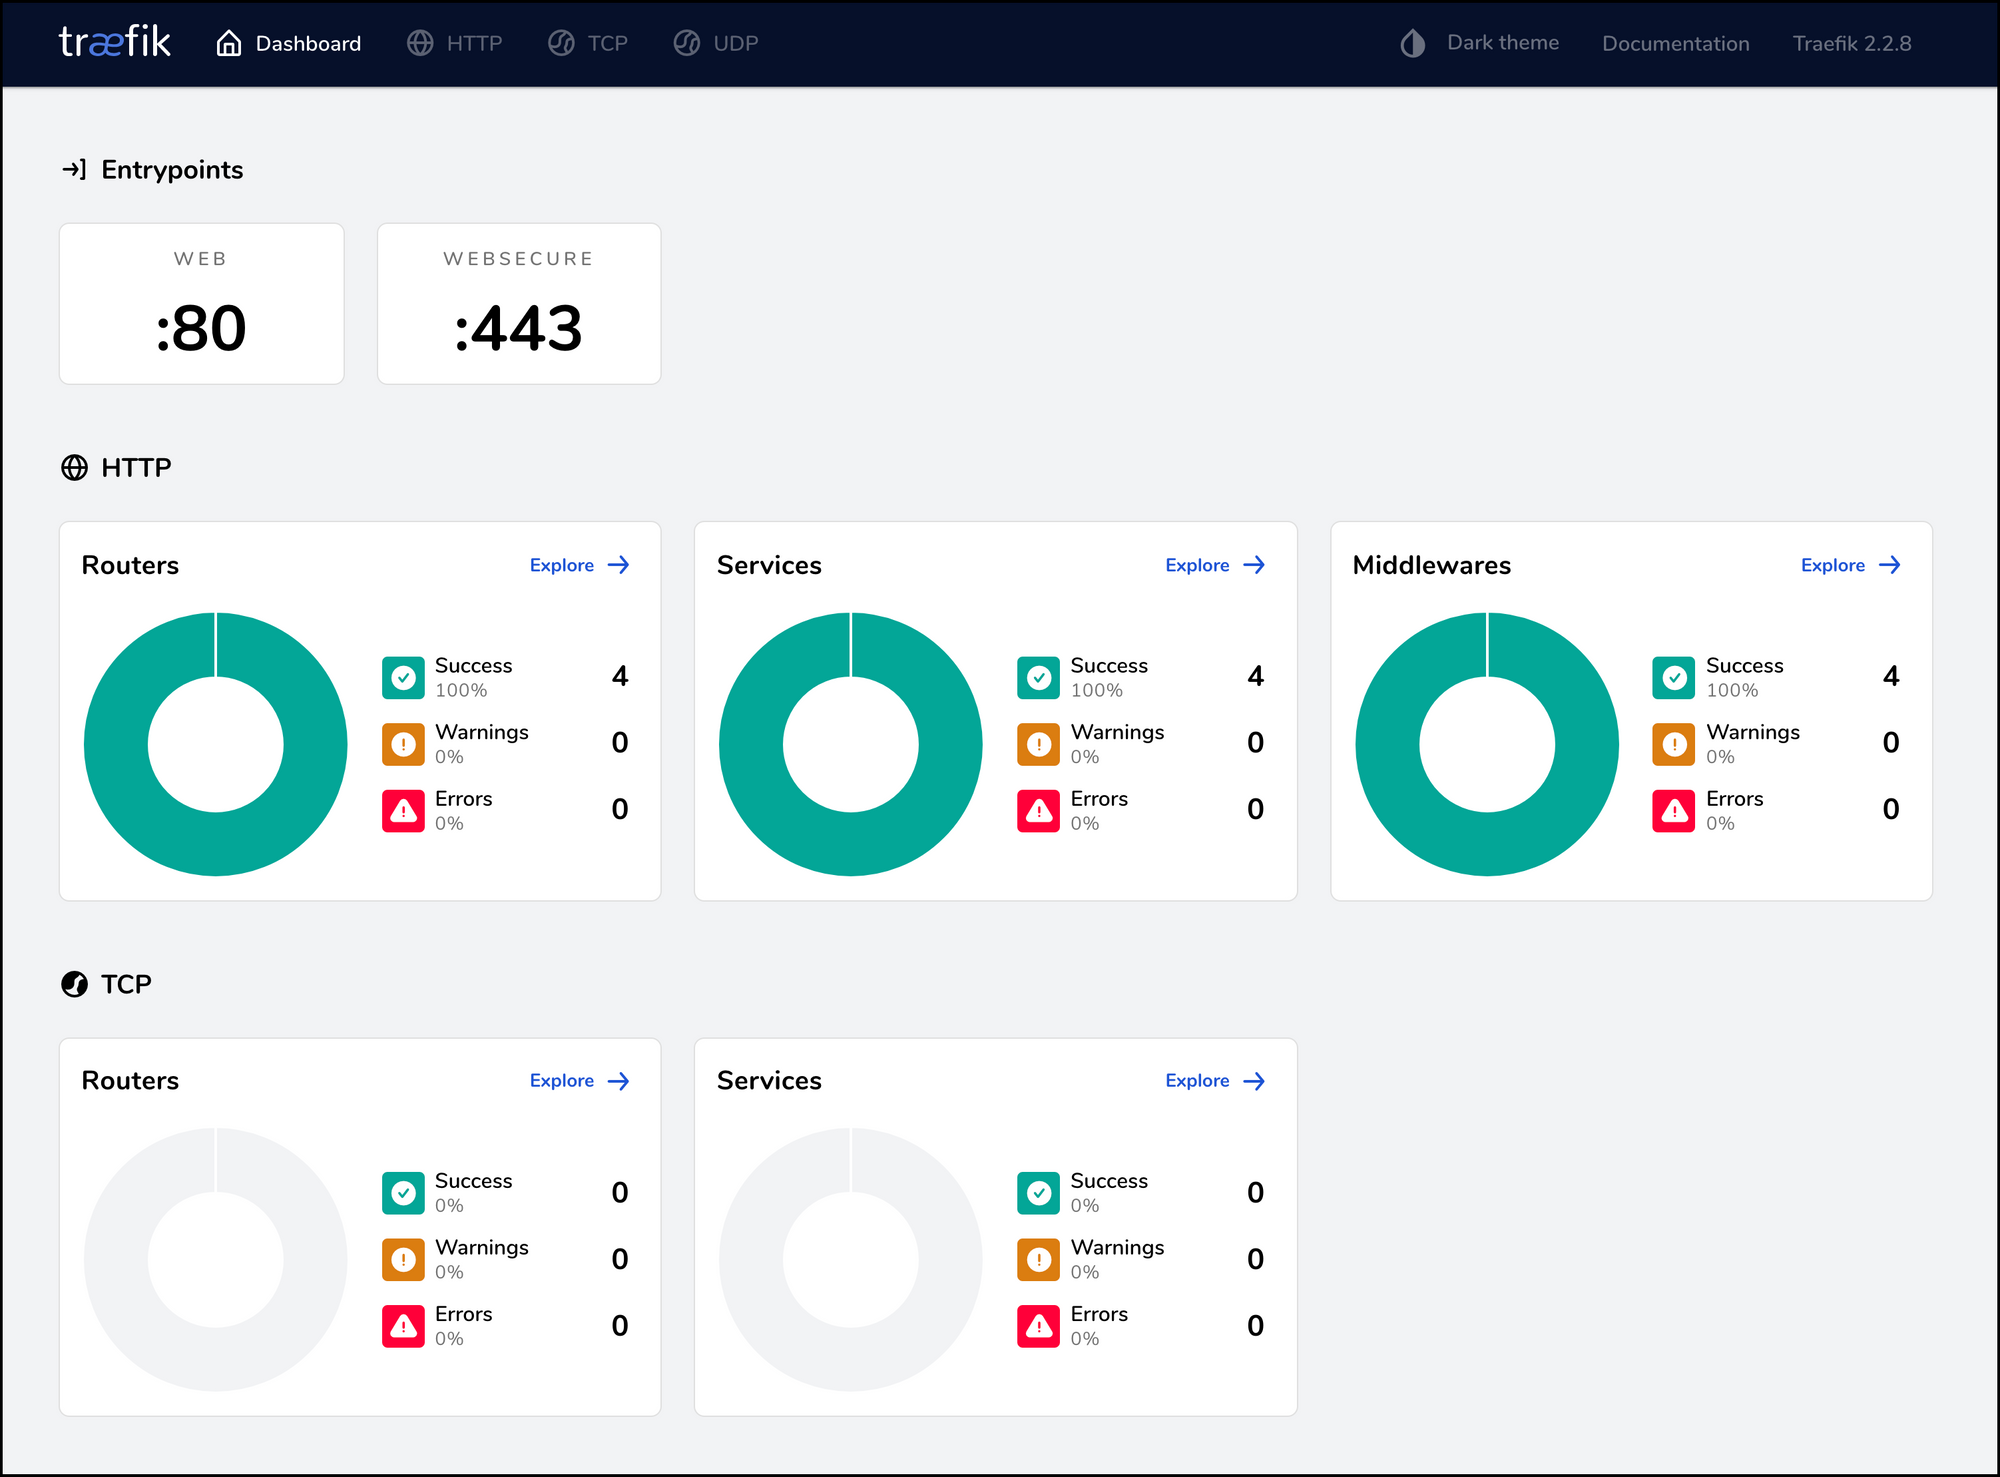
What about the Traefik dashboard at http://traefik.ptarmiganlabs.net, will it redirect to https and then load correctly?
Yes! After authenticating with admin/admin we are rewarded with the dashboard:
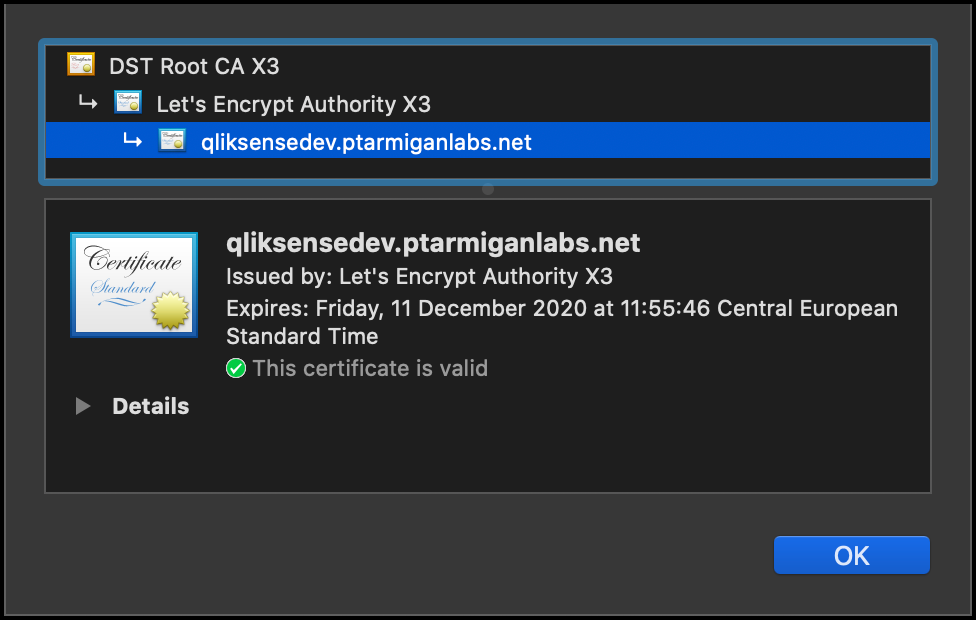
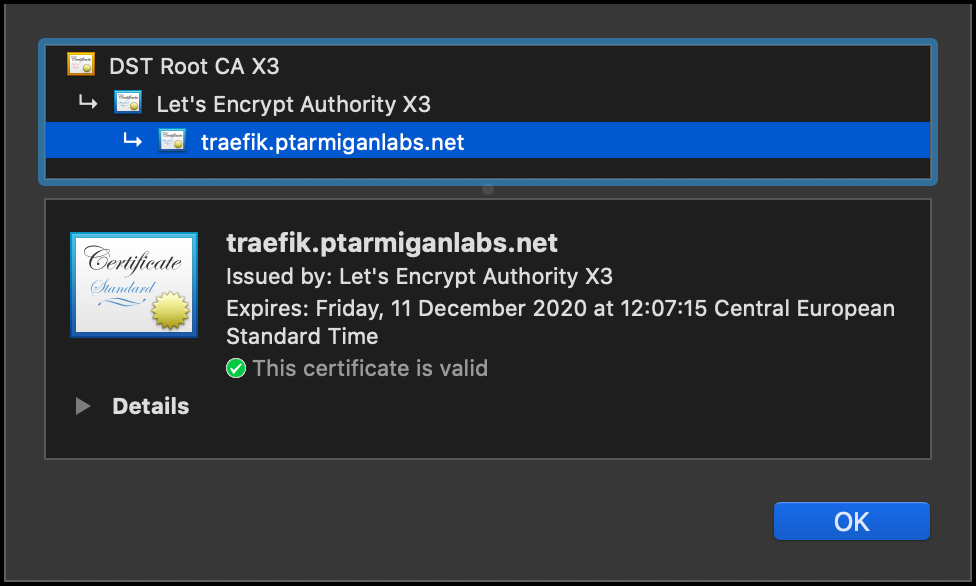
Let’s take a look at the certificate just to be sure. Yep, looks good:
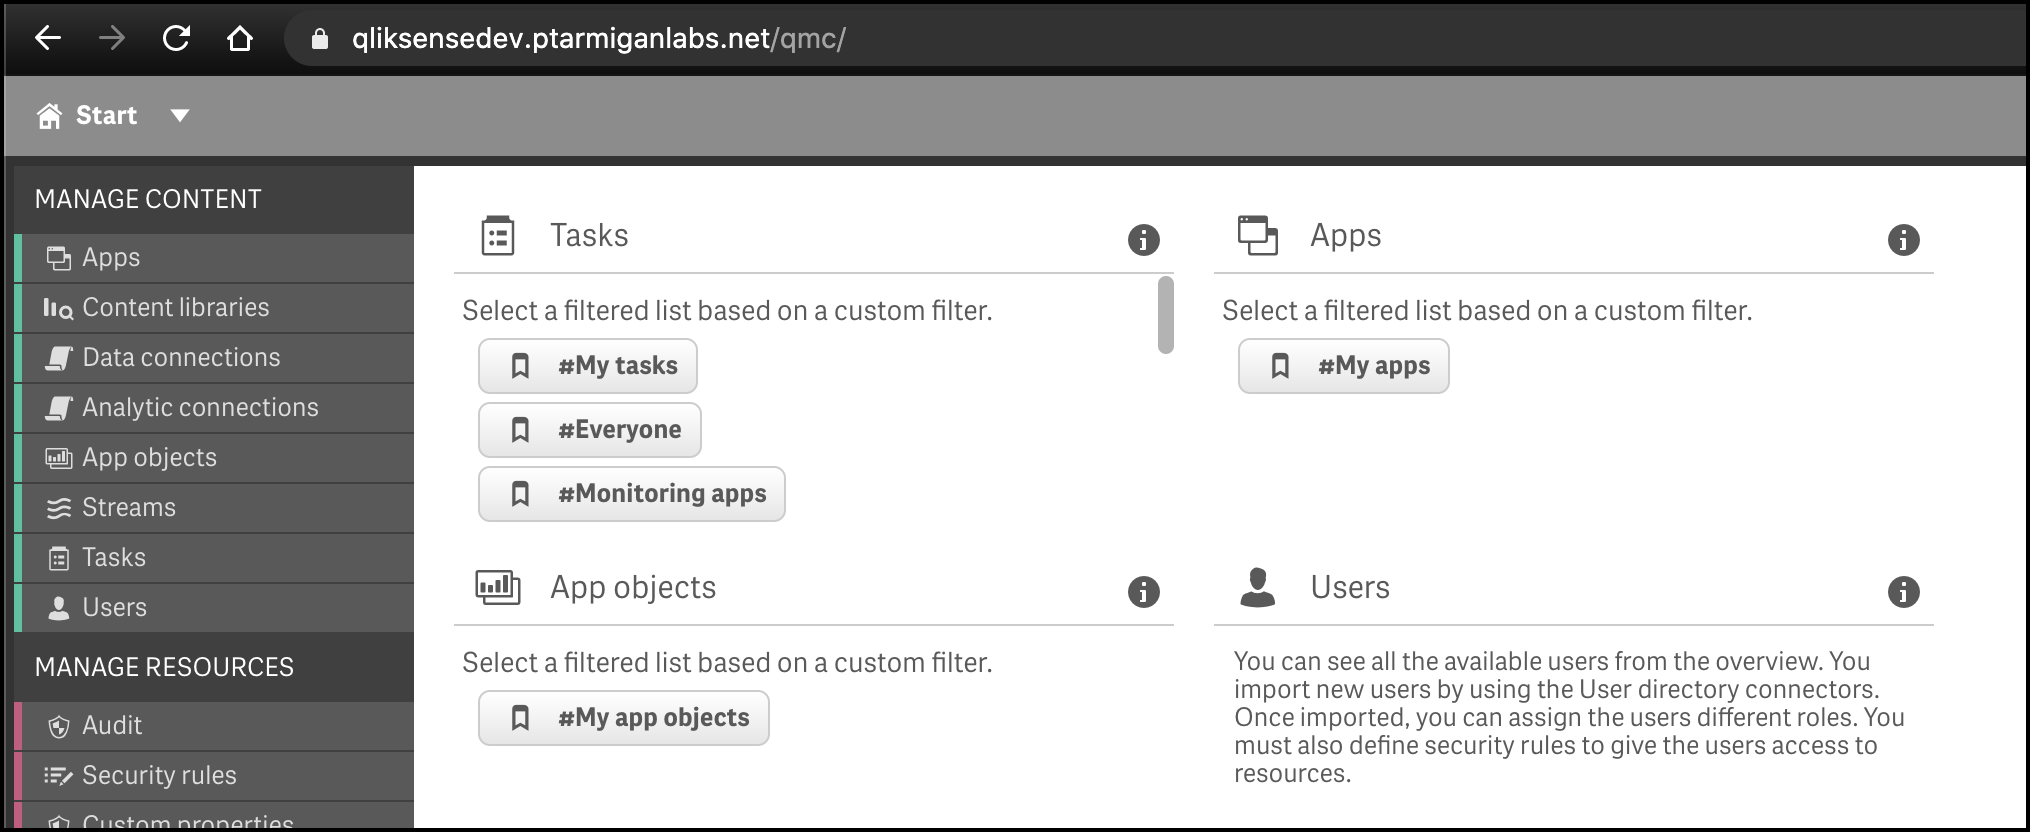
Finally… let’s check one of the Qlik Sense endpoints too.
http://qliksensedev.ptarmiganlabs.net redirect to https and its associated certificate look like this: